Aero Precision M4E1 Lower Build—A Few Parts Adjustments
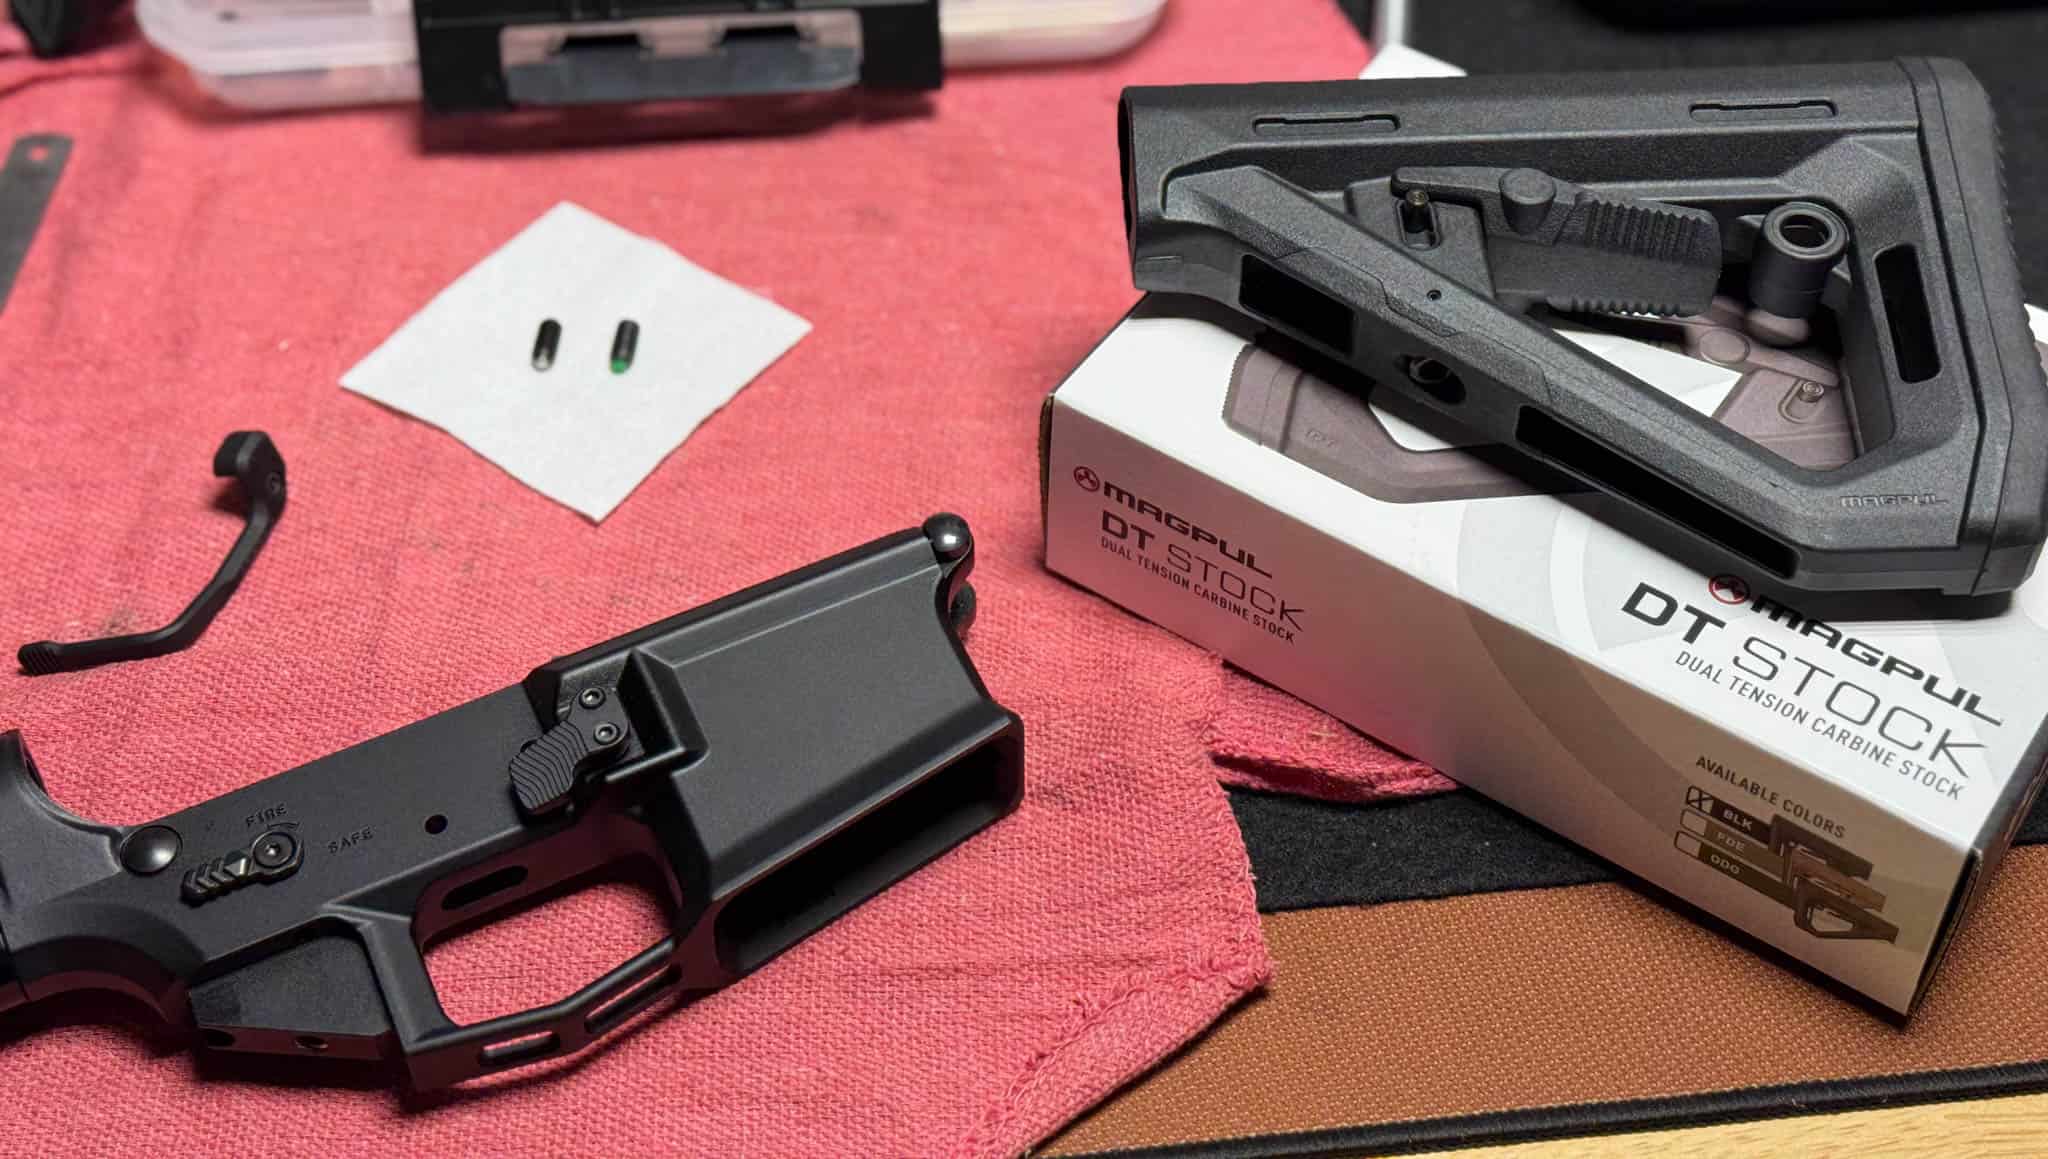
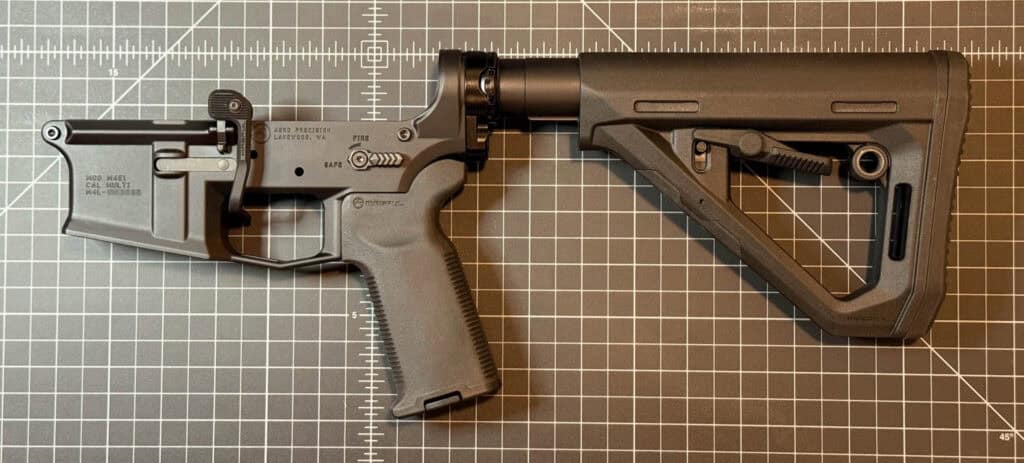
Nearing the end of my Aero Precision M4E1 lower receiver build—this one a “Low Profile” version with no overt Aero branding, just a blank starboard side and a small Aero Precision logo on the serialized port side—I decided to make a few small quality-of-life adjustments. (View the previous installment here.)
One notable M4E1 feature is the inclusion of a tension screw intended to take up any slop or wobble between the upper and lower receivers. This can be useful when mixing and matching receivers from different manufacturers—or when just dealing with forged Mil-spec receivers in general, where even the smallest differences in takedown lug tolerances might produce a fit that’s less than tight.
Aero Precision includes a nylon-tipped screw that fits into the receiver behind the pistol grip, extending into the receiver’s interior to place tension on the rear takedown pin and thus tightening the fit.
One day I ran across a Reddit post that suggested using a ball-nose spring plunger instead of the nylon-tipped screw. Using one of these, available here from McMaster-Carr, allows you to more easily fine-tune the fit and tension against the takedown pin.
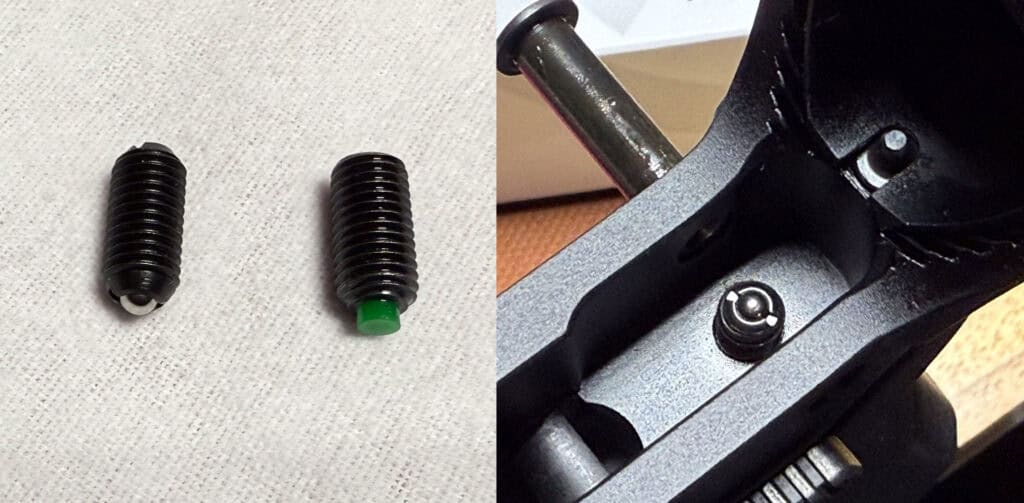
It’s easily installed using a long, thin flathead screwdriver (versus the hex-drive factory issue screw). Because the ball end is also slotted, it’s also adjustable from the top and after installation with the pistol grip in place.
The spring-loaded ball end allows the takedown pin to move in and out more freely when you go to break the rifle apart and you don’t have to worry about knocking the nylon tip off the screw if you originally drive it in a tad too far—which I did during initial install and test-fitting.
If this happens to you with your factory screw, the nylon tip generally will snap back into place. Mine did, anyway.
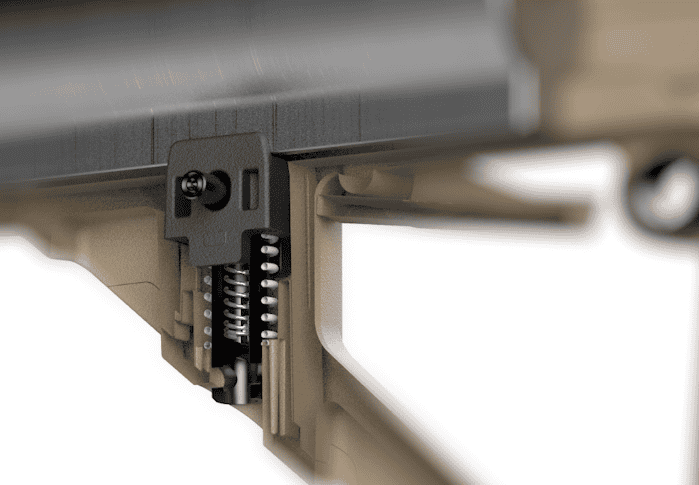
For the buttstock, I ordered a Magpul DT Carbine Stock, DT for “dual tension.” The DT stock features a minimalist A-frame look and, according to Magpul, was engineered to merge “the best features of the SL and CTR product lines with its new dual tensioning technology.”
Also according to Magpul, the DT stock includes a non-slip buttpad that matches Magpul’s SL footprint and the optimized curvature from the CTR. It has an ambidextrous adjustment lever, a rotation-limiting QD sling mount that can be used from either side, and a 1.25” footman’s loop.
I’ve yet to run into an adjustable stock that didn’t have a little bit of wobble on the buffer tube, but the DT’s dual-tension system provides the most solid lock-up I’ve yet experienced in an adjustable polymer stock.
Since I was ordering the stock and since I was going to be taking the pistol grip back off anyway, I went ahead and ordered an MOE-K2+ grip, with the rubberized overmold, to replace the hard polymer MOE-K2 I’d initially installed.
For controls I’d previously installed a complete CMMG Zeroed LPK. Since I wanted to add Magpul’s BAD (Battery Assist Device) lever, a part that’s been sitting in the bin for several years now, I had to changed out the CMMG enlarged bolt release for a standard unit, required to attach the BAD.
I also changed over to a standard mag release, since the left-side ambi release would not be compatible with the BAD lever. In the end I reckoned having the ability to manipulate the bolt release from the trigger well was a worthwhile tradeoff for not having an off-hand mag release.
Since the mag release assembly was being replaced, I also added an Odin Works XMR (extended mag release) to the starboard side, which effectively doubles or triples the main release button’s surface area and brings it closer to the trigger well so you don’t ever have to reach.
And that about covers it. This build is nearly complete, with the obvious exception of a trigger group. And, of course, an upper assembly. More on those to come in future posts.
Aero Precision
URL: aeroprecision.com
CMMG
URL: cmmg.com
Magpul Industries
URL: magpul.com
McMaster-Carr
URL: mcmaster.com
Odin Works
URL: odinworks.com