The 25¢ Glock Trigger Job- DIY


If you’re a seasoned shooter this DIY either isn’t for you, or you’ve already done it to one or more of your Glocks already. To those who may have picked up their first Glock (yes, it may be hard to believe, but there are still people out there that are new to the platform), you’ll want to pay attention to this DIY if you want a better feeling and performing trigger for your favorite polymer pistol.
The 25¢ Glock Trigger Job, as it’s often called, is a simple polishing job that can greatly enhance your stock Glock trigger’s smoothness and pull weight. Let’s start off by saying that the name of this DIY job is sort of a misnomer. The materials used in it indeed cost more than a quarter, but it’s probably called that because you end up using such a minute amount of polish that it’s how this trigger job ended up with its name.
For many, this is the first modification job that they do to their Glocks. (The first of many, we’re sure.) If you’re not ready to step up to an aftermarket trigger, or just plain don’t need one, this quick and easy modification to your existing trigger can help you enhance your shooting experience at little cost.

What it does essentially is that it accelerates the natural wear of your brand-new or low-round-count trigger parts so that certain areas of the metal surface become smooth. The smoother the surfaces, the smoother the trigger feels, and lighter the pull, too. Some say that there’s no appreciable trigger-pull weight loss from performing this polishing job. But from what we’ve noticed, we’ve seen pull weights fall by about a pound. Not bad for a “25¢” job! Or you can go to the range and run 10,000+ rounds through your Glock to get the same effect.
Before you begin, make sure that your workspace is in a well-ventilated area. The polishing process can be messy, so we recommend doing it on a surface that you don’t mind getting dirty. Maybe line up some newspapers or do it over an old towel. Once you’re ready, let’s get to it.
Disclaimer: Always take safety precautions when working with tools or other dangerous goods. This DIY should be done at your own risk. Verify your results with a certified gunsmith prior to using the final product.
What’s Needed:
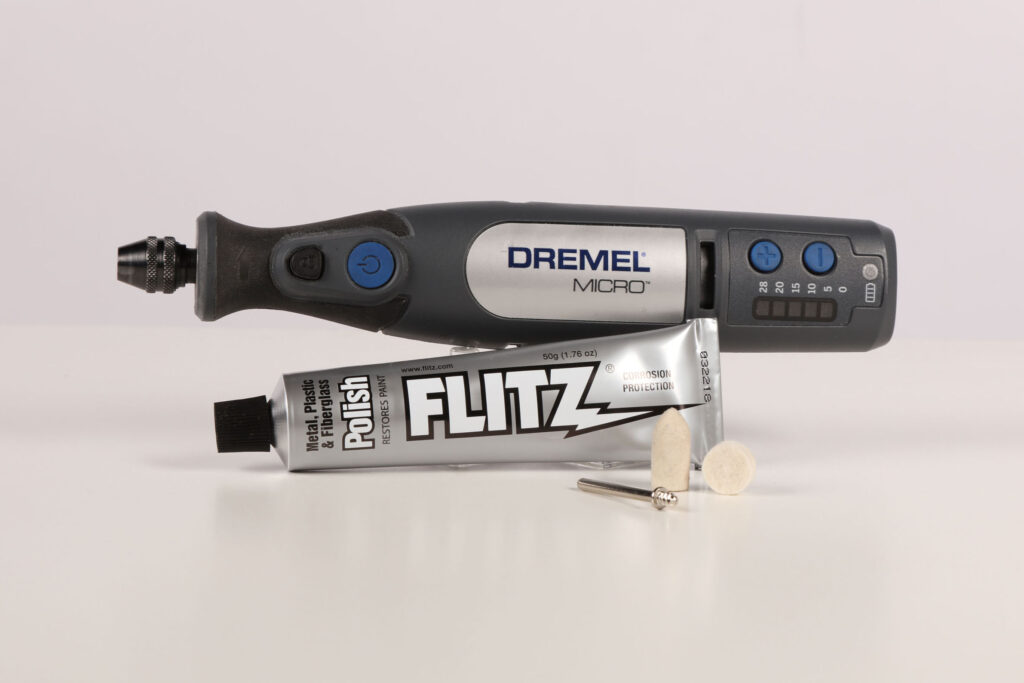
- Metal Polish
- Clean Rags
- Rotary Tool (optional)
- Dremel 414 Felt Polishing ½” Wheel (optional)
- Dremel 401 Mondrel (optional)
- Dremel 422 Felt Polishing Cone (optional)
- Power Drill (optional)
Tool Choice

You may choose to use a rotary tool like we do in this DIY, or you can go with good old-fashioned elbow grease and hand polish with a rag or Q-tip. It’s your choice, but we do highly recommend going with the rotary tool route to save time and for a more thorough job.

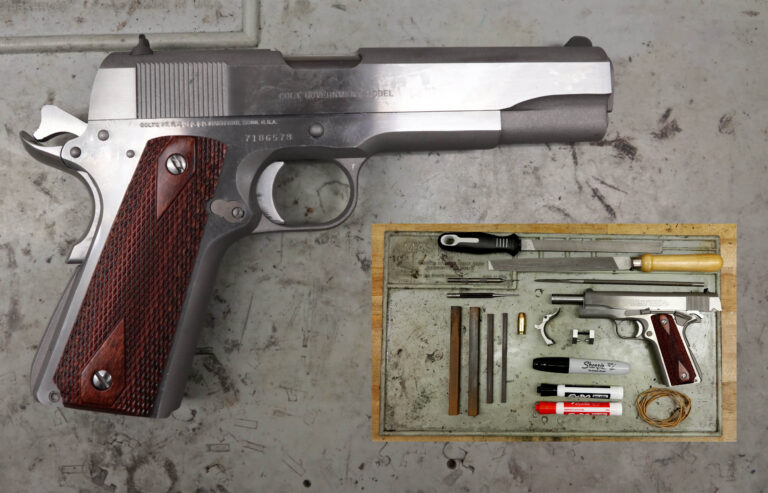
01) Preparation
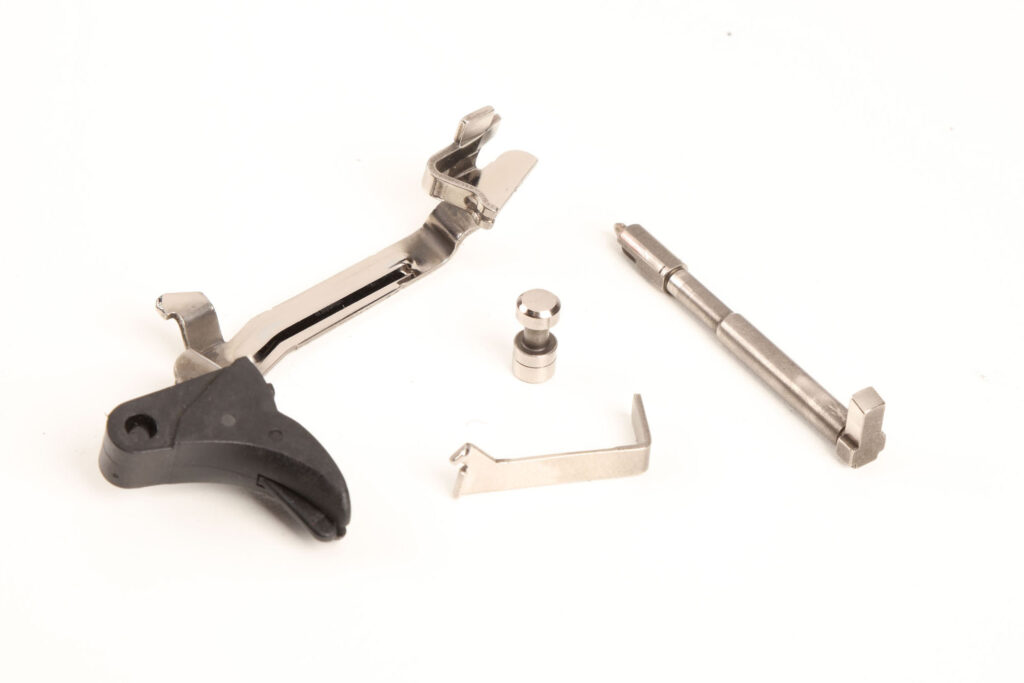
Making absolutely sure that your Glock is unloaded, strip the pistol according to the manufacturer’s manual and separate the following parts as shown. You will need to have the trigger bar, firing pin (striker), firing pin safety (safety plunger), and connector.
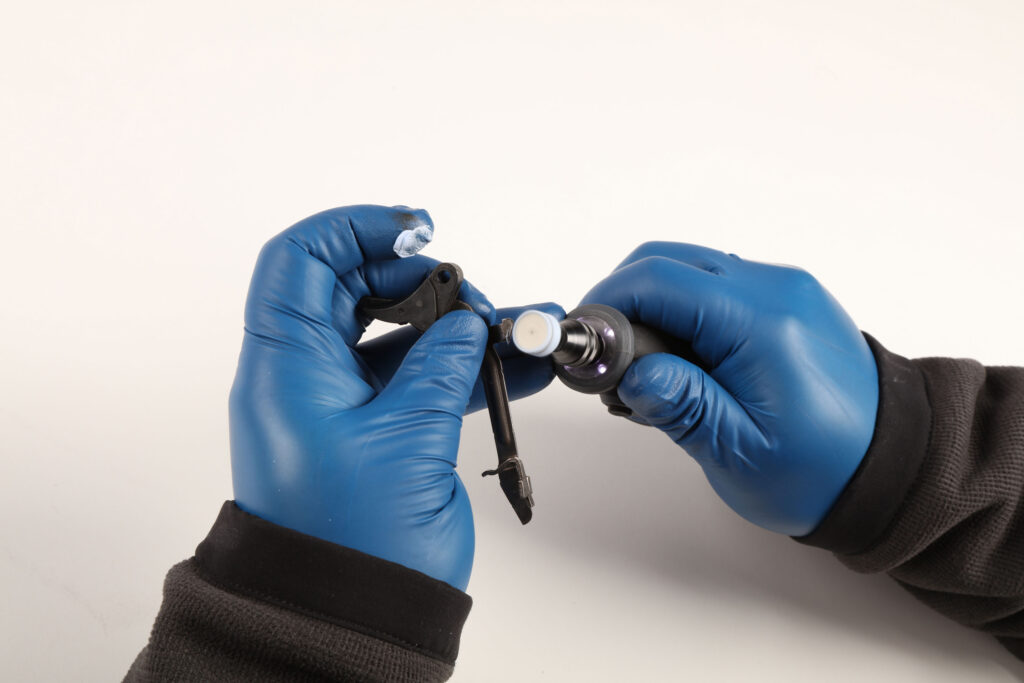
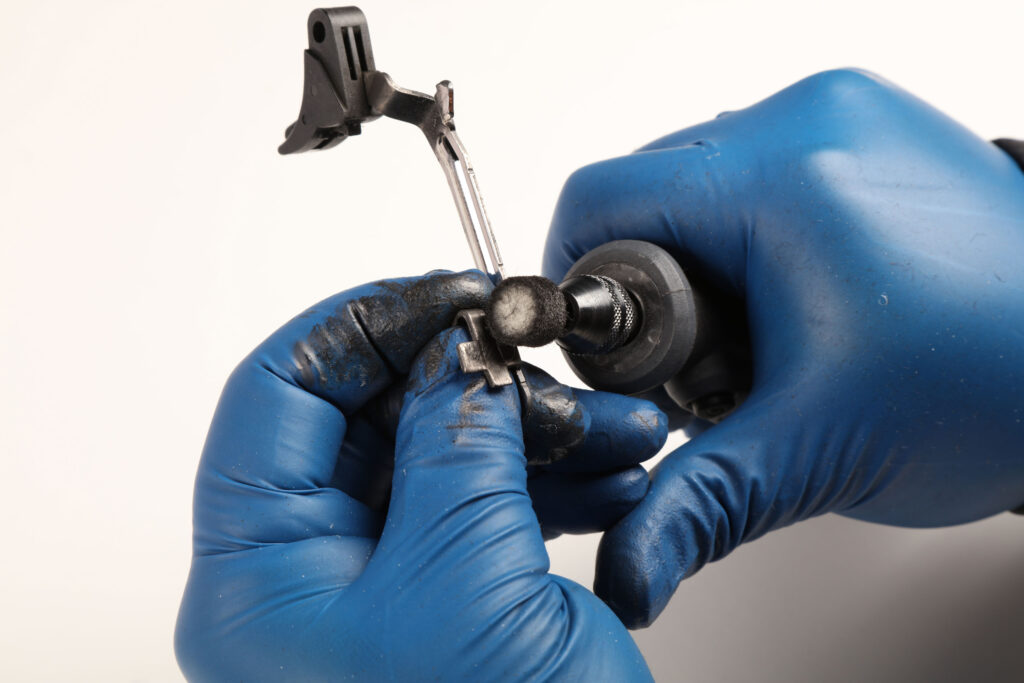
02) Polishing the Trigger Bar Ramp
Apply polish to your polishing tool of choice. We are using a metal polish called Flitz, but any metal polish will do. Polish the ramp on the trigger bar that disengages the firing pin safety/safety plunger. This is the ramp that rides along the safety plunger. Be careful not to reduce the height of the ramp because doing so will not fully disengage the plunger.
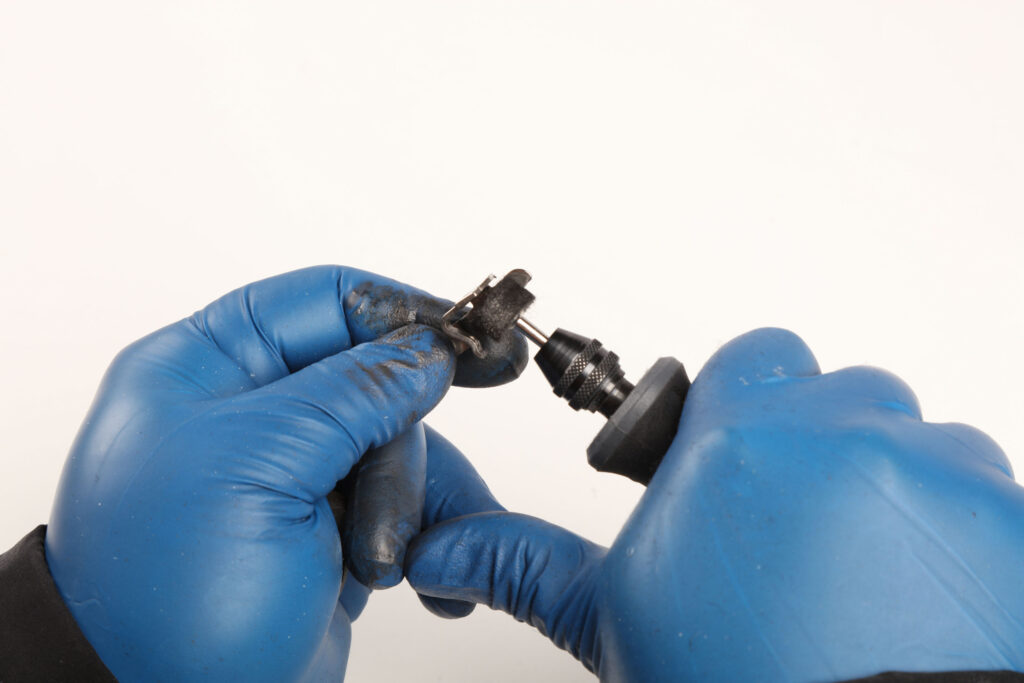
03) Polishing the Trigger Bar Cruciform
You may want to polish the entire cruciform on the trigger bar, which is fine, but the important area is the tail end that contacts the firing pin/striker. This is the edge that loads tension onto the striker. Warning: Do not physically alter any angles as this may cause severe malfunctions. Remember, we’re only polishing the surface for smoothness and not looking to remove material.
04) Polishing the Trigger Bar to Connector Contact Points
Polish both the inside surface and spine of the trigger bar area that makes metal-to-metal contact with the connector. This drops the trigger bar and releases the striker. Warning: It’s hard to do, but if you change the angle of the spine, it may not release the trigger from the striker.

05) Polishing Firing Pin Ledge
Polish the inside ledge of the firing pin/striker that touches the cruciform tail on the trigger bar. Warning: Do not alter any angles or edges as this can cause severe malfunctions.
06) Polishing the Connector
Polish under both ledges and the flat surface that contacts the trigger bar, which is about halfway down the connector. The square ledge of the connector pushes the trigger bar to drop. Warning: do no alter any angles as it may cause severe malfunctions. Tip: When removing the connector from trigger housing, try not to change the angle as it can alter the trigger reset tension. Make a note of the gap between the connector and the trigger housing.
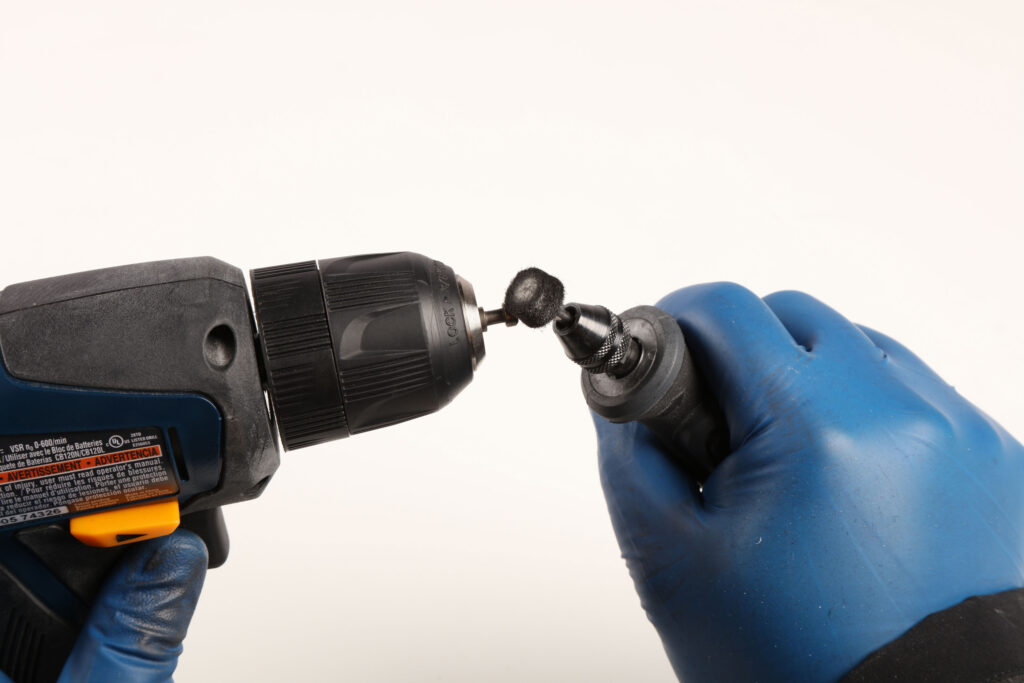
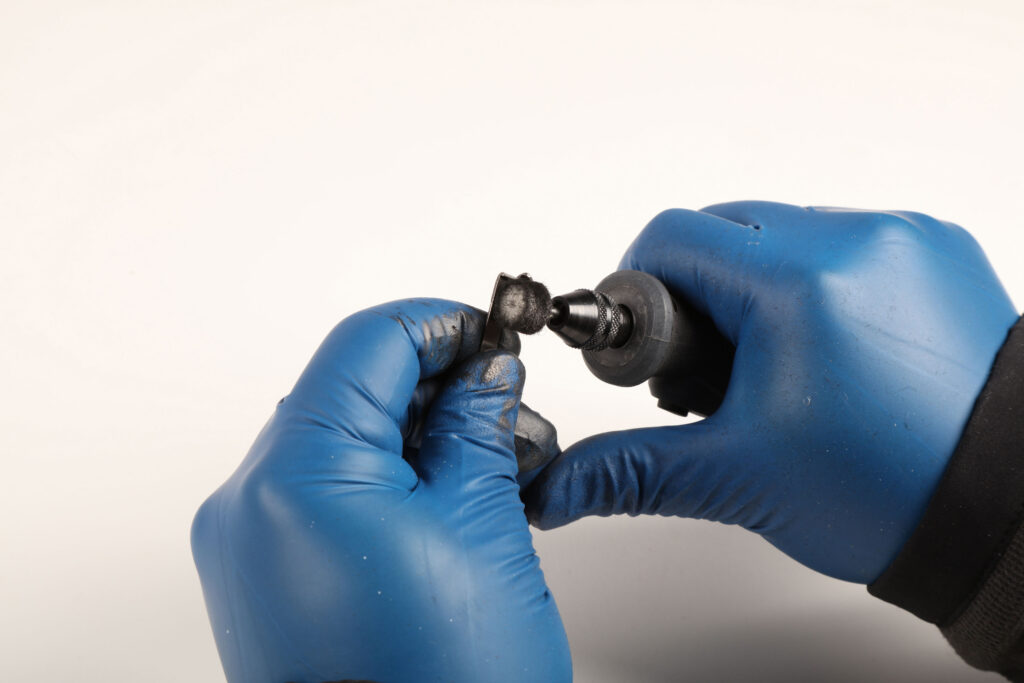
07) Polish the Firing Pin Safety
Polish both ends of the firing pin safety/safety plunger. Polishing the dome will make it ride more smoothly along trigger bar ramp. The polished barrel of the safety plunger with travel with less friction inside the slide. Tip: The power drill is optional as mentioned because it will speed things along and help keep the polishing more uniform. Remember, we are only polishing to smooth the surface and not remove any material.
08) Complete
Congratulations—your Glock’s trigger is much smoother now. You can see in our final example that we ended up polishing more areas than mentioned in these steps as it not only looks cool, but it also makes all the parts smoother. Polishing metal on metal contact makes everything smoother but don’t forget metal-to-plastic contact makes a difference as well.
Once again, before attempting this DIY, please remember that you are only polishing surfaces for smoothness and not looking to remove or alter the shape of the metal. Reassemble your pistol according to the manufacturer’s instructions and revel in the smoothness of your trigger.
Text by Chris Lee & Danny Chang
Images by Michael Grey