POLYMER STIPPLING
Disclaimer: Always take safety precautions when working with tools or other dangerous goods. This DIY should be done at your own risk. Verify your results with a certified gunsmith prior to using the final product
If you went back about a decade and a half or so and told your buddy that you were going to use a soldering iron to melt hundreds of divots into your pistol’s frame for increased grip, he’d probably think you were out of your mind. Fast-forward to today and polymer stippling is something that’s no longer scoffed at, but considered a bona-fide art form to many.
As the development of firearms and their accessories moves forward, we find more and more polymer being used in the construction of everything from pistol frames to magazines and beyond. Learning how to stipple these surfaces gives the applicator the opportunity to enhance the feel of any polymer surface.
Polymer stippling is essentially the art of melting polymer to modify its texture, with the goal of increasing the “grippiness” of a surface. A side effect is that a stippled surface can look pretty cool too if done right. There are many different patterns, textures and levels of grip that one can apply to a polymer surface. It’s the method of application, as well as the apparatus used to do the stippling, that make the biggest impact on the final results.

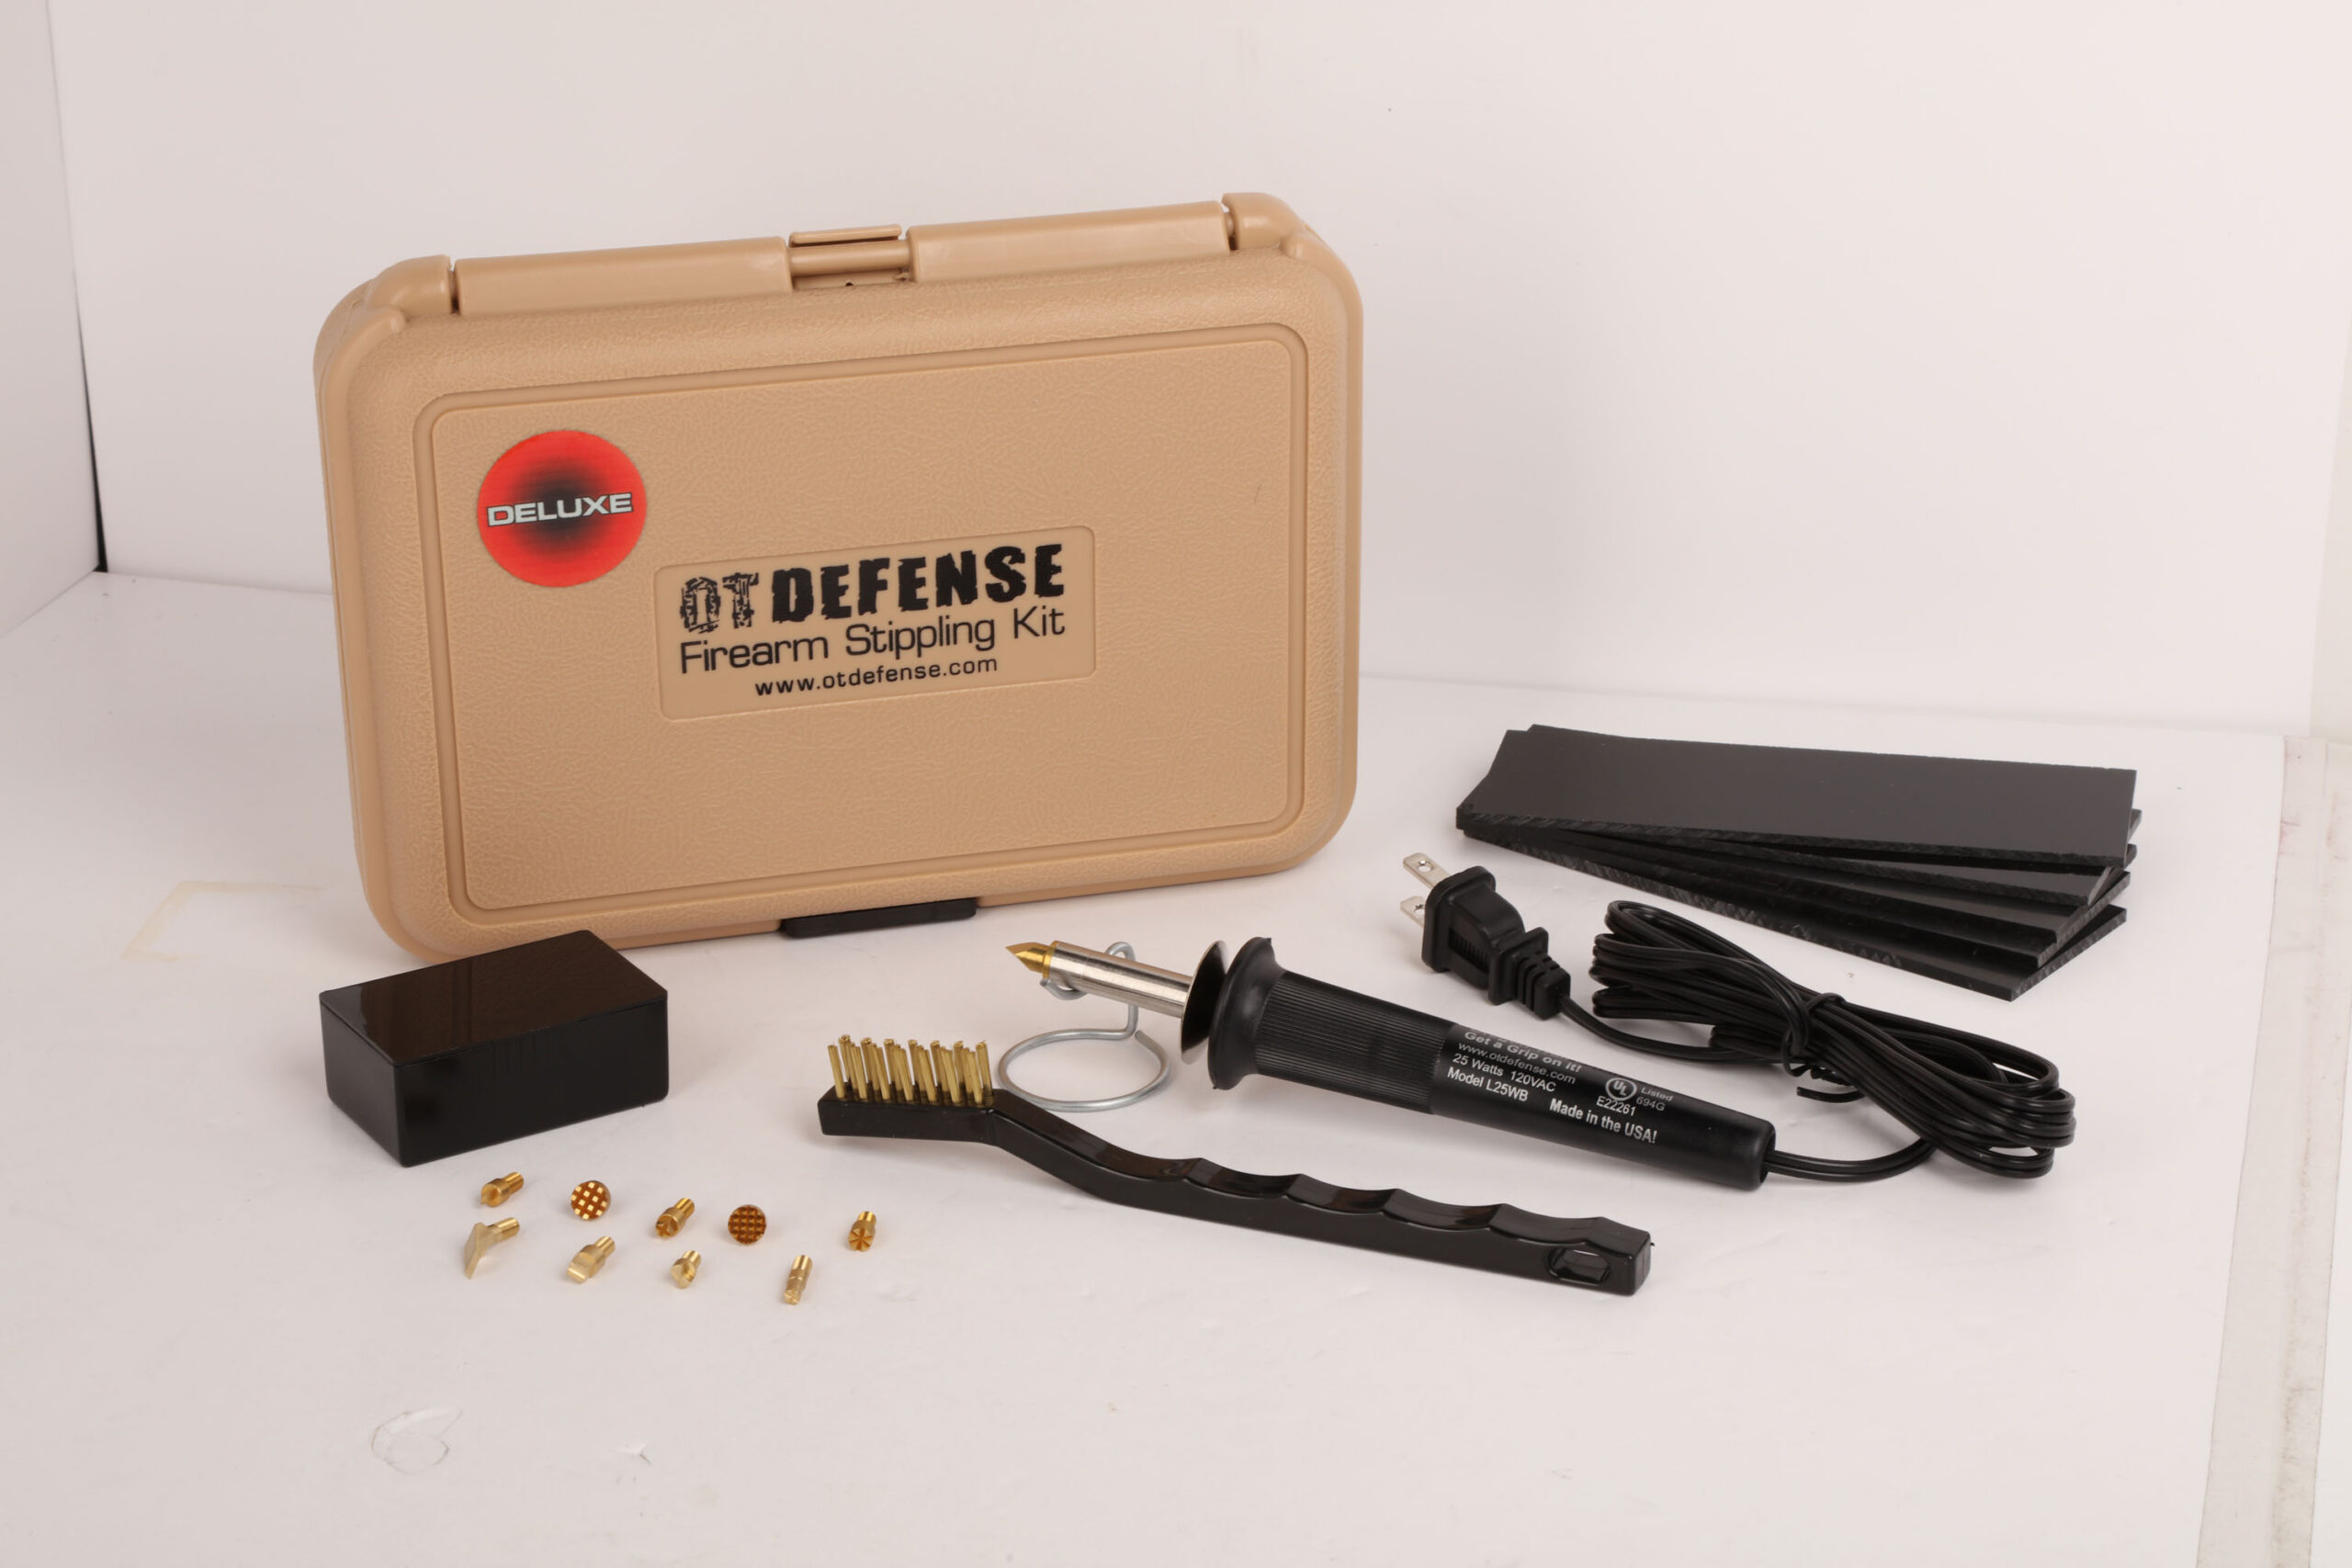
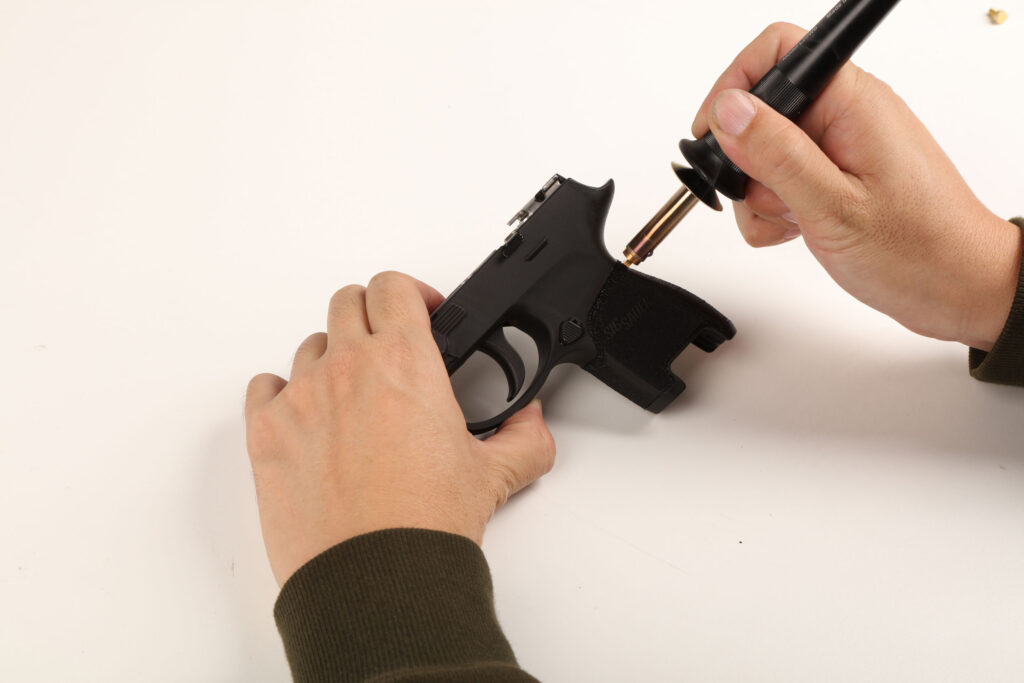
It wasn’t so long ago that those who wished to stipple their pistol frame or polymer magazines would usually settle for a soldering iron and whatever tips for it you could scrounge up at the hardware store. Nowadays we’re spoiled by the many specialized stippling options that are out there. In this do-it-yourself article, we use a firearm stippling kit made by Oregon Trail Defense (OTD) that we got from our friends at U.S. Tactical Supply. Instead of using a 40-watt soldering iron like we used to use, OTD employs a lower wattage 25-watt wood burner. The lower-power tool allows for a greater margin for error, which is great when you only have one chance to get it right. Unlike soldering irons, wood burners have a threaded end so that specialized tips can screw into the tool for a more secure fit.
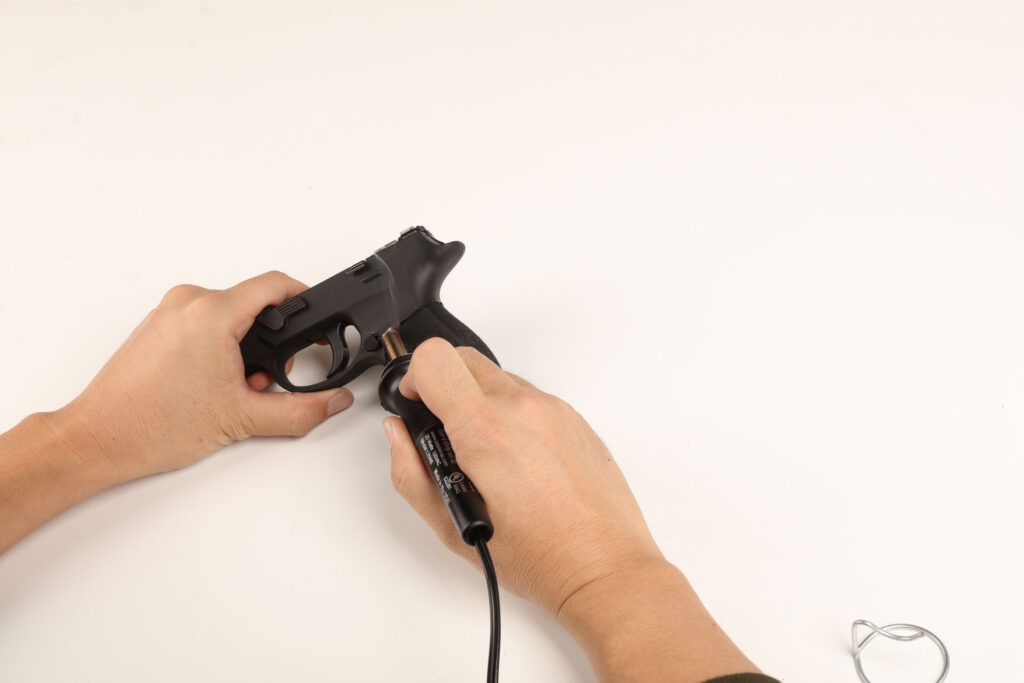
Before attempting polymer stippling yourself, it’s wise to take common-sense safety precautions and understand that once you touch the stippling tip to the surface, there’s no taking it back. Of course, when working on a firearm make sure that it is unloaded. Separate the slide from the frame to make it easier to work on. Melting plastic releases toxic fumes, so be sure to do this job in a well-ventilated place, and wear suitable safety gear such as goggles and a respirator. The heated wood burner tip can reach well over 900° F, so remember to keep it away from any flammables as well as all body parts.
The basic tenets of stippling can be covered by three factors: time, heat and pressure. Everything revolves around these three things. Depending on the type of material and amount of heat built up in the tip, you’ll need to apply the tip for more or less time to get your desired results. The amount of heat applied is also dependent on what material you’re working on. According to OTD, the 25-watt powered tool included in their kit provides enough power for most jobs. A higher-powered tool, such as a 40-watt model, can be used and would result in less required time and pressure to apply stippling, but it also greatly reduces your margin of error. The amount of pressure applied dictates the depth that the tip creates into the surface. The more pressure applied, the deeper and more aggressive the result.
It’s also important to understand that not all polymers are the same. Different plastics formulations will stipple differently. It’s best to practice on a scrap piece of polymer whenever possible. For the most part, black polymers will remain black after being stippled, but lighter colored polymers such as tan or gray will change color. You are burning it after all, so unless you plan on applying a different-color coating to your stipple job afterward, expect some discoloration on lighter-colored surfaces. Text by Martin Anders / Michael Grey

Armed with the right tools, there are many ways to go about stippling your item. We are in no way professionals, which is why this DIY was interesting, and this is the first time that we are attempting a stipple job with these tools. With practice, we’re sure it’ll get better from here on out. In the meantime, let’s get to it!
What’s Needed
- OT Defense wood burner
- OT Defense stippling tips
- OT Defense Brass Wire Brush
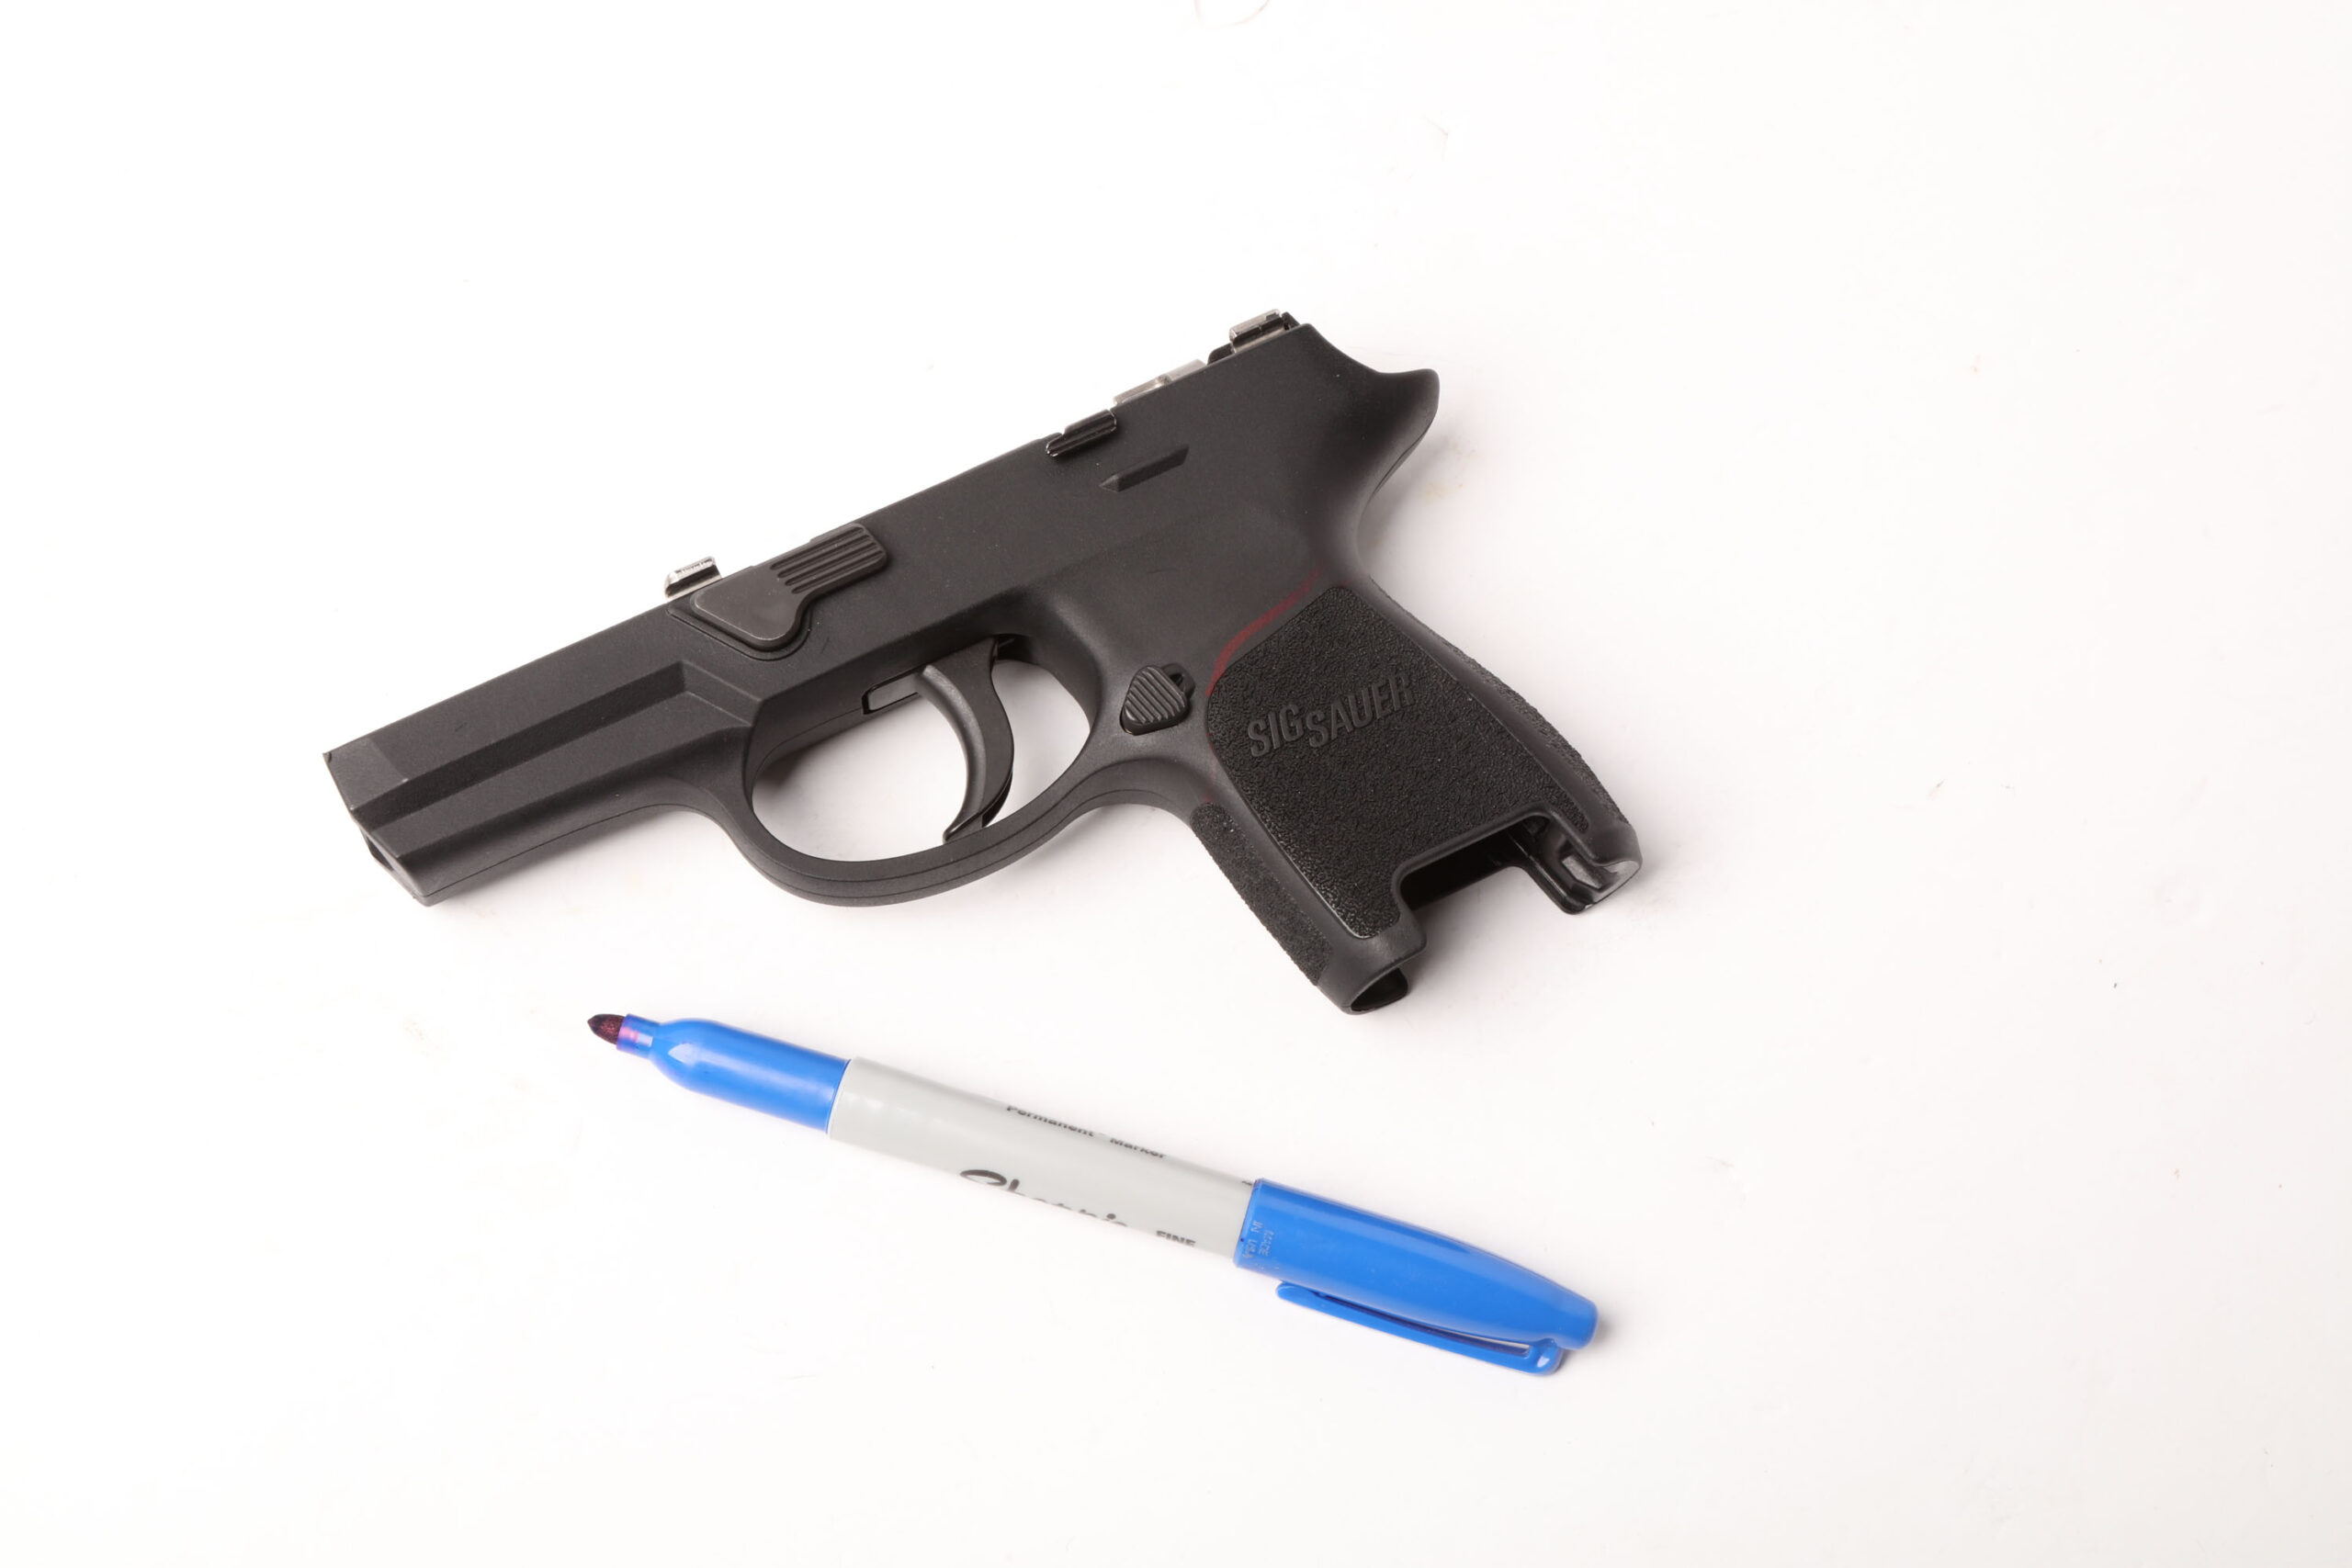
- Marker
- Eye protection
- Mask
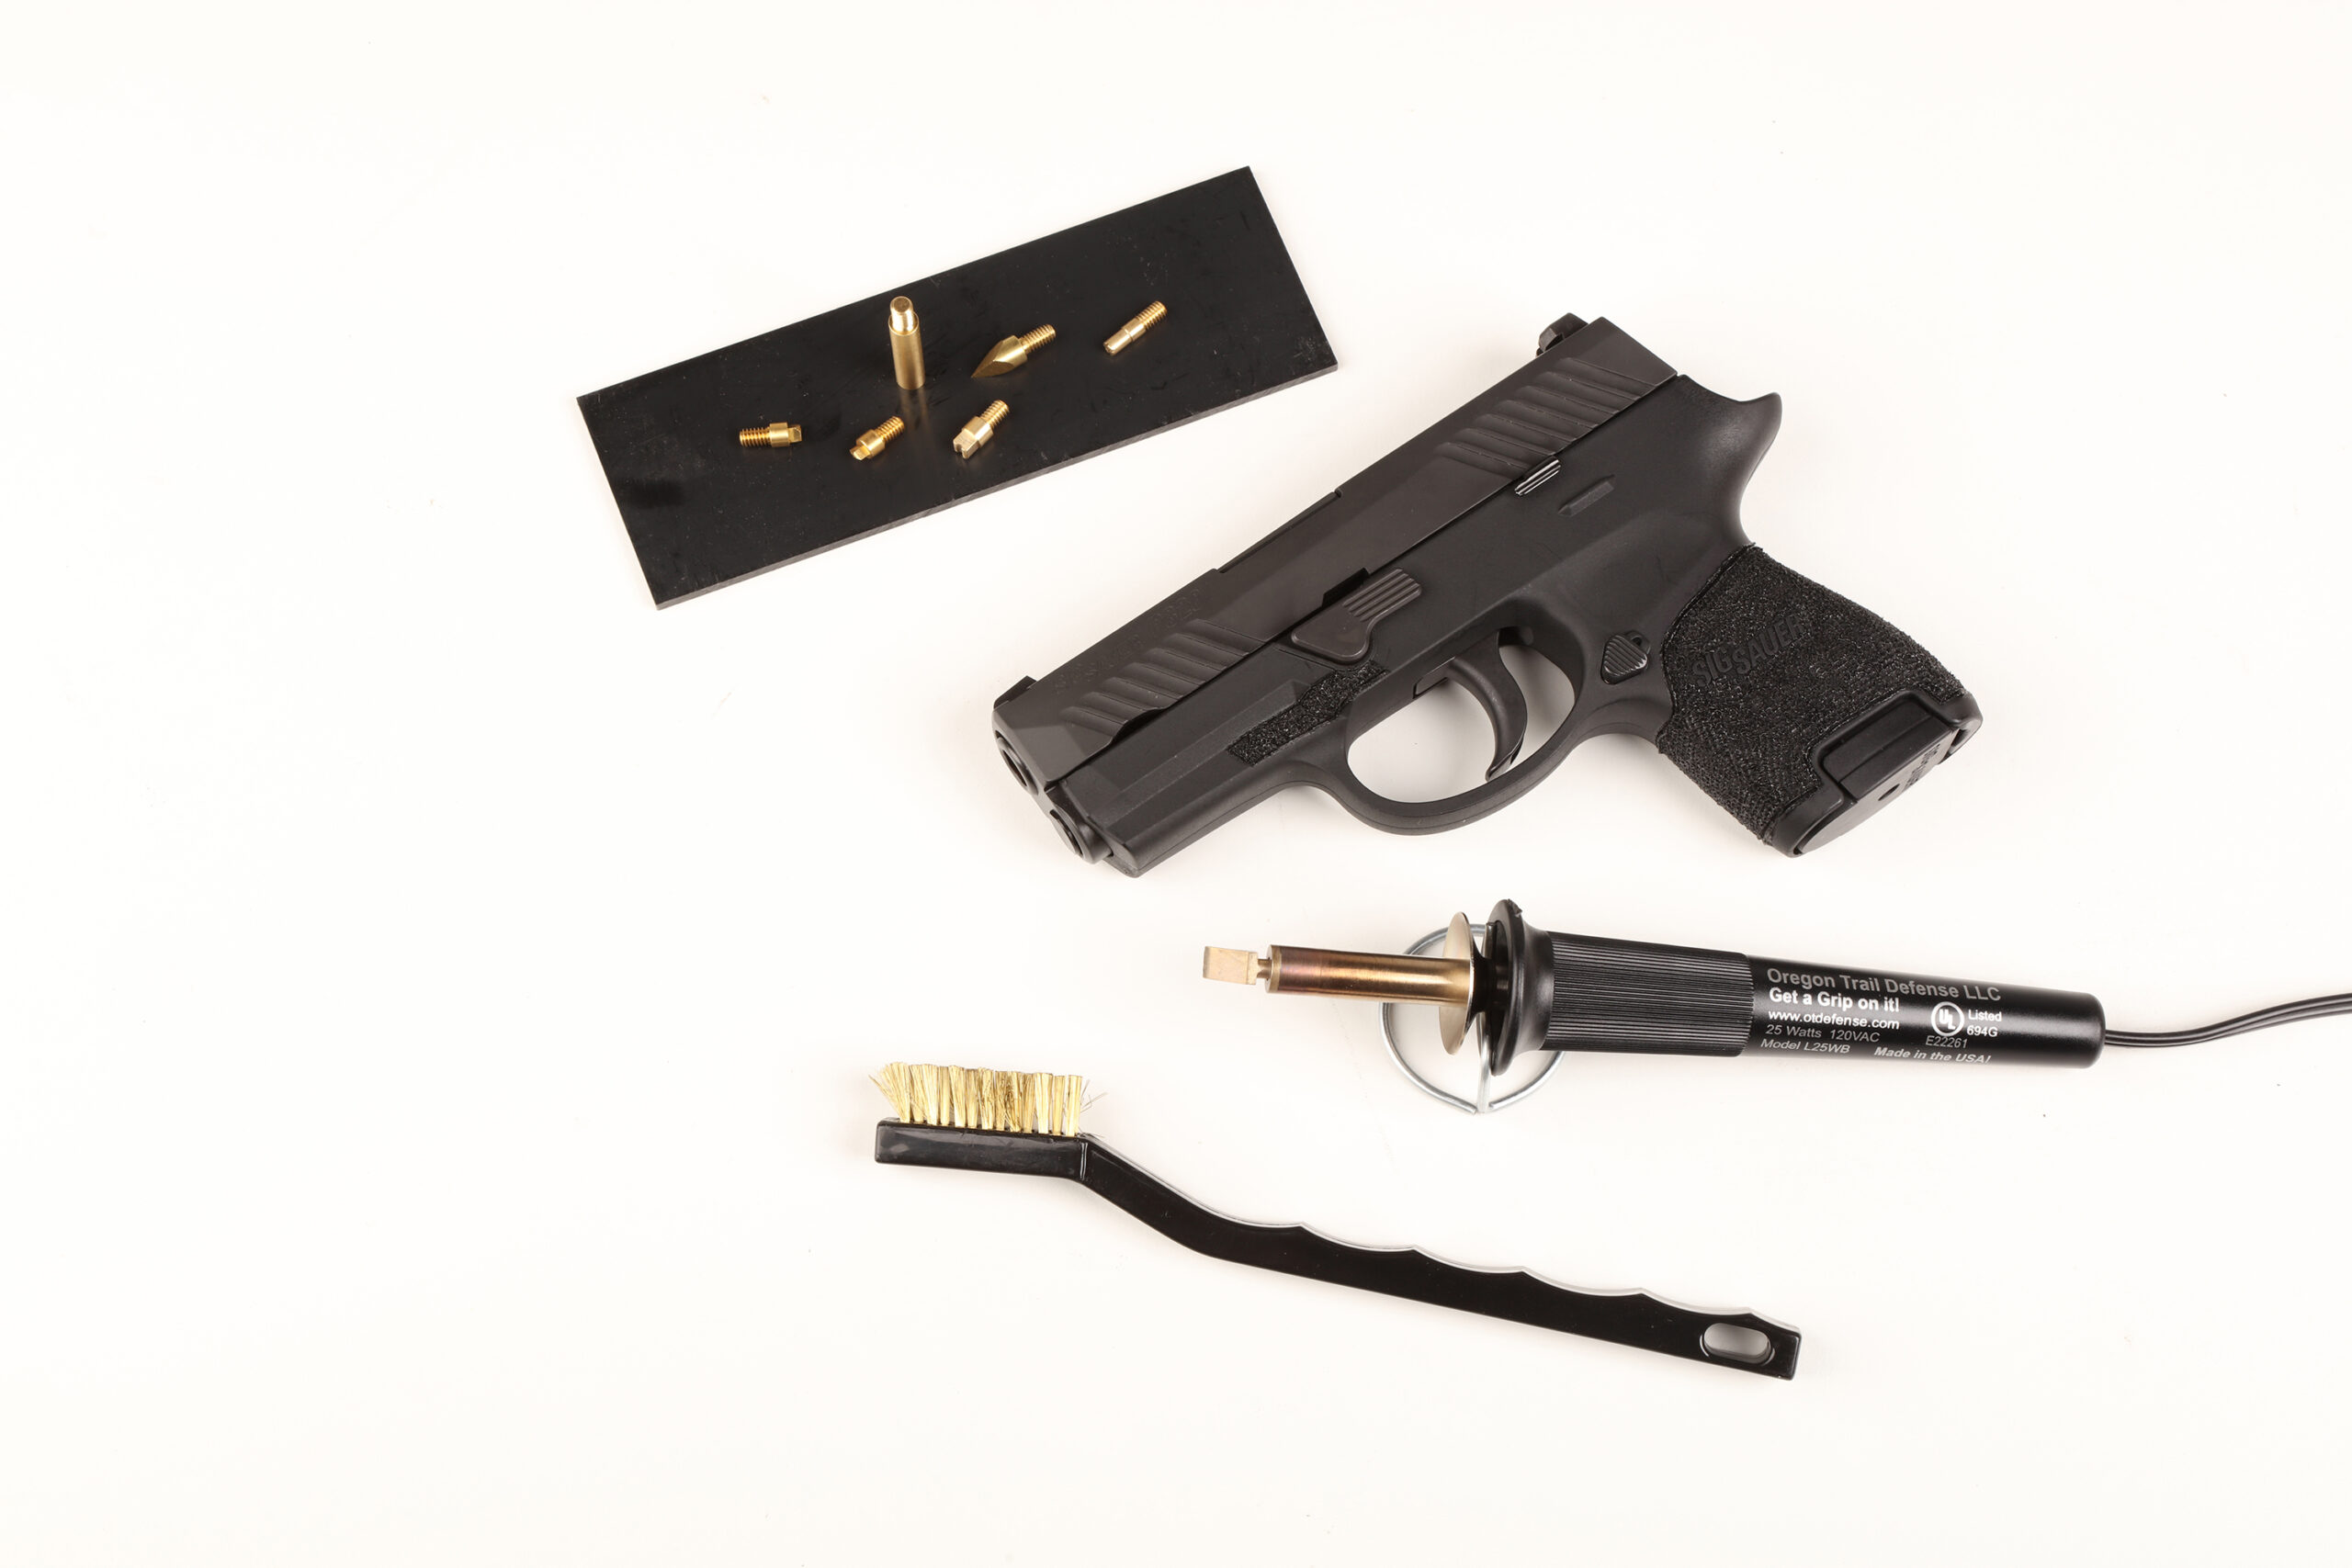
The Tips
We’ll be using three different OTD tips in this guide. The narrow 20LPI Finish Tip is designed to apply finishing edging and borders. The round 16LPI Waffle Tip provides fast results and can be used in multiple ways to vary the amount of grip desired. The arched Cutting Tip can be used for borders or flattening material and removing raised portions. Its angle provides an easy way to cut straight lines

step 1
Mark Your Pattern
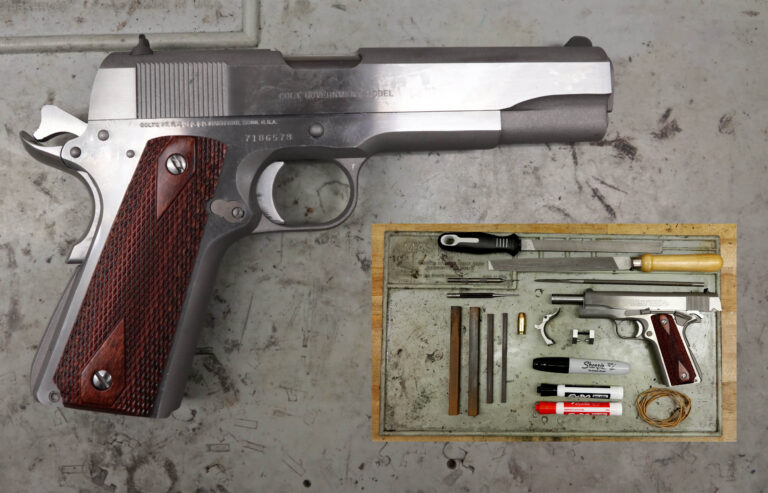
In this example, we are going to stipple a pistol frame. After making sure our firearm is unloaded, we removed its slide so the frame is easier to work with. Using a permanent marker, we drew the borders of where we intend to apply stippling. Don’t worry; markings from markers such as a Sharpie can be removed with rubbing alcohol.
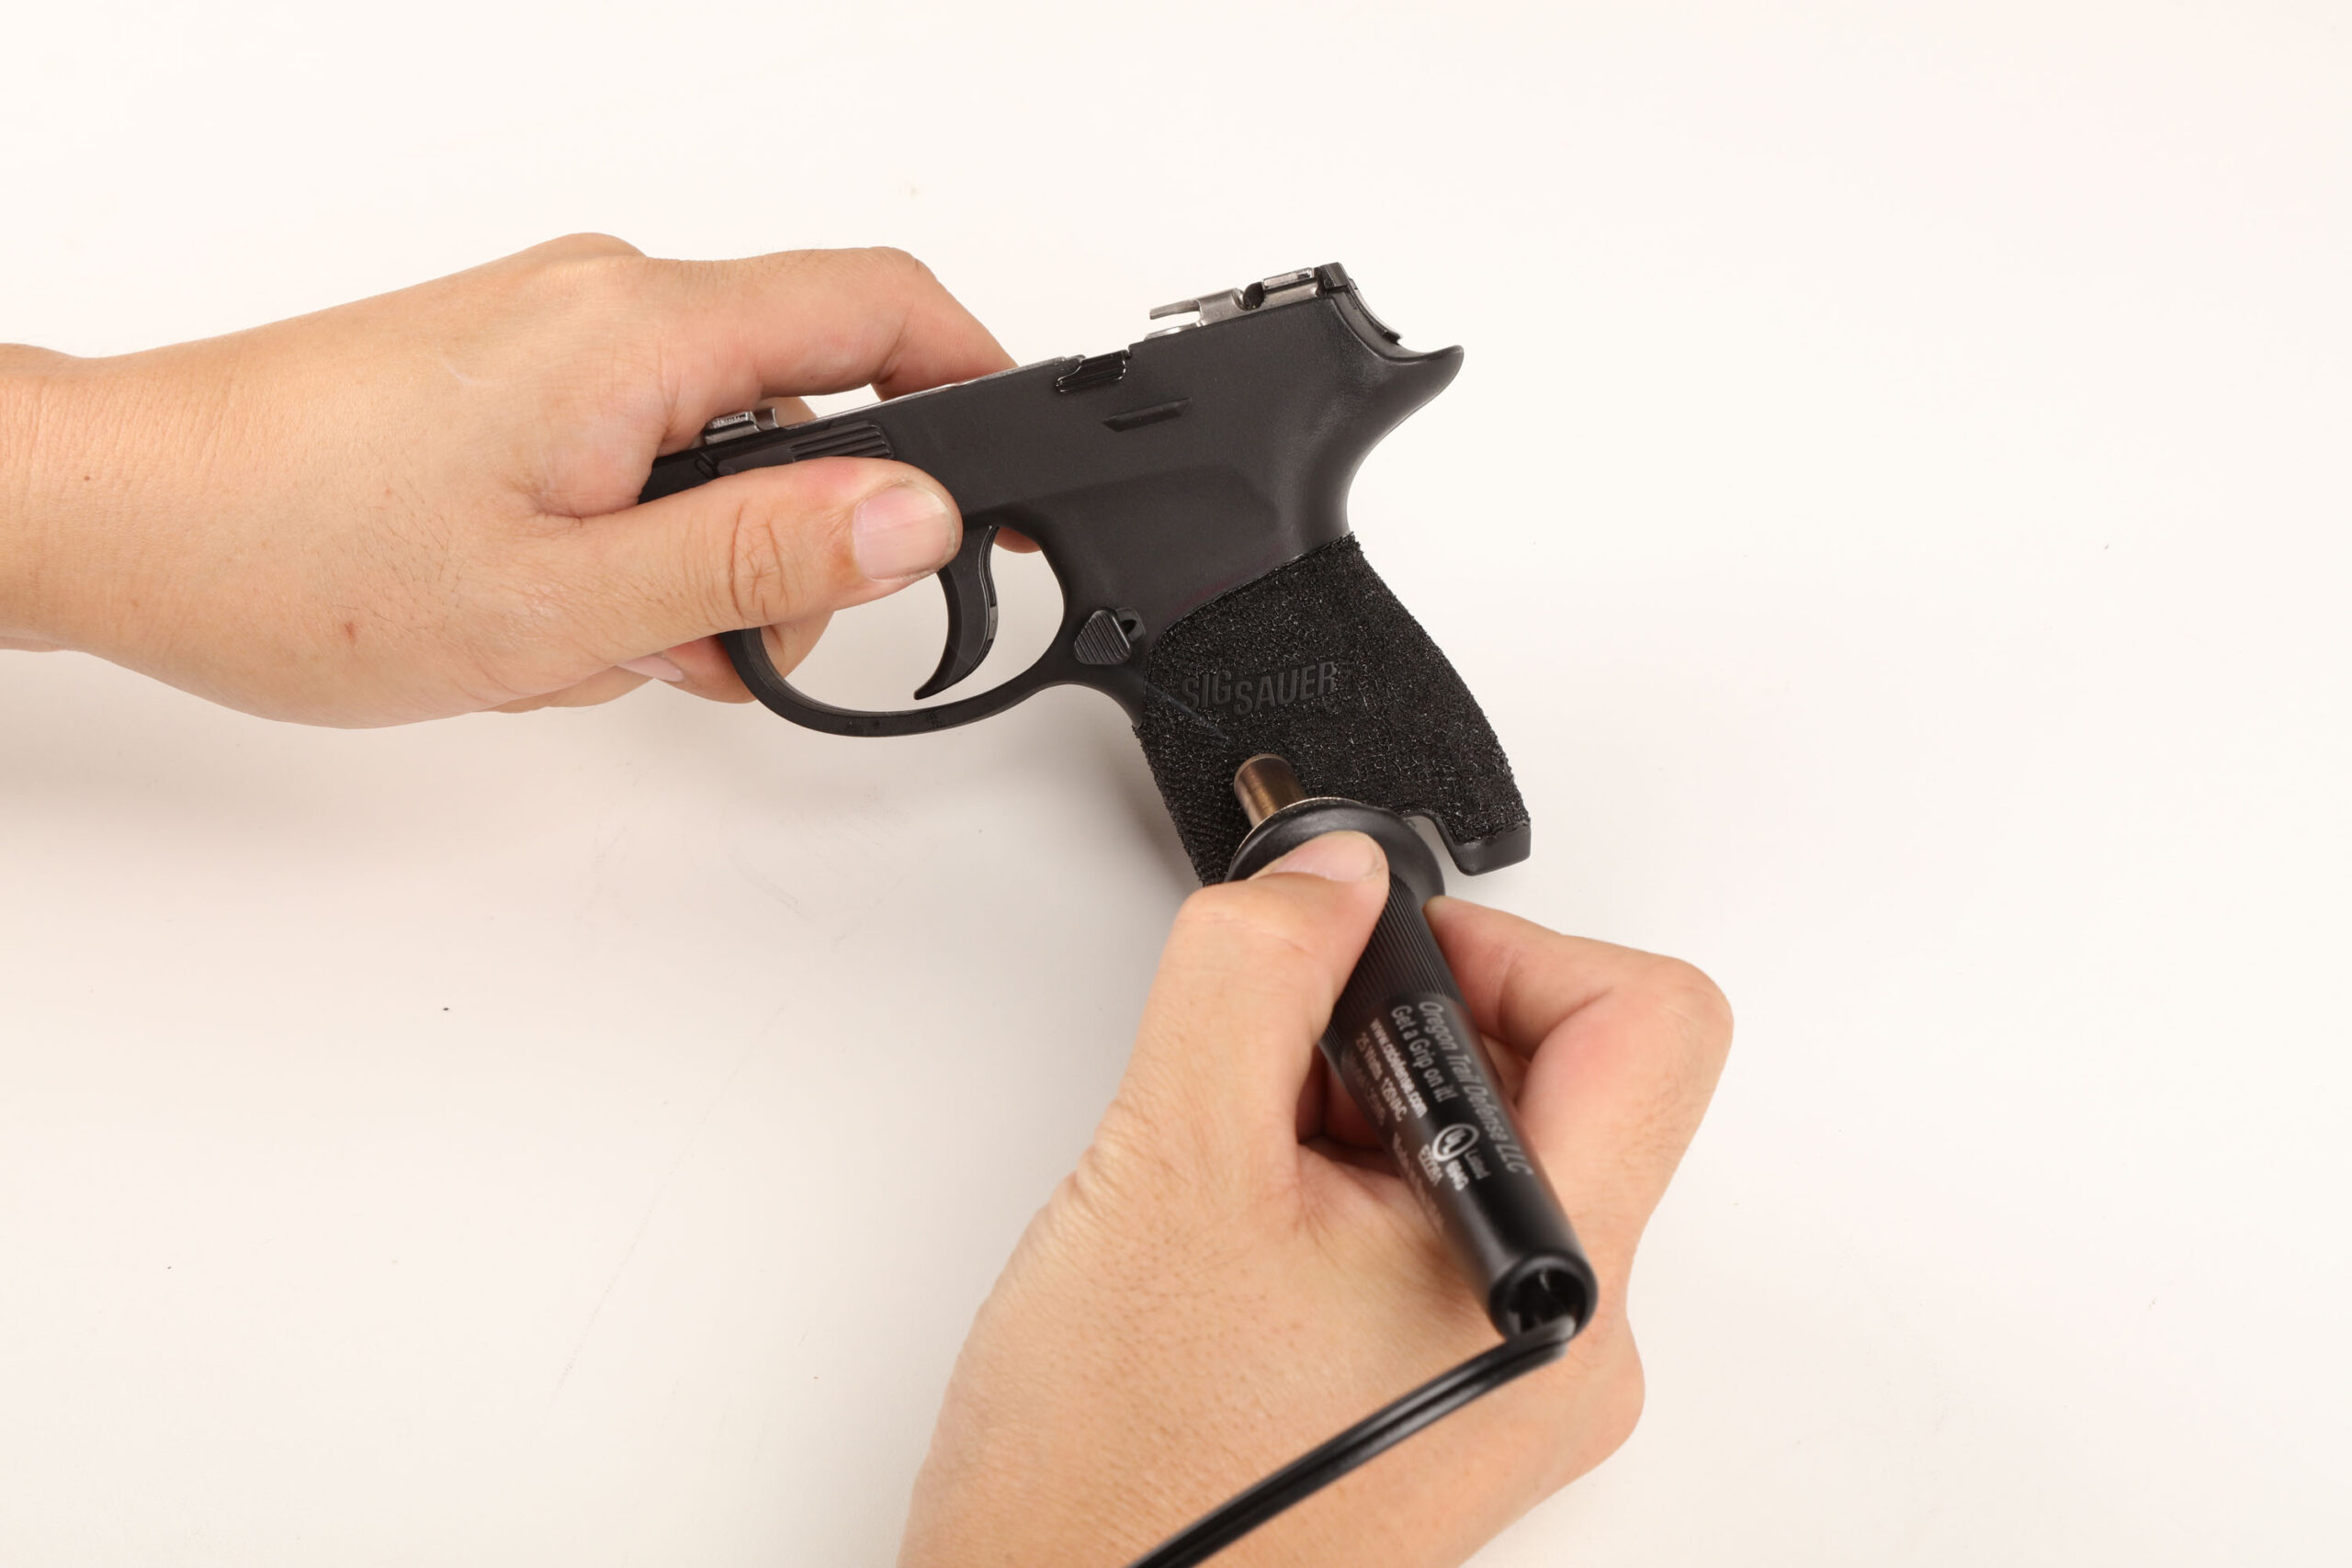
step 2

Define the Borders
Using the Cutting Tip, we went over the borders that we drew with the marker. This is optional depending on what look you’re going for, but we like having a defined border. It makes it look neater and makes it easier to see what areas to stipple. The act of stippling is about observation and feel. Don’t over-do it. You can always go back and apply more heat and pressure if you feel that your first pass is too light.
step 3
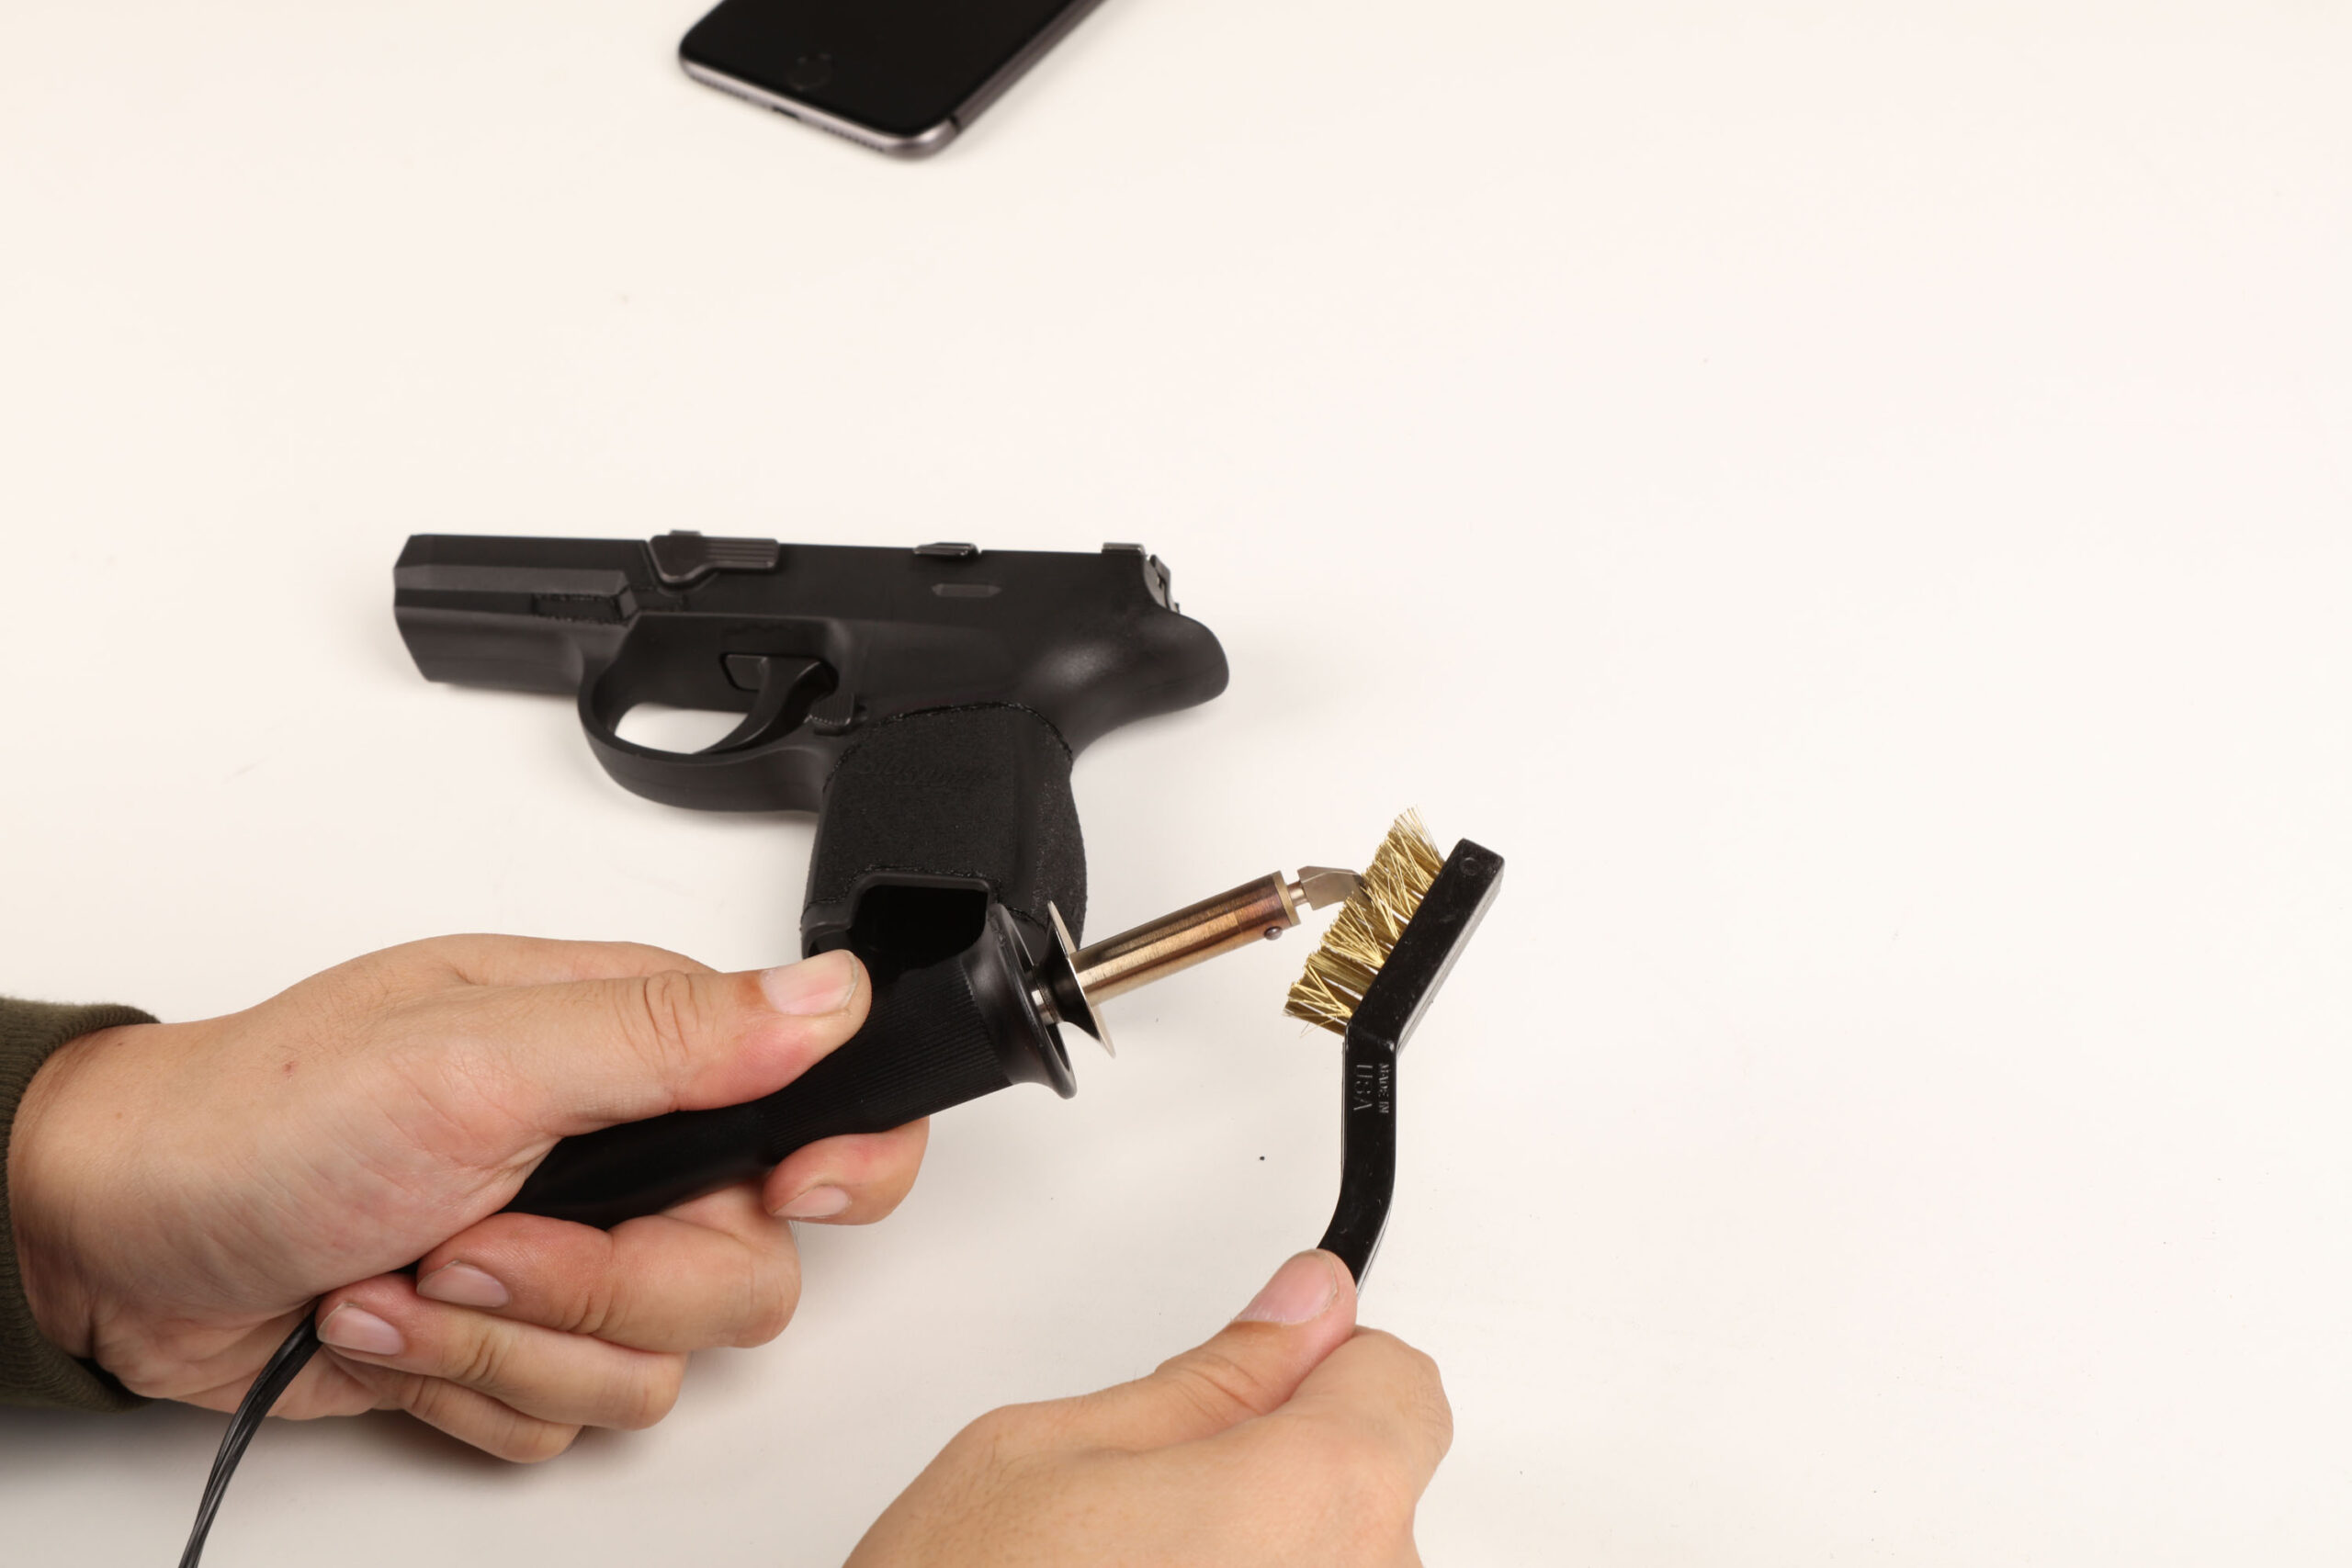
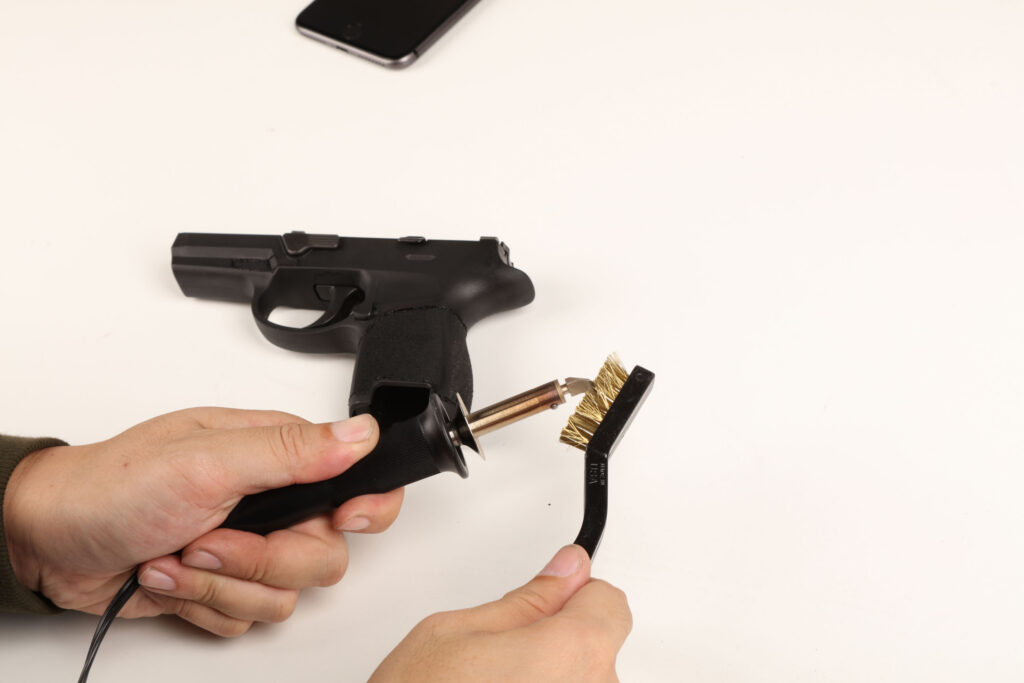
Clean the Tip
It’s important to remember to clean the tip often with a brass wire brush, especially before you begin stippling. Melted plastic can stick to the tip, causing debris to be inadvertently applied to your frame. Pieces of burnt plastic can accumulate and give off more fumes than you want as well. A quick brushing on the tip is good enough, especially when the tip is still hot. Do this with each tip.
step 4

Stippling the Border
Using the 20LPI Finish Tip, we carefully work around the edges of the border. This narrow tip allows us to apply a 20LPI of stippling along the curving border that the circular-shaped waffle tip that we will use later on won’t be able to fit. In the tighter areas we apply the tip twice in anticipation of places that the waffle tip won’t be able to access.

step 5
Bulk Stippling
The 16LPI Waffle Tip is great for making quick work of larger spaces. Back before the advent of these specialized tips you had to stipple each point individually. Now, with 16LPI of points, you can canvas an area in no time. Some people like to make their stippling lined up nice and neat, while others like to randomize their contact points. You can cover up any missed or bald spots by touching the surface again.

step 6
Redefine the Borders
This step is truly optional. After finishing the previous step, we decided that we wanted to clean up the edges a little bit more, so we went back over the stippling boarders one more time with the cutting tool as demonstrated in Step 2. This gives the stippling a cleaner, refined look.
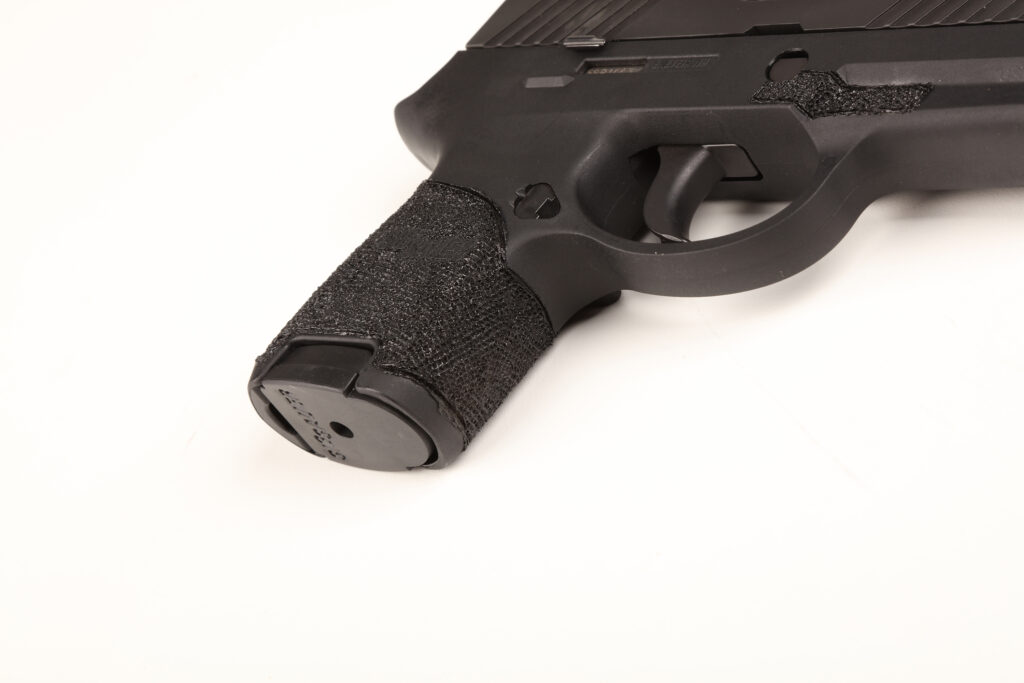
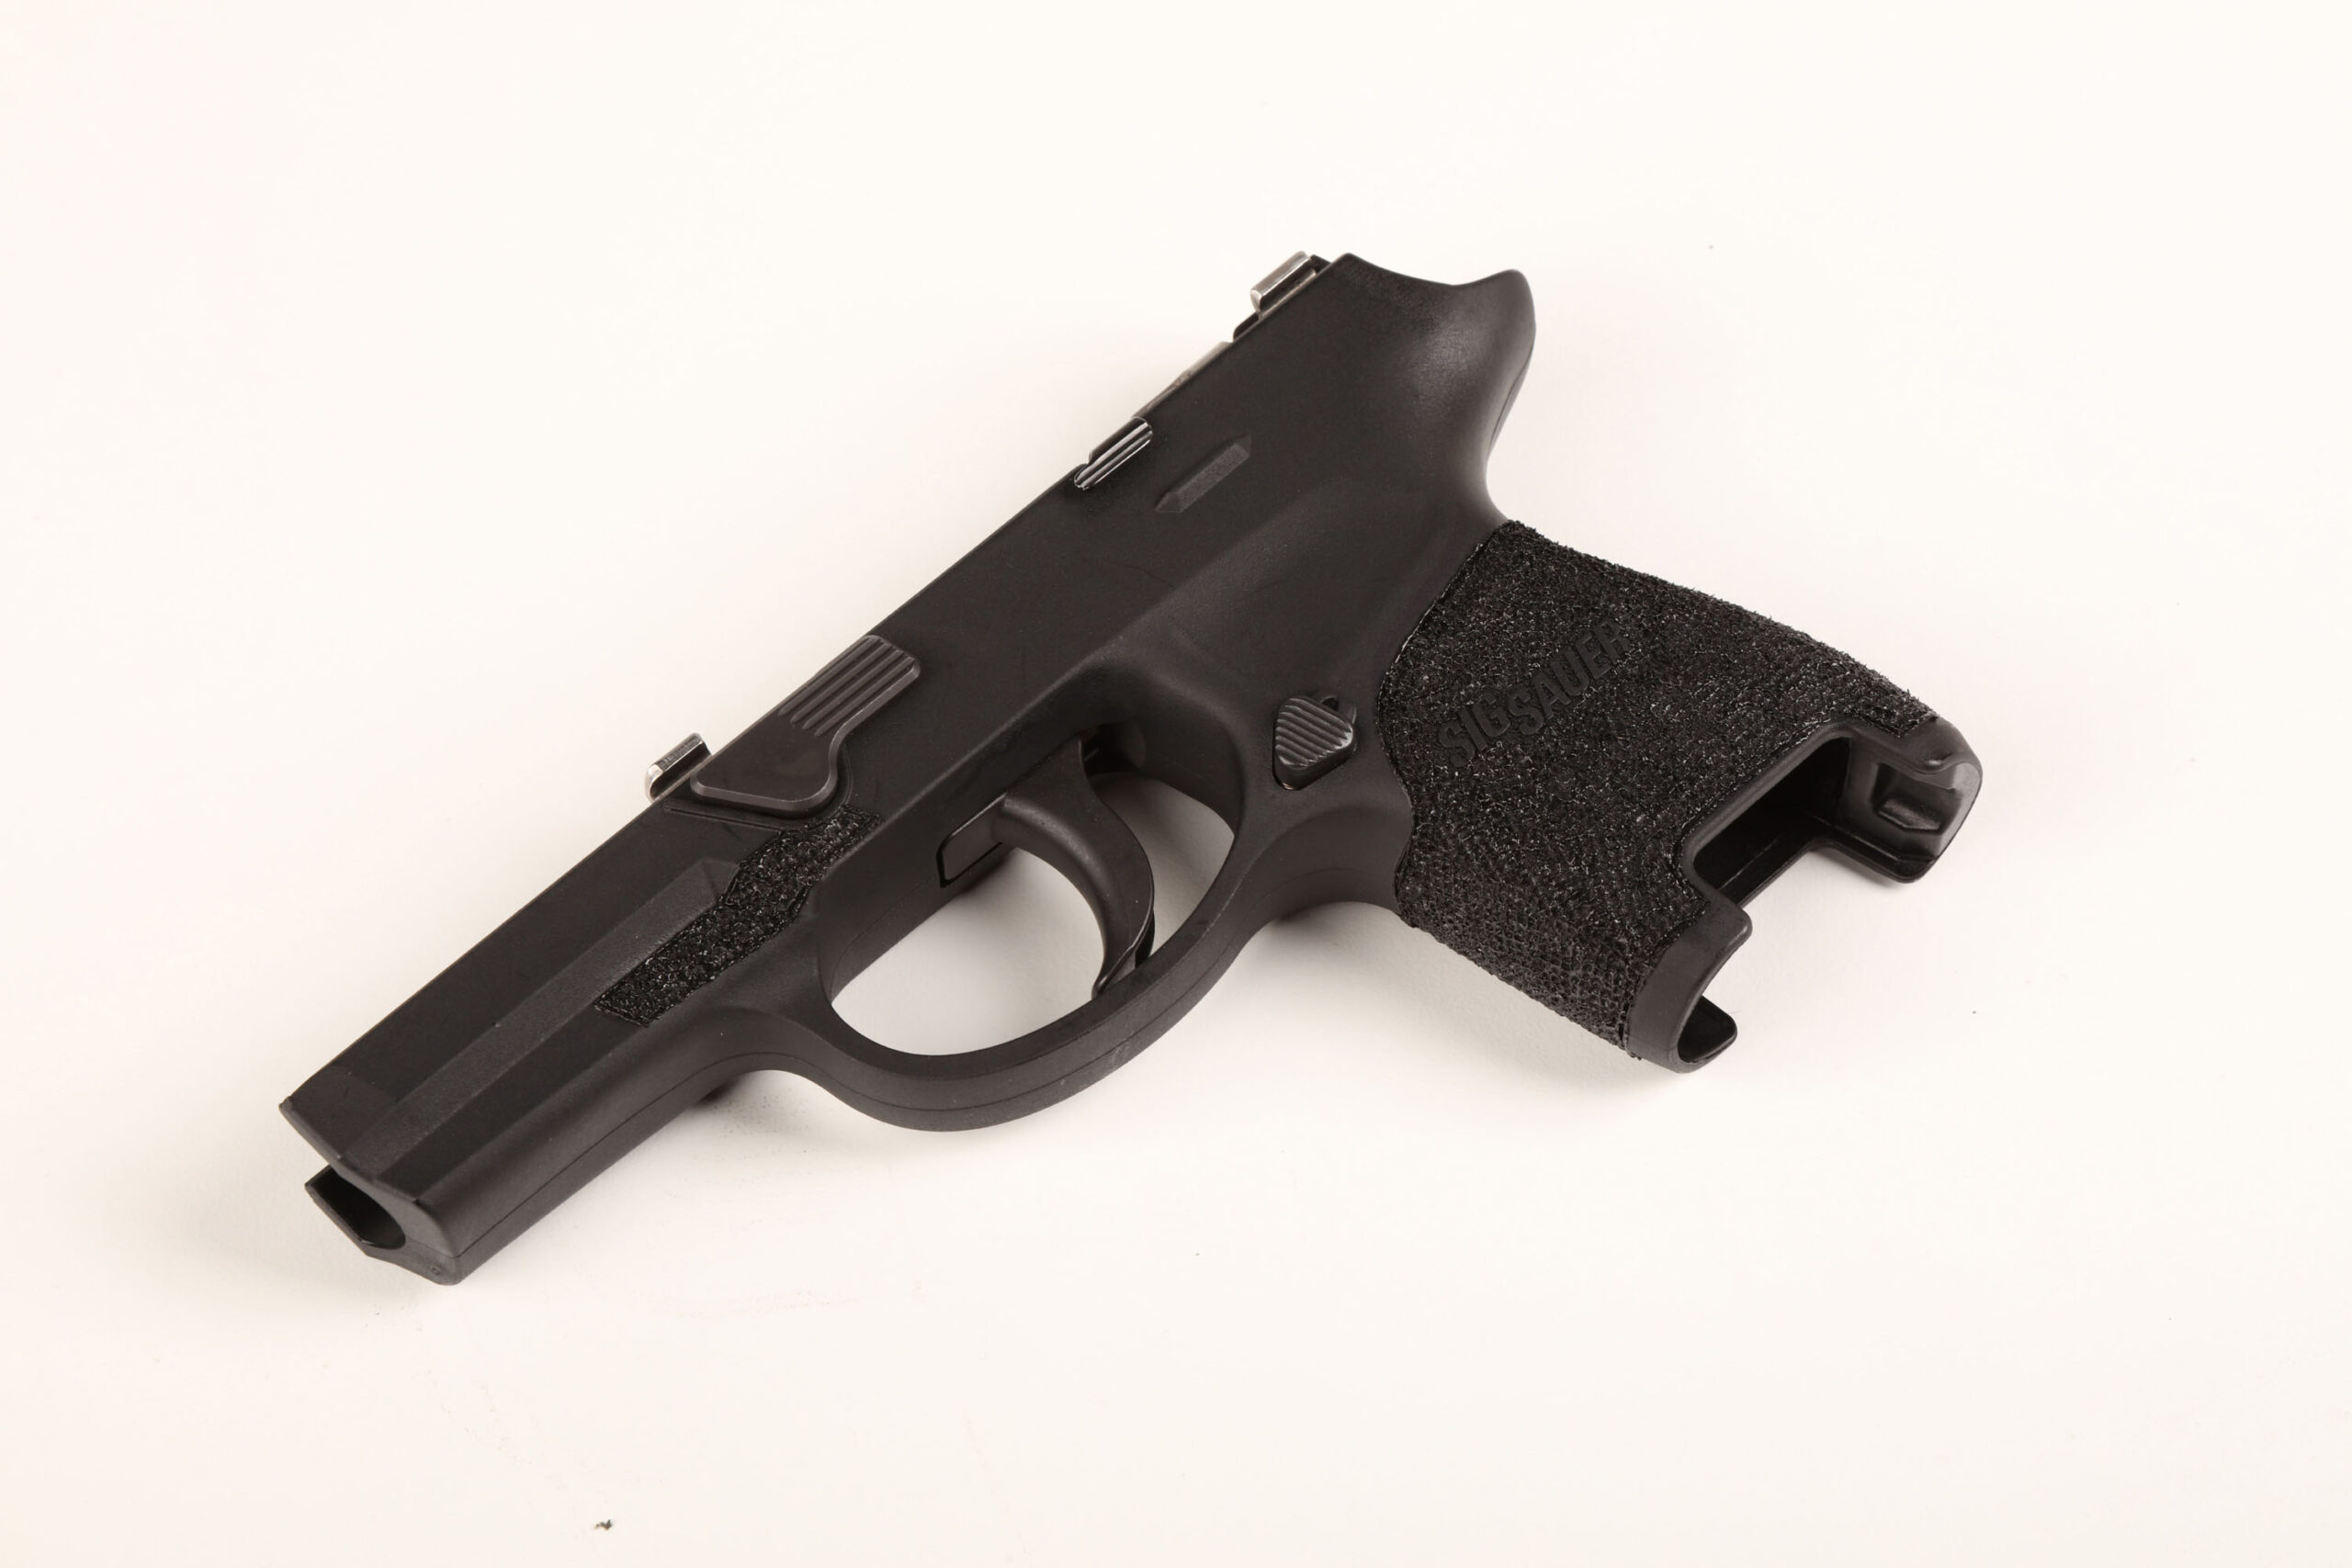
step 7

Complete

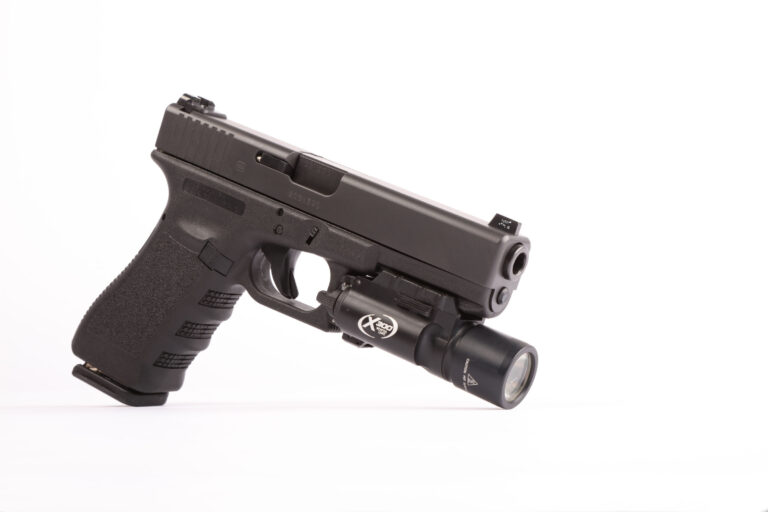
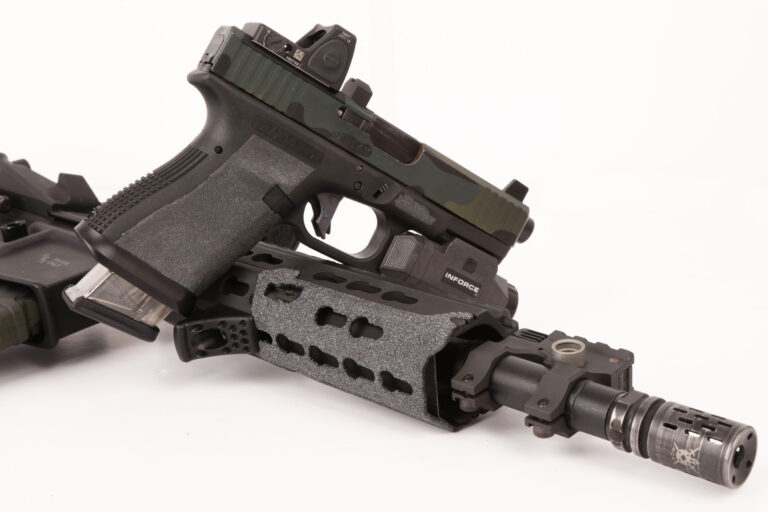
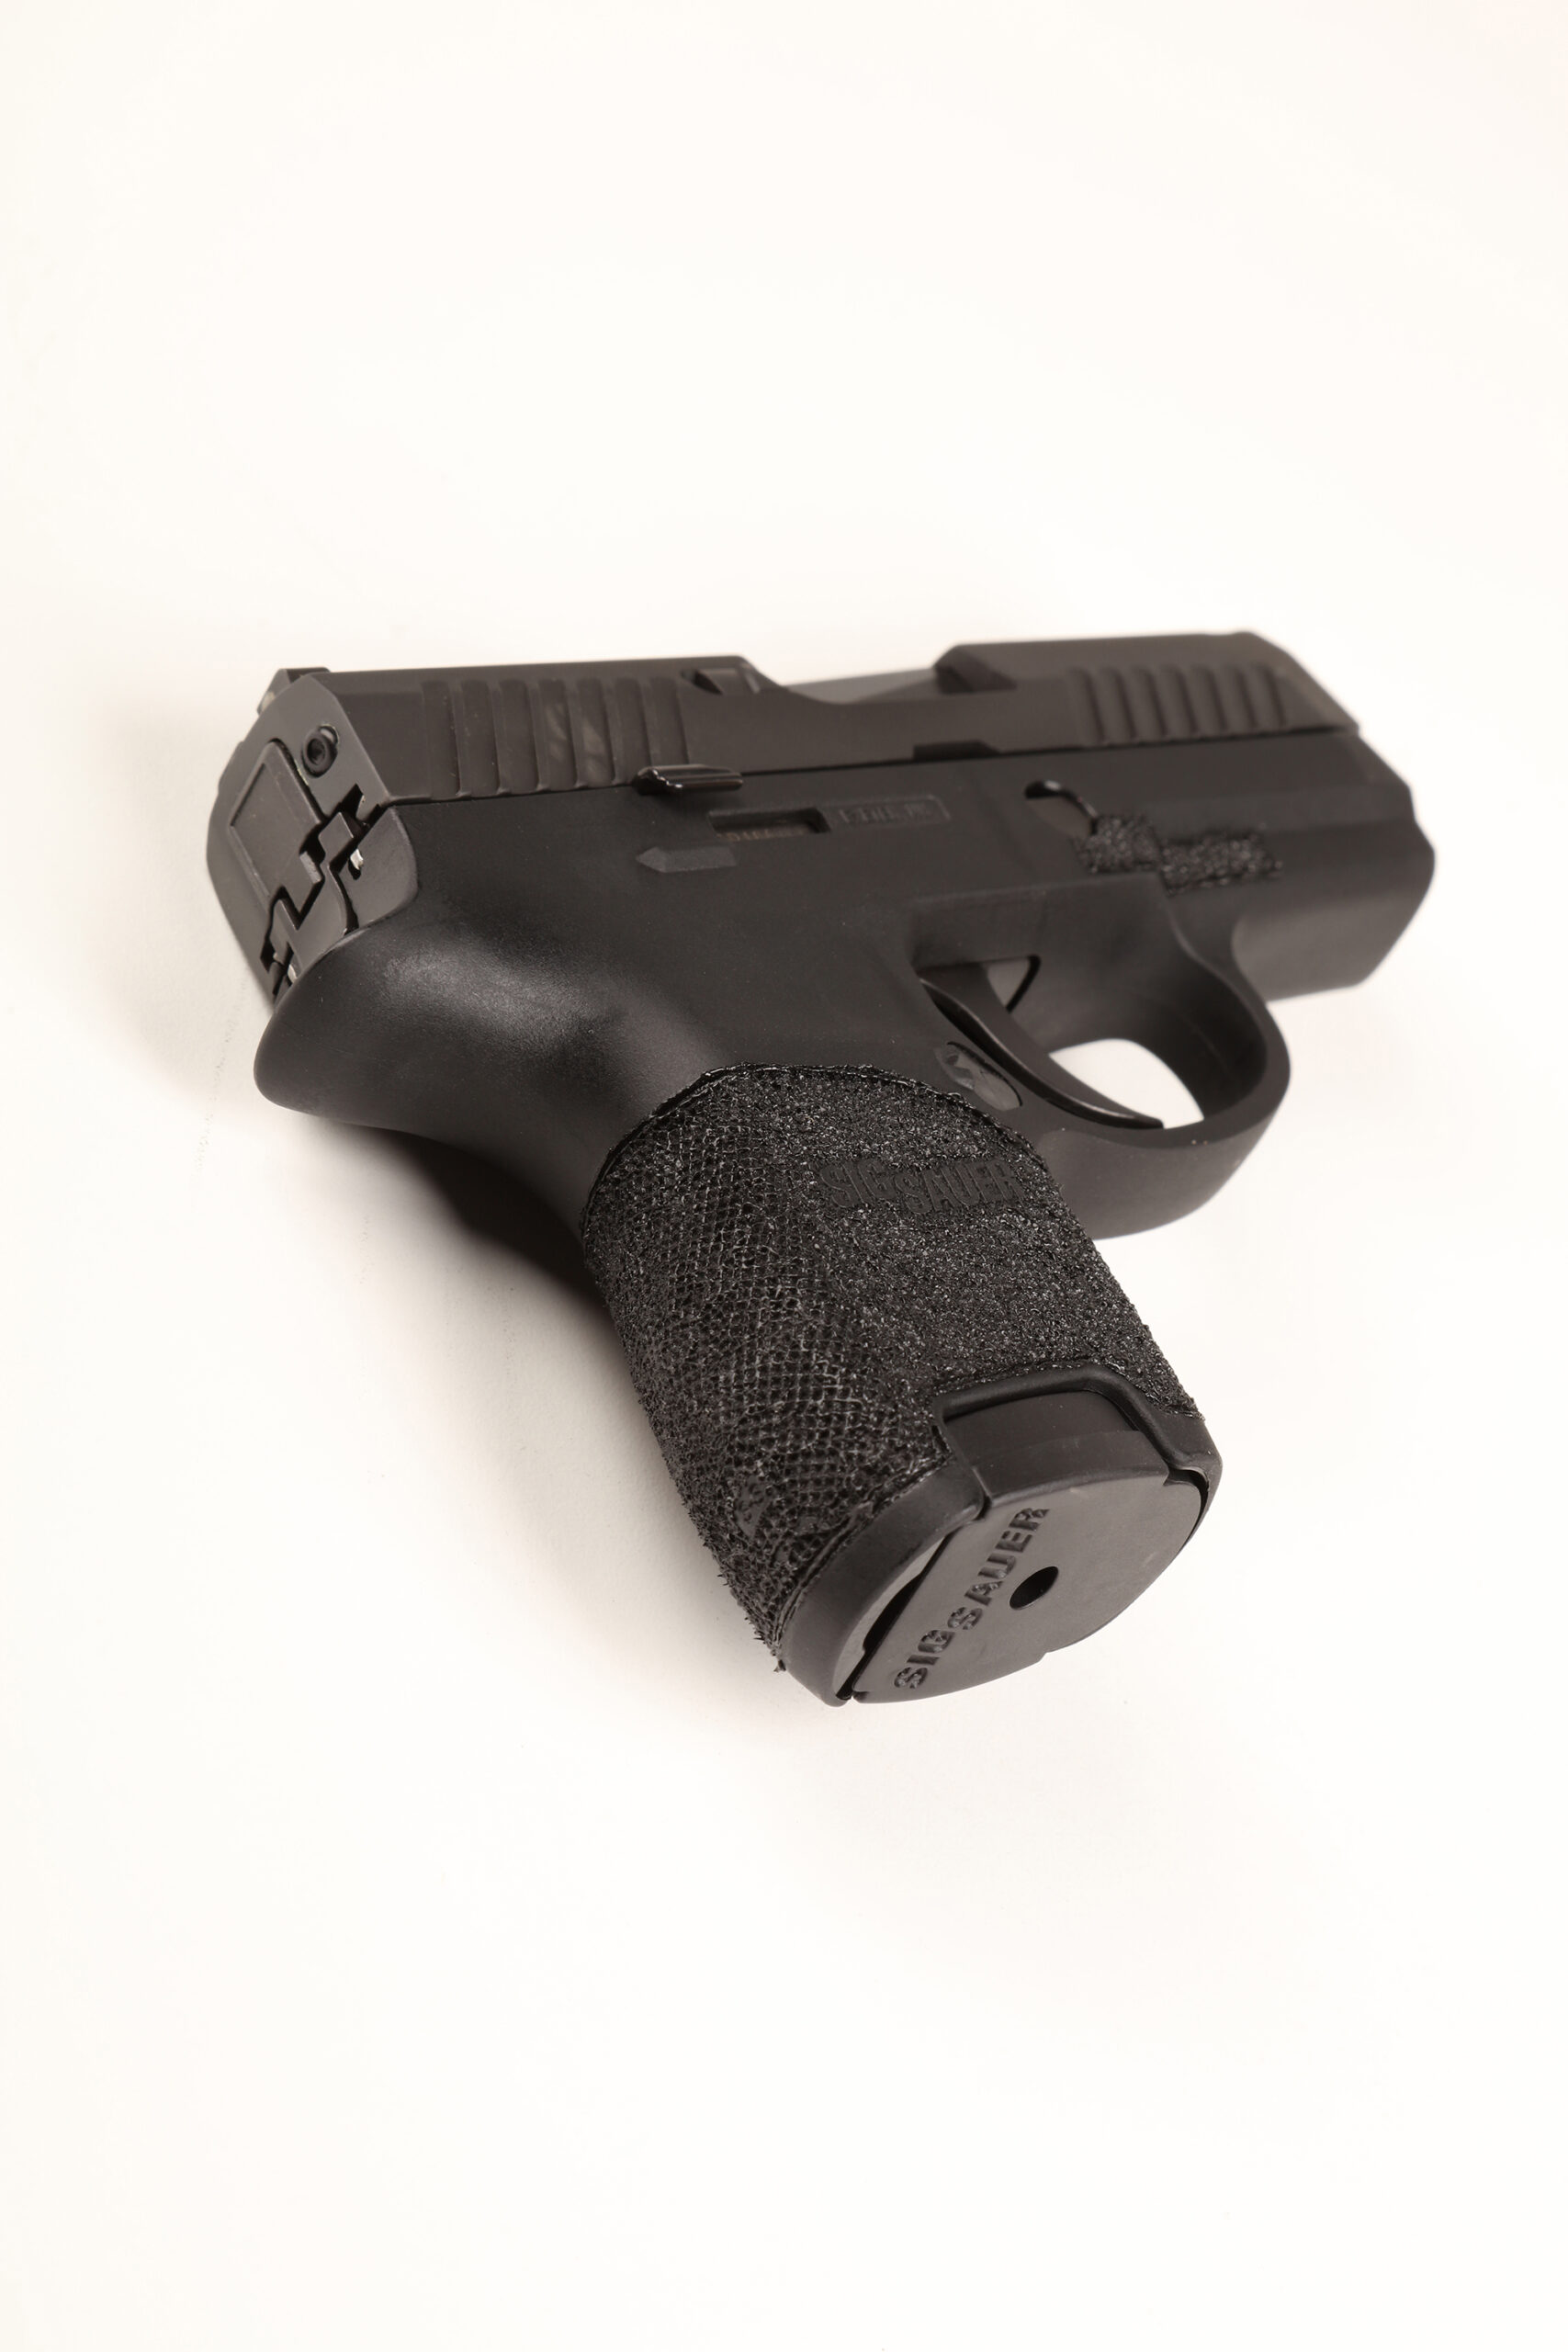
With the frame stippled, we reattached the slide. The 20LPI stippling gave the pistol’s grip much more bite than the smooth factory surfaces. More or less aggressive textures can be achieved through the use of different tips as well as more heat and/or more applied pressure.
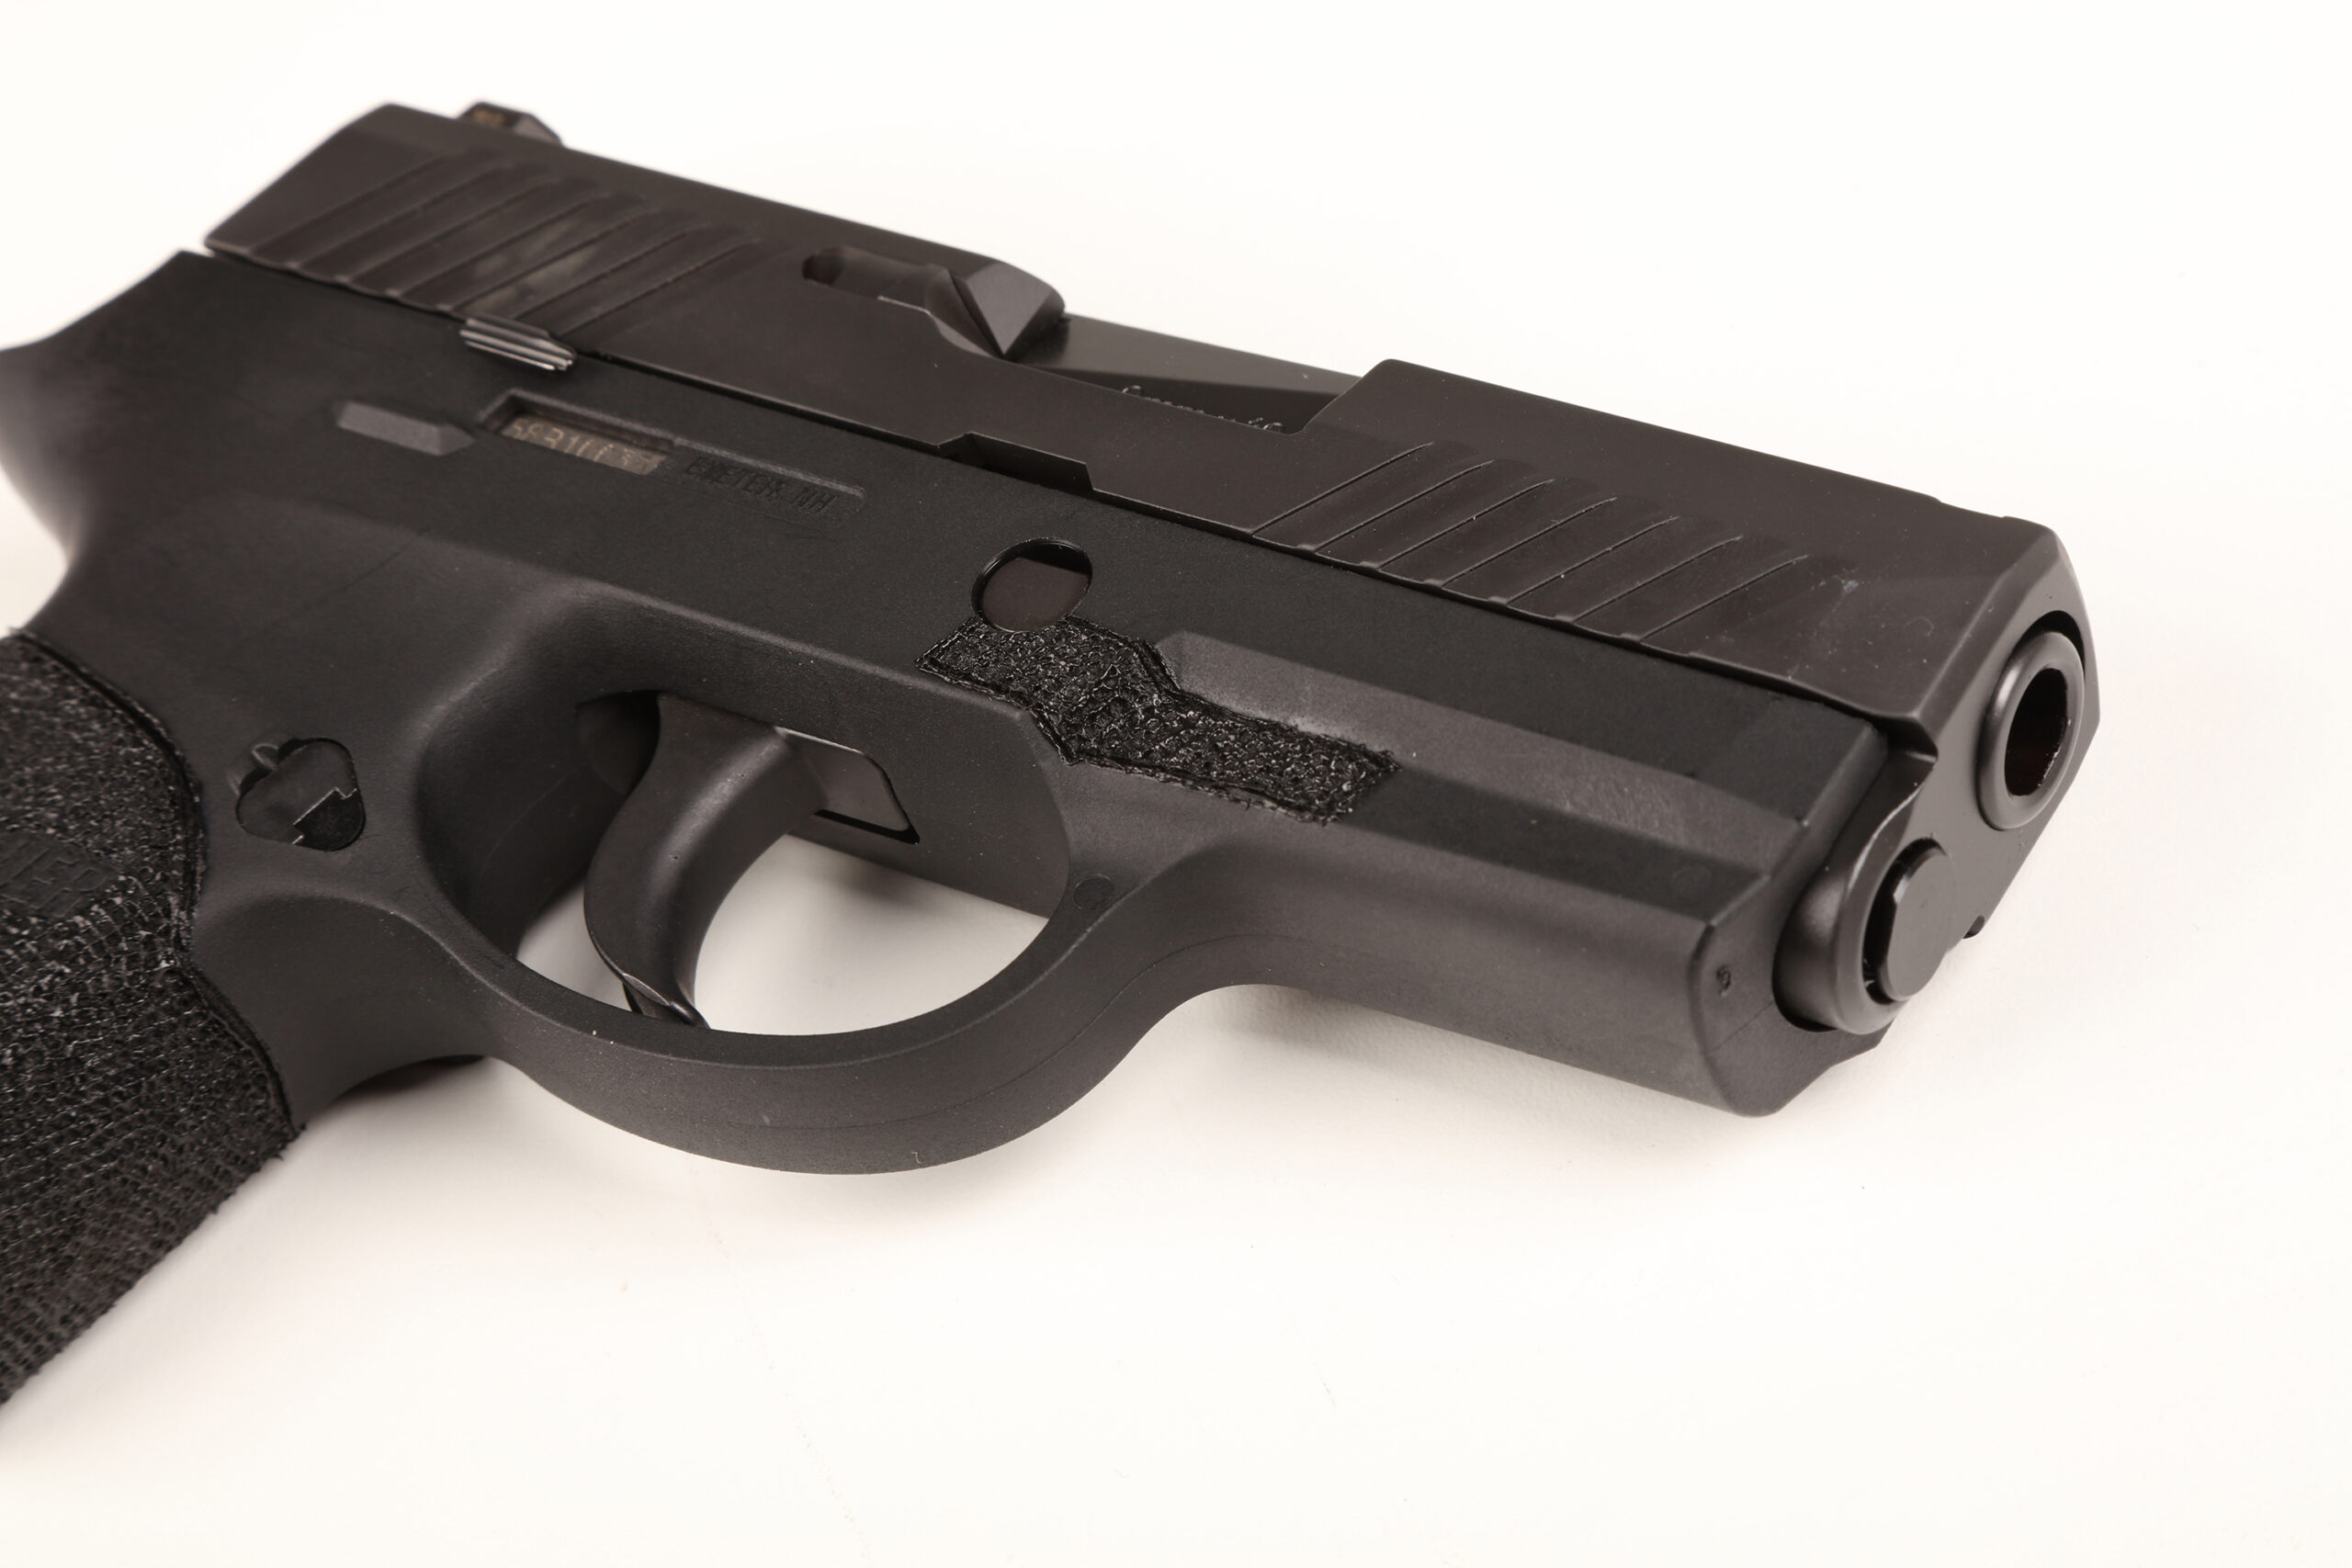
Overall, we are completely satisfied with our first try at stippling by using the Oregon Trail Defense Deluxe Firearm Stippling Kit. The kit allows for plenty of options and additional optional tips and parts can really take one’s stippling capabilities to another level. We can see how the procedure can become addicting. The only drag was waiting for the tips to cool down in between tip changes, but that can’t be helped.
Considering that professional stipple jobs can run into the hundreds of dollars, you can really save some money and have some fun while you’re at it if you do it yourself. OTD’s kits start at $65, with our deluxe kit running $115. Optional tips start under $4. Our only problem now is that we’re close to running out of things to stipple. Now, where’s that TV remote?
Oregon Trail Defense Deluxe Firearm Stippling Kit
MSRP: $115
URL: otdefense.com / ustacticalsupply.com
Practice Makes Perfect
Stippling takes plenty of practice and finesse to get right. There’s a reason why professionals charge what they charge for a proper stipple job. They are artisans that perform their craft extremely well. But just how did they get that good? It’s probably a mixture of natural talent and tons of hard work.
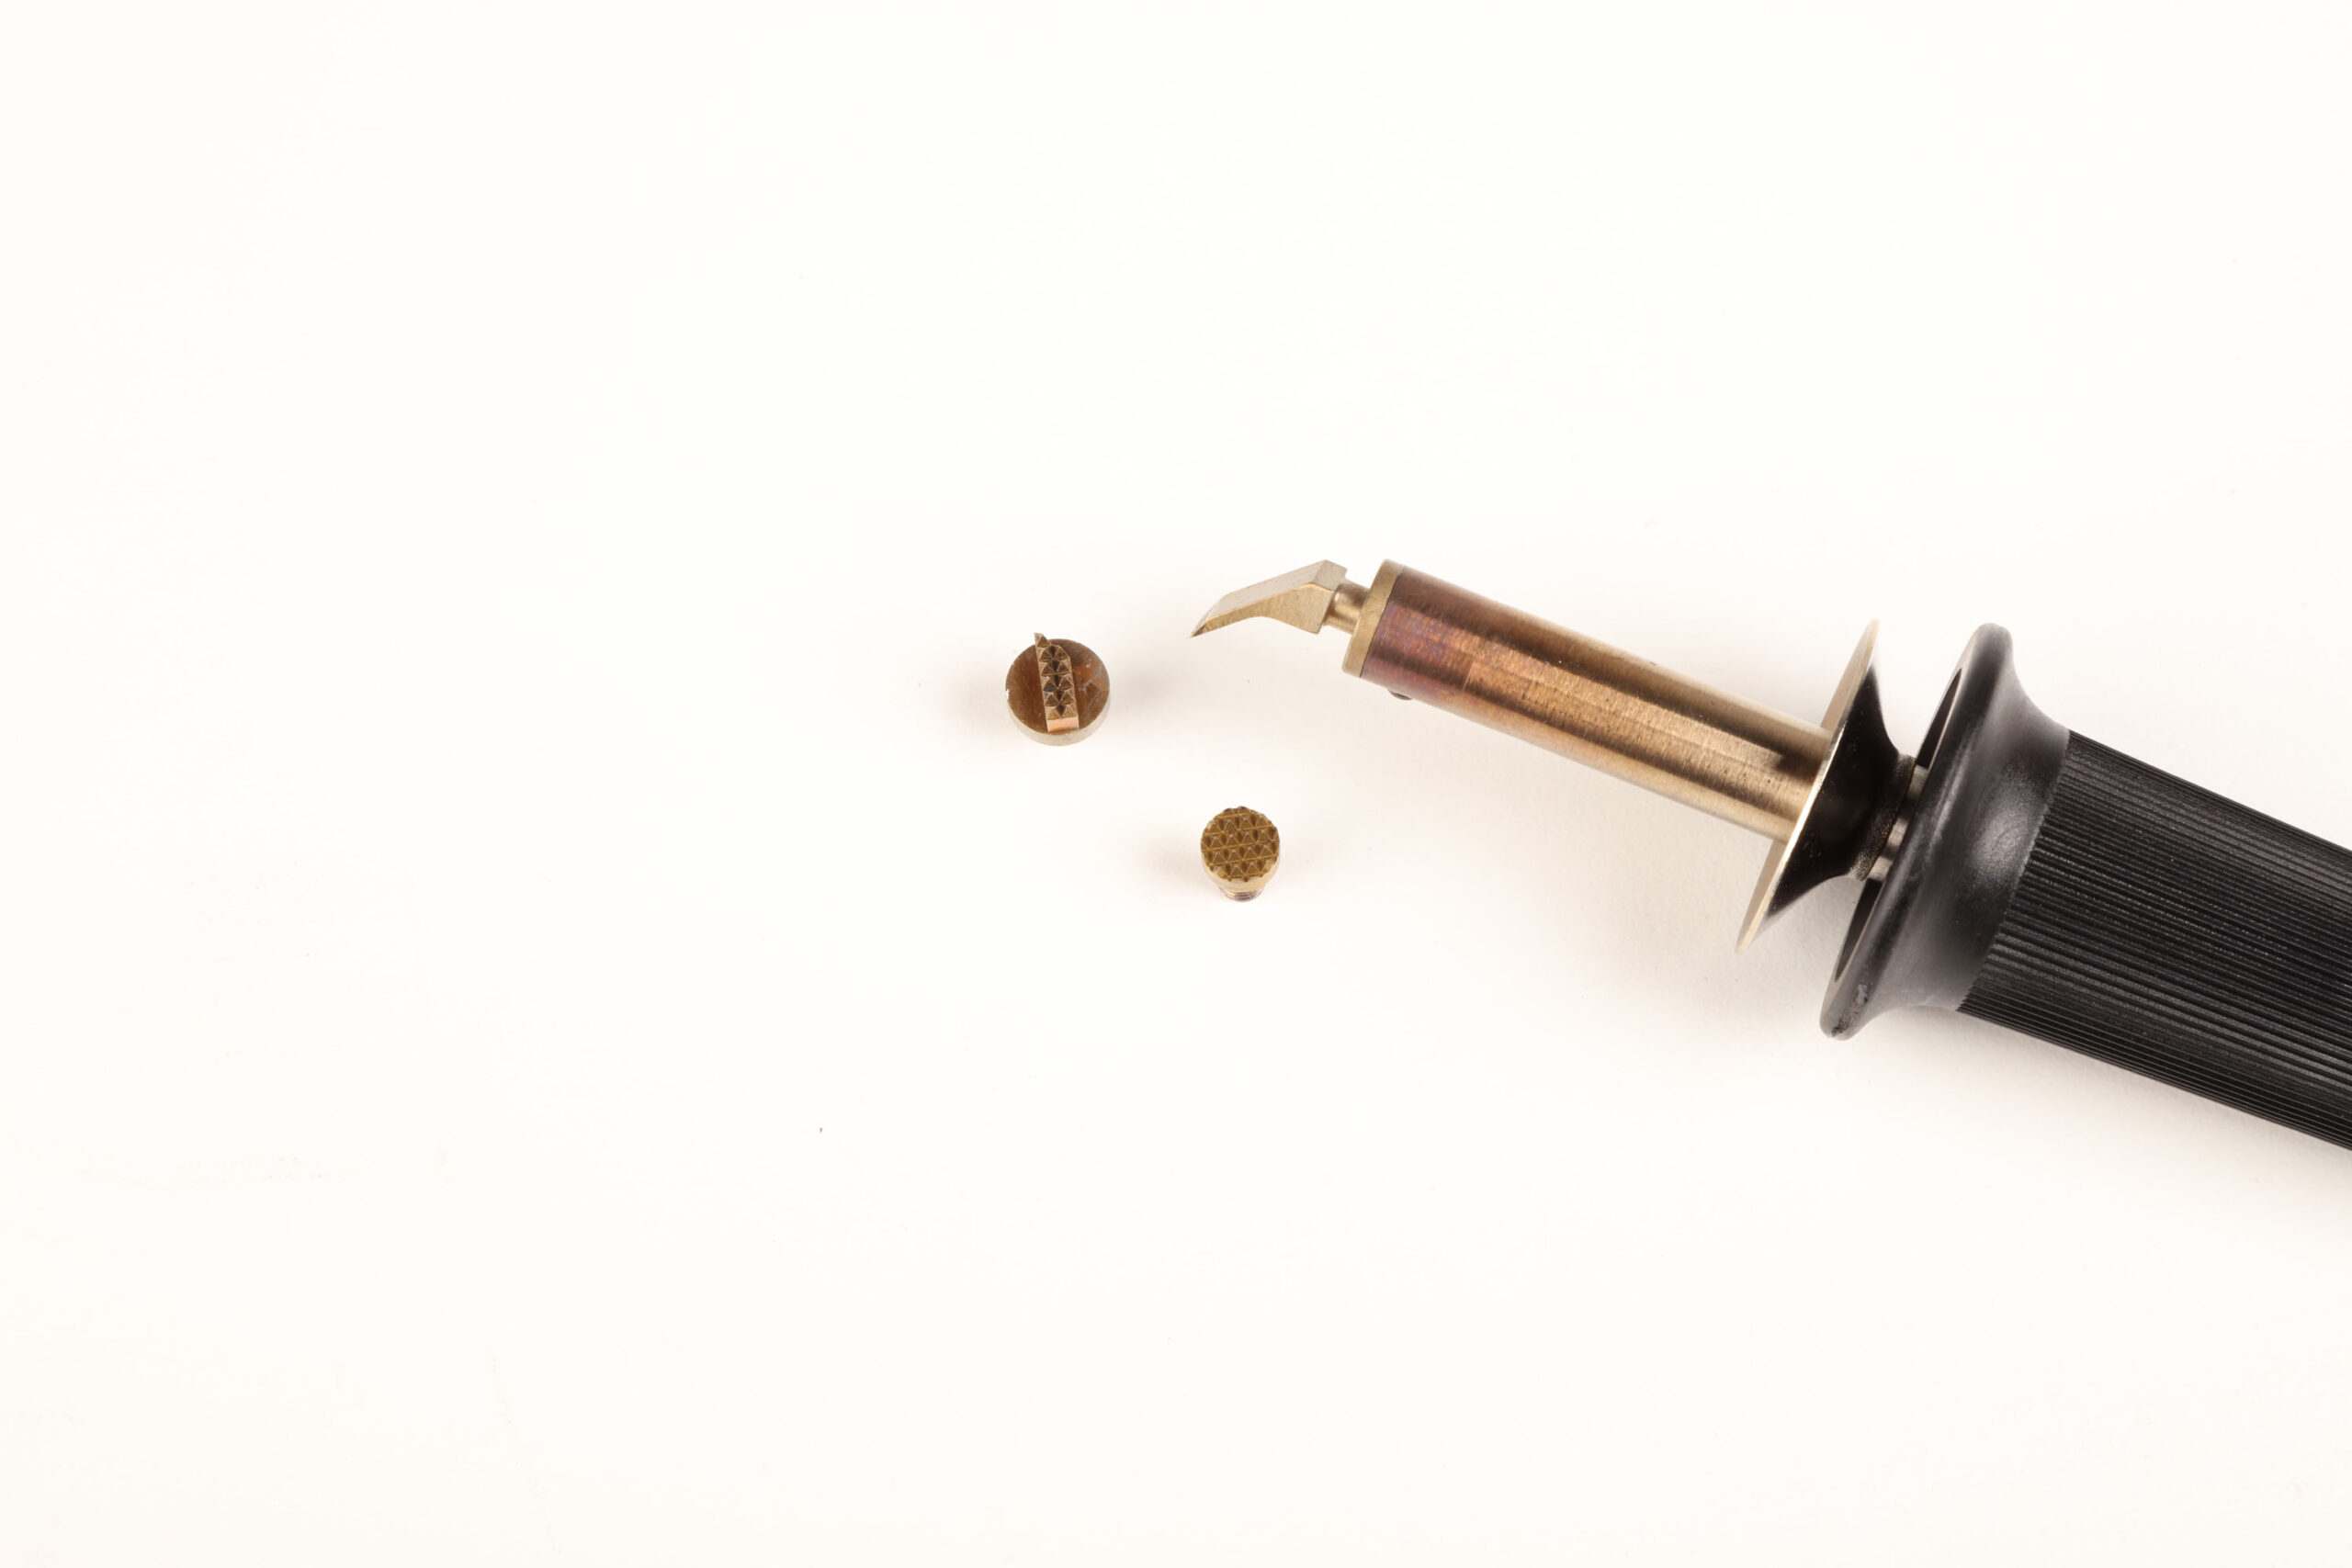
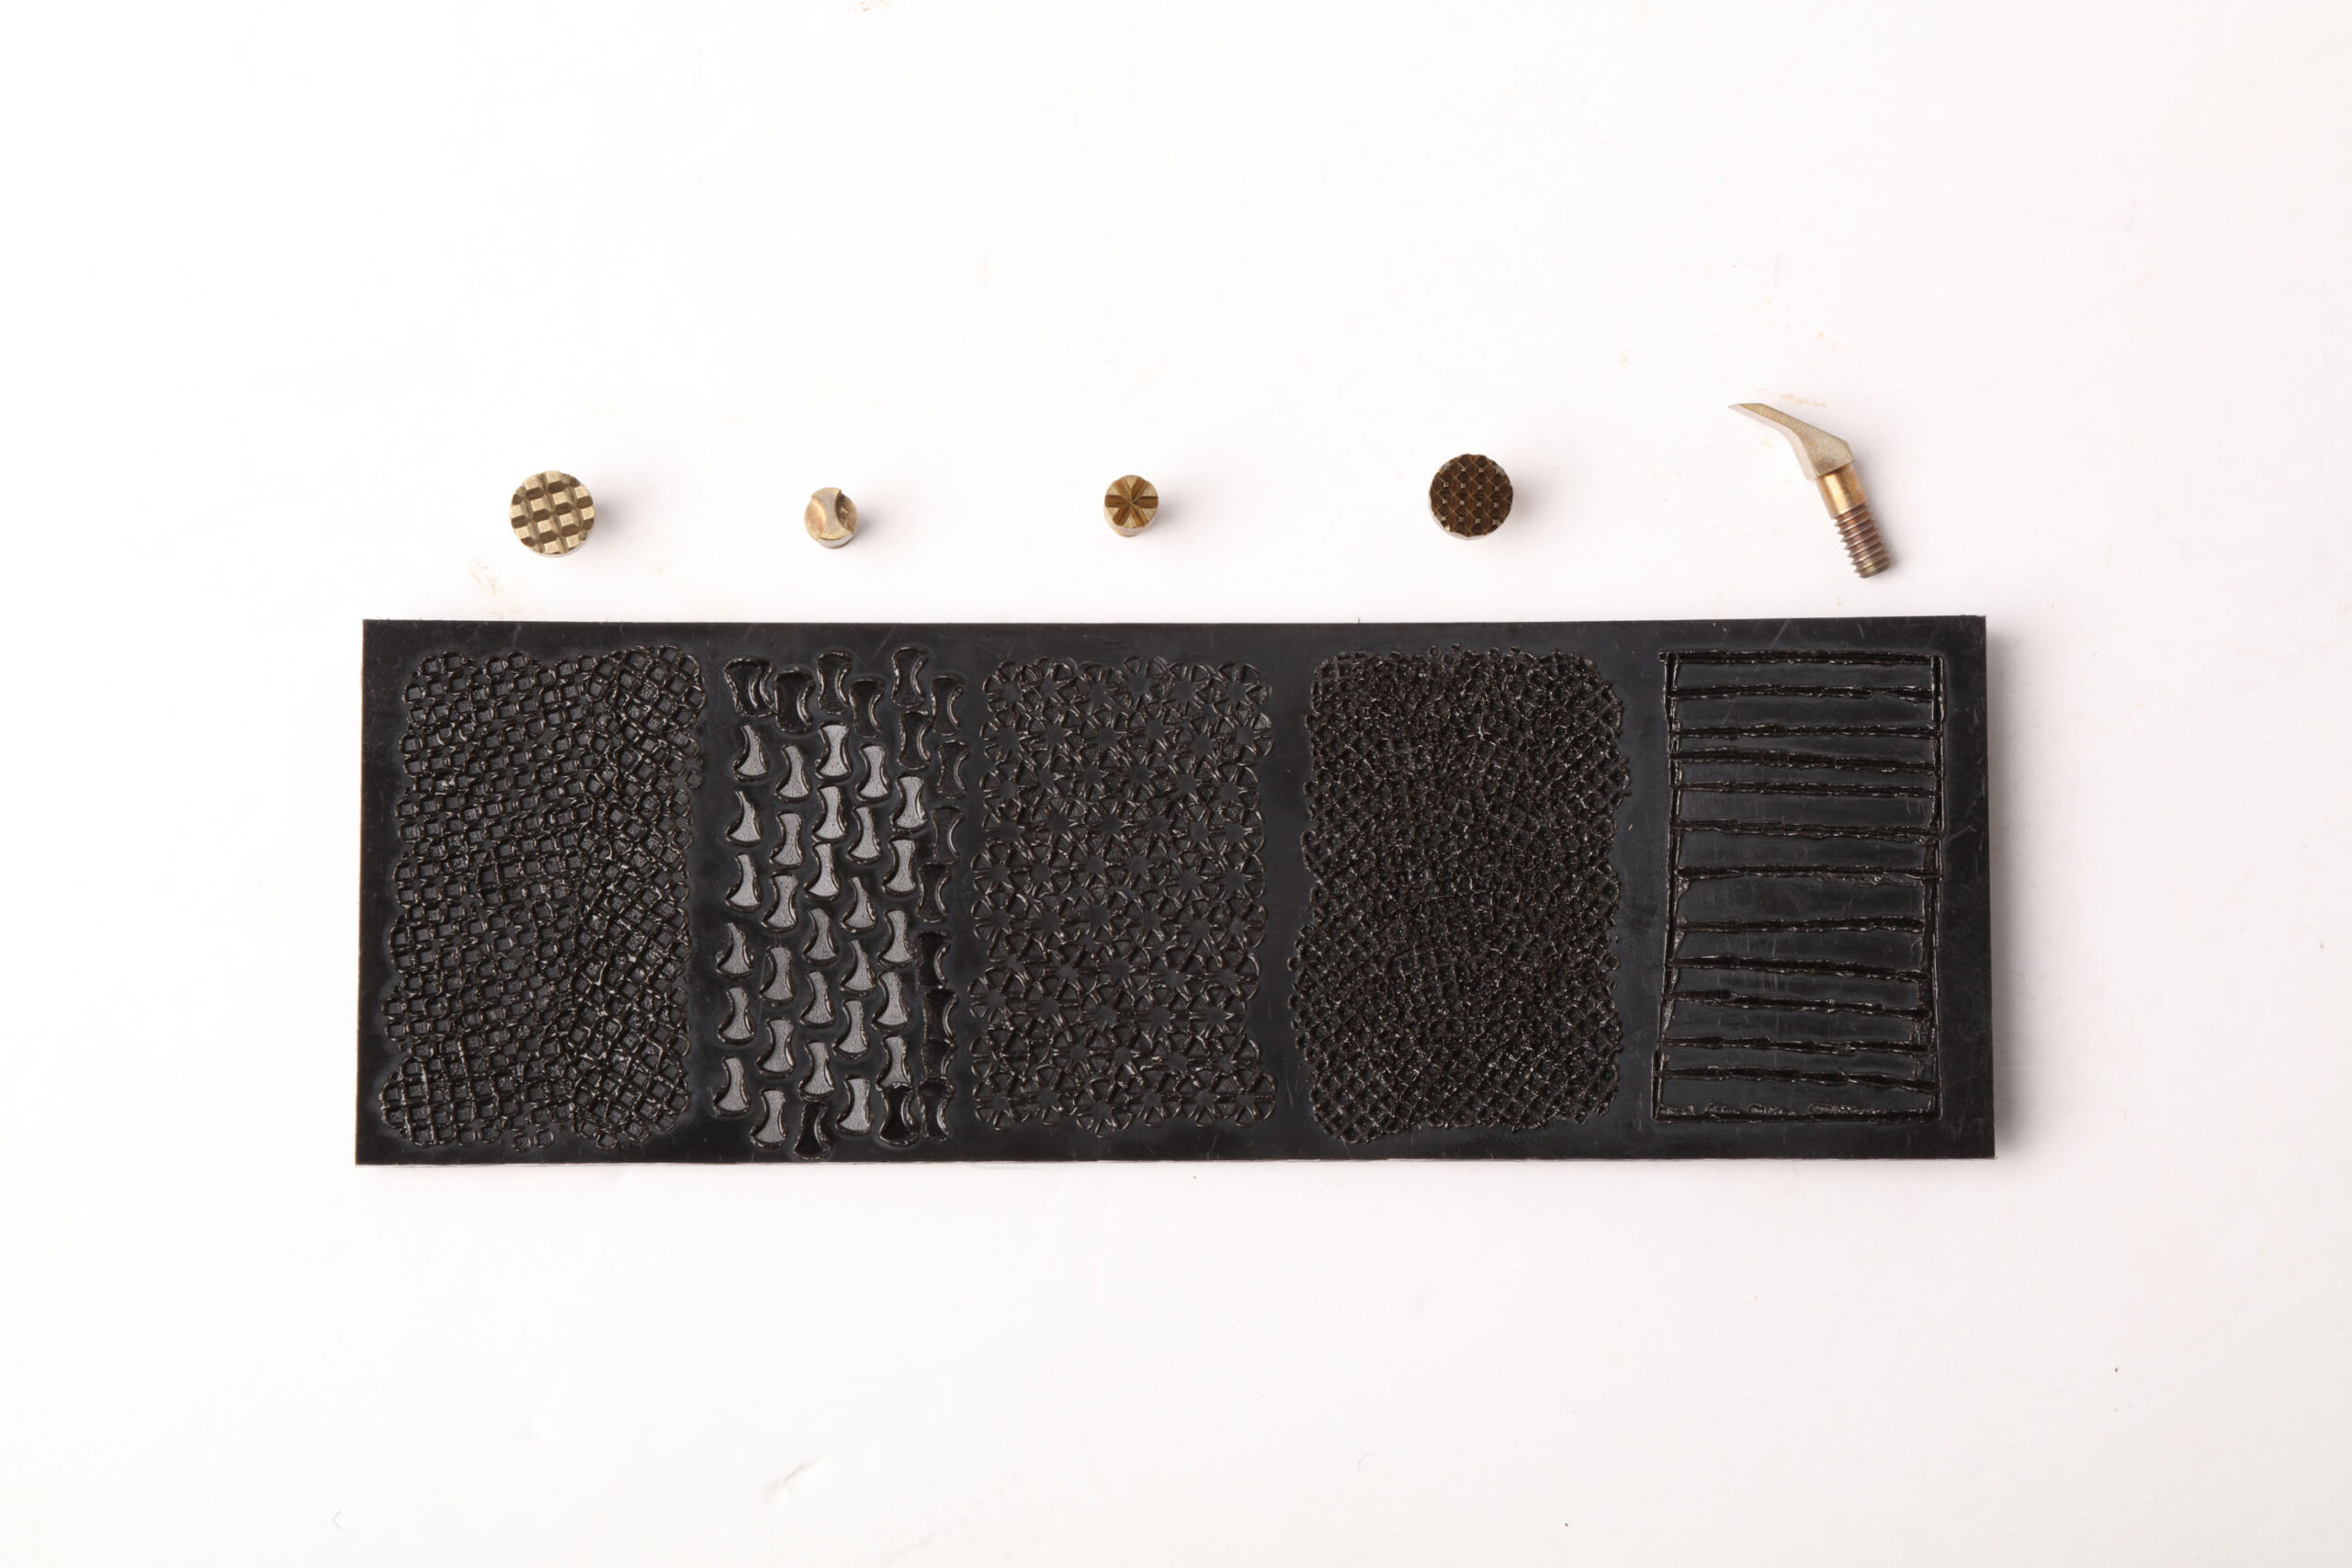
Oregon Trail Defense offers practice stipple sheets available in both plastic and Nylon 6/6, which provide a similar texture and feel when stippling a pistol frame—without the cost of actually using a pistol frame. (We like that.) The plastic version is a bit softer than most frames, while the Nylon approximates a Glock frame. Use these sheets to practice with and experiment with the many optional tips. (Shown in the image from left to right are OTD’s 12LPI Waffle Tip, Hourglass Tip, Wagon Wheel Tip, 20LPI Waffle Tip, and Cutting Tip.)
Text and Images by Staff