COMPLETING A POLYMER80 PISTOL FRAME
Disclaimer: Always take safety precautions when working with tools or other dangerous goods. This DIY should be done at your own risk. Verify your results with a certified gunsmith prior to using the final product.
Perhaps the ultimate project for someone who loves to work on guns is to create one with his or her own hands. With more 80% receiver options on the market today than there probably ever has been in the past, firearms enthusiasts have the choice of creating any number of different types, from AR-15s to 1911s and even MP5 clones.
One of those most popular pistol platforms over the past few decades is Glock. For any number of reasons including performance, reliability and aftermarket parts availability, Glock pistols have reigned supreme in the polymer-frame pistol realm. For those who want to build their own custom handgun from a Glock-compatible frame, all they need to do is to start with a kit from Polymer 80.
Polymer 80 offers a selection of 80% receivers that include AR-15 and .308 ARs, as well as Glock-compatible pistol frames. The two newest versions of their unfinished frames are the PF940C Compact and PF940V2 Standard. Think of the PF940C, which is a compact-sized frame, as being equivalent to a Gen 3 Glock 19 or 23, while the full-size PF940V2 is their version of a Gen 3 G17 or G22. Both frames feature what many shooters would call improvements over the originals, including a slightly more aggressive grip texture as well as deleted finger grooves and grip hump and a high trigger guard undercut.

Polymer 80’s PF940 series of pistol frames have been out for a few years now, but it’s their newest generation that we are most excited about. From what we’ve seen, previous versions of their frames had their hiccups, but the latest models are said to have these issues ironed out.
Never having worked on a Polymer 80 frame before, we thought it would be a good test to see just how “DIY” it is. Would we run into any problems with building a pistol from their V2 frame? We decided to tackle the project and find out. We imagine like most readers of UN12 we are proficient with our hands and love to work on guns. However, we are not professionals and are not trained in gunsmithing. If anything, we’re good at problem solving and looking up how-to videos up on YouTube if we get stumped. Follow along and see how our Polymer 80 PF940V2 Standard frame turned out.

What We Used
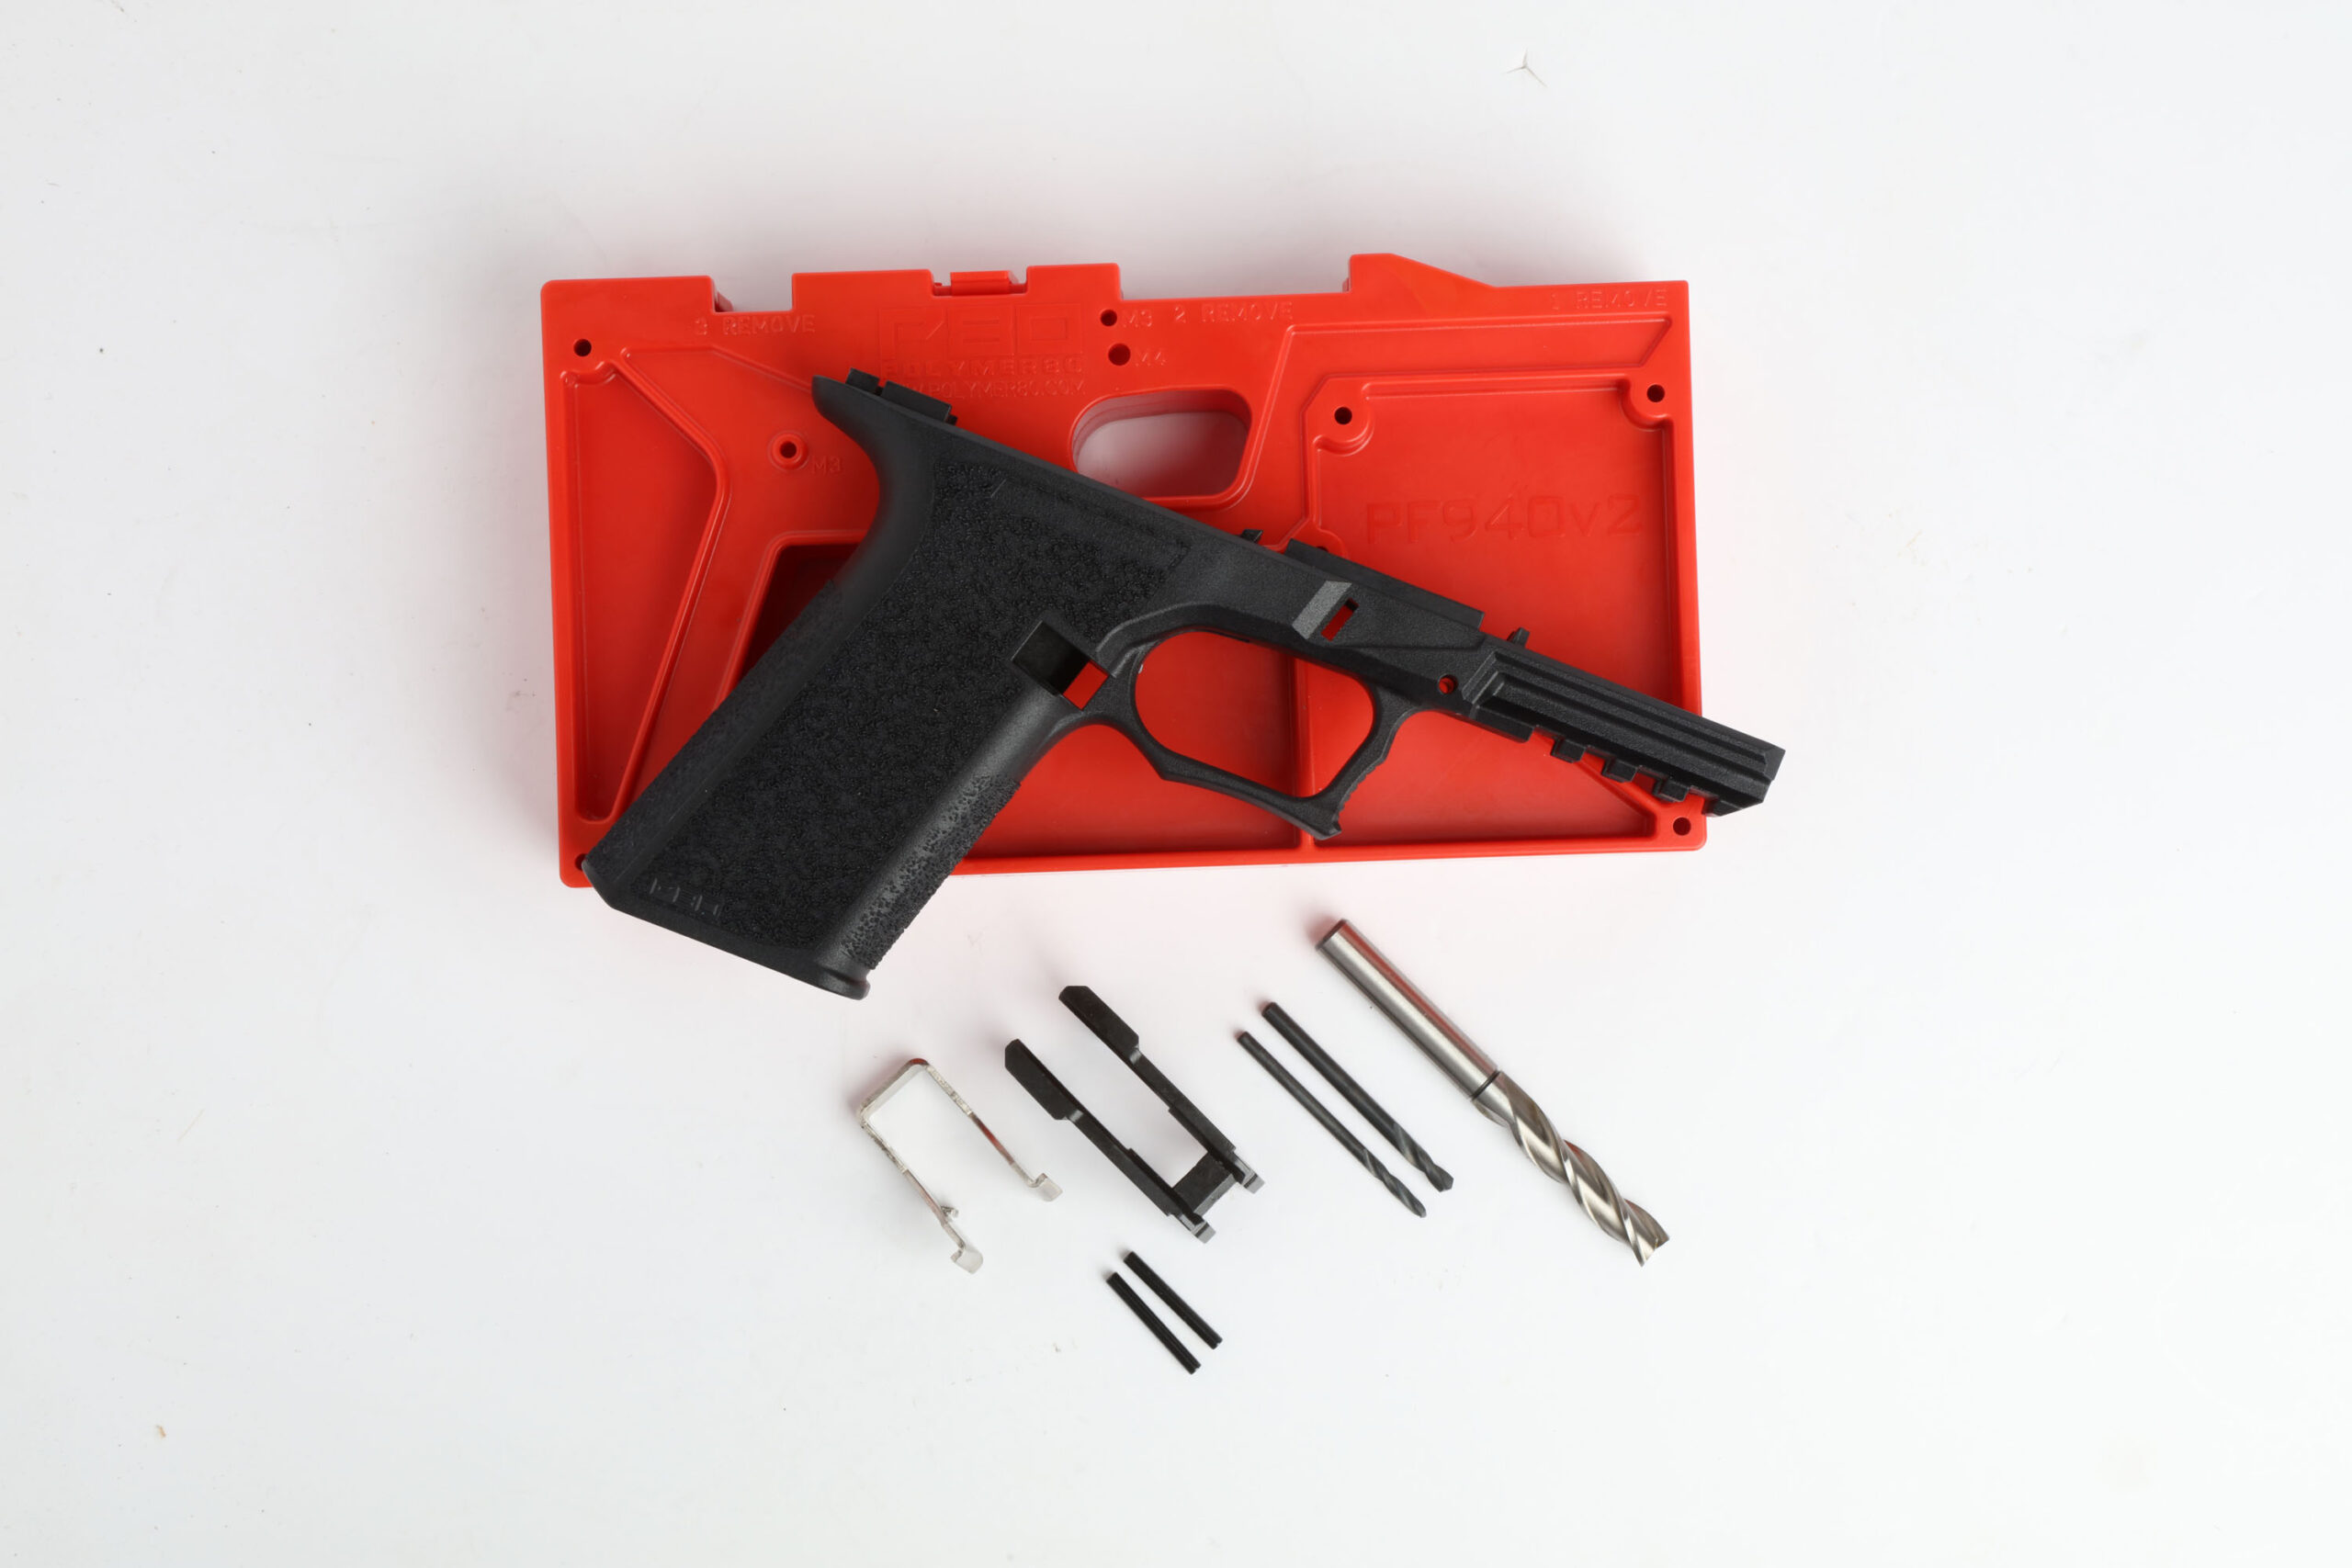
- Polymer 80 PF940v2 80% Standard Pistol Frame Kit
- Drill Press
- Cross Vise
- Power Drill
- Bar Clamp (Quick Grip)
- File
- Torpedo Level
- Nylon Mallet
- Pin Punches
- Glock compatible frame parts kit
Preparation
After reading the kit’s instructions and preparing the work surface, we installed a cross vise to the drill press as recommended by Polymer 80. The kit came with a 9mm end mill, which we also attached to the drill. From what we observed, there are many ways one can complete this job with many different tools. We downloaded Polymer 80’s instructions and watched their instructional video.
Jig Placement
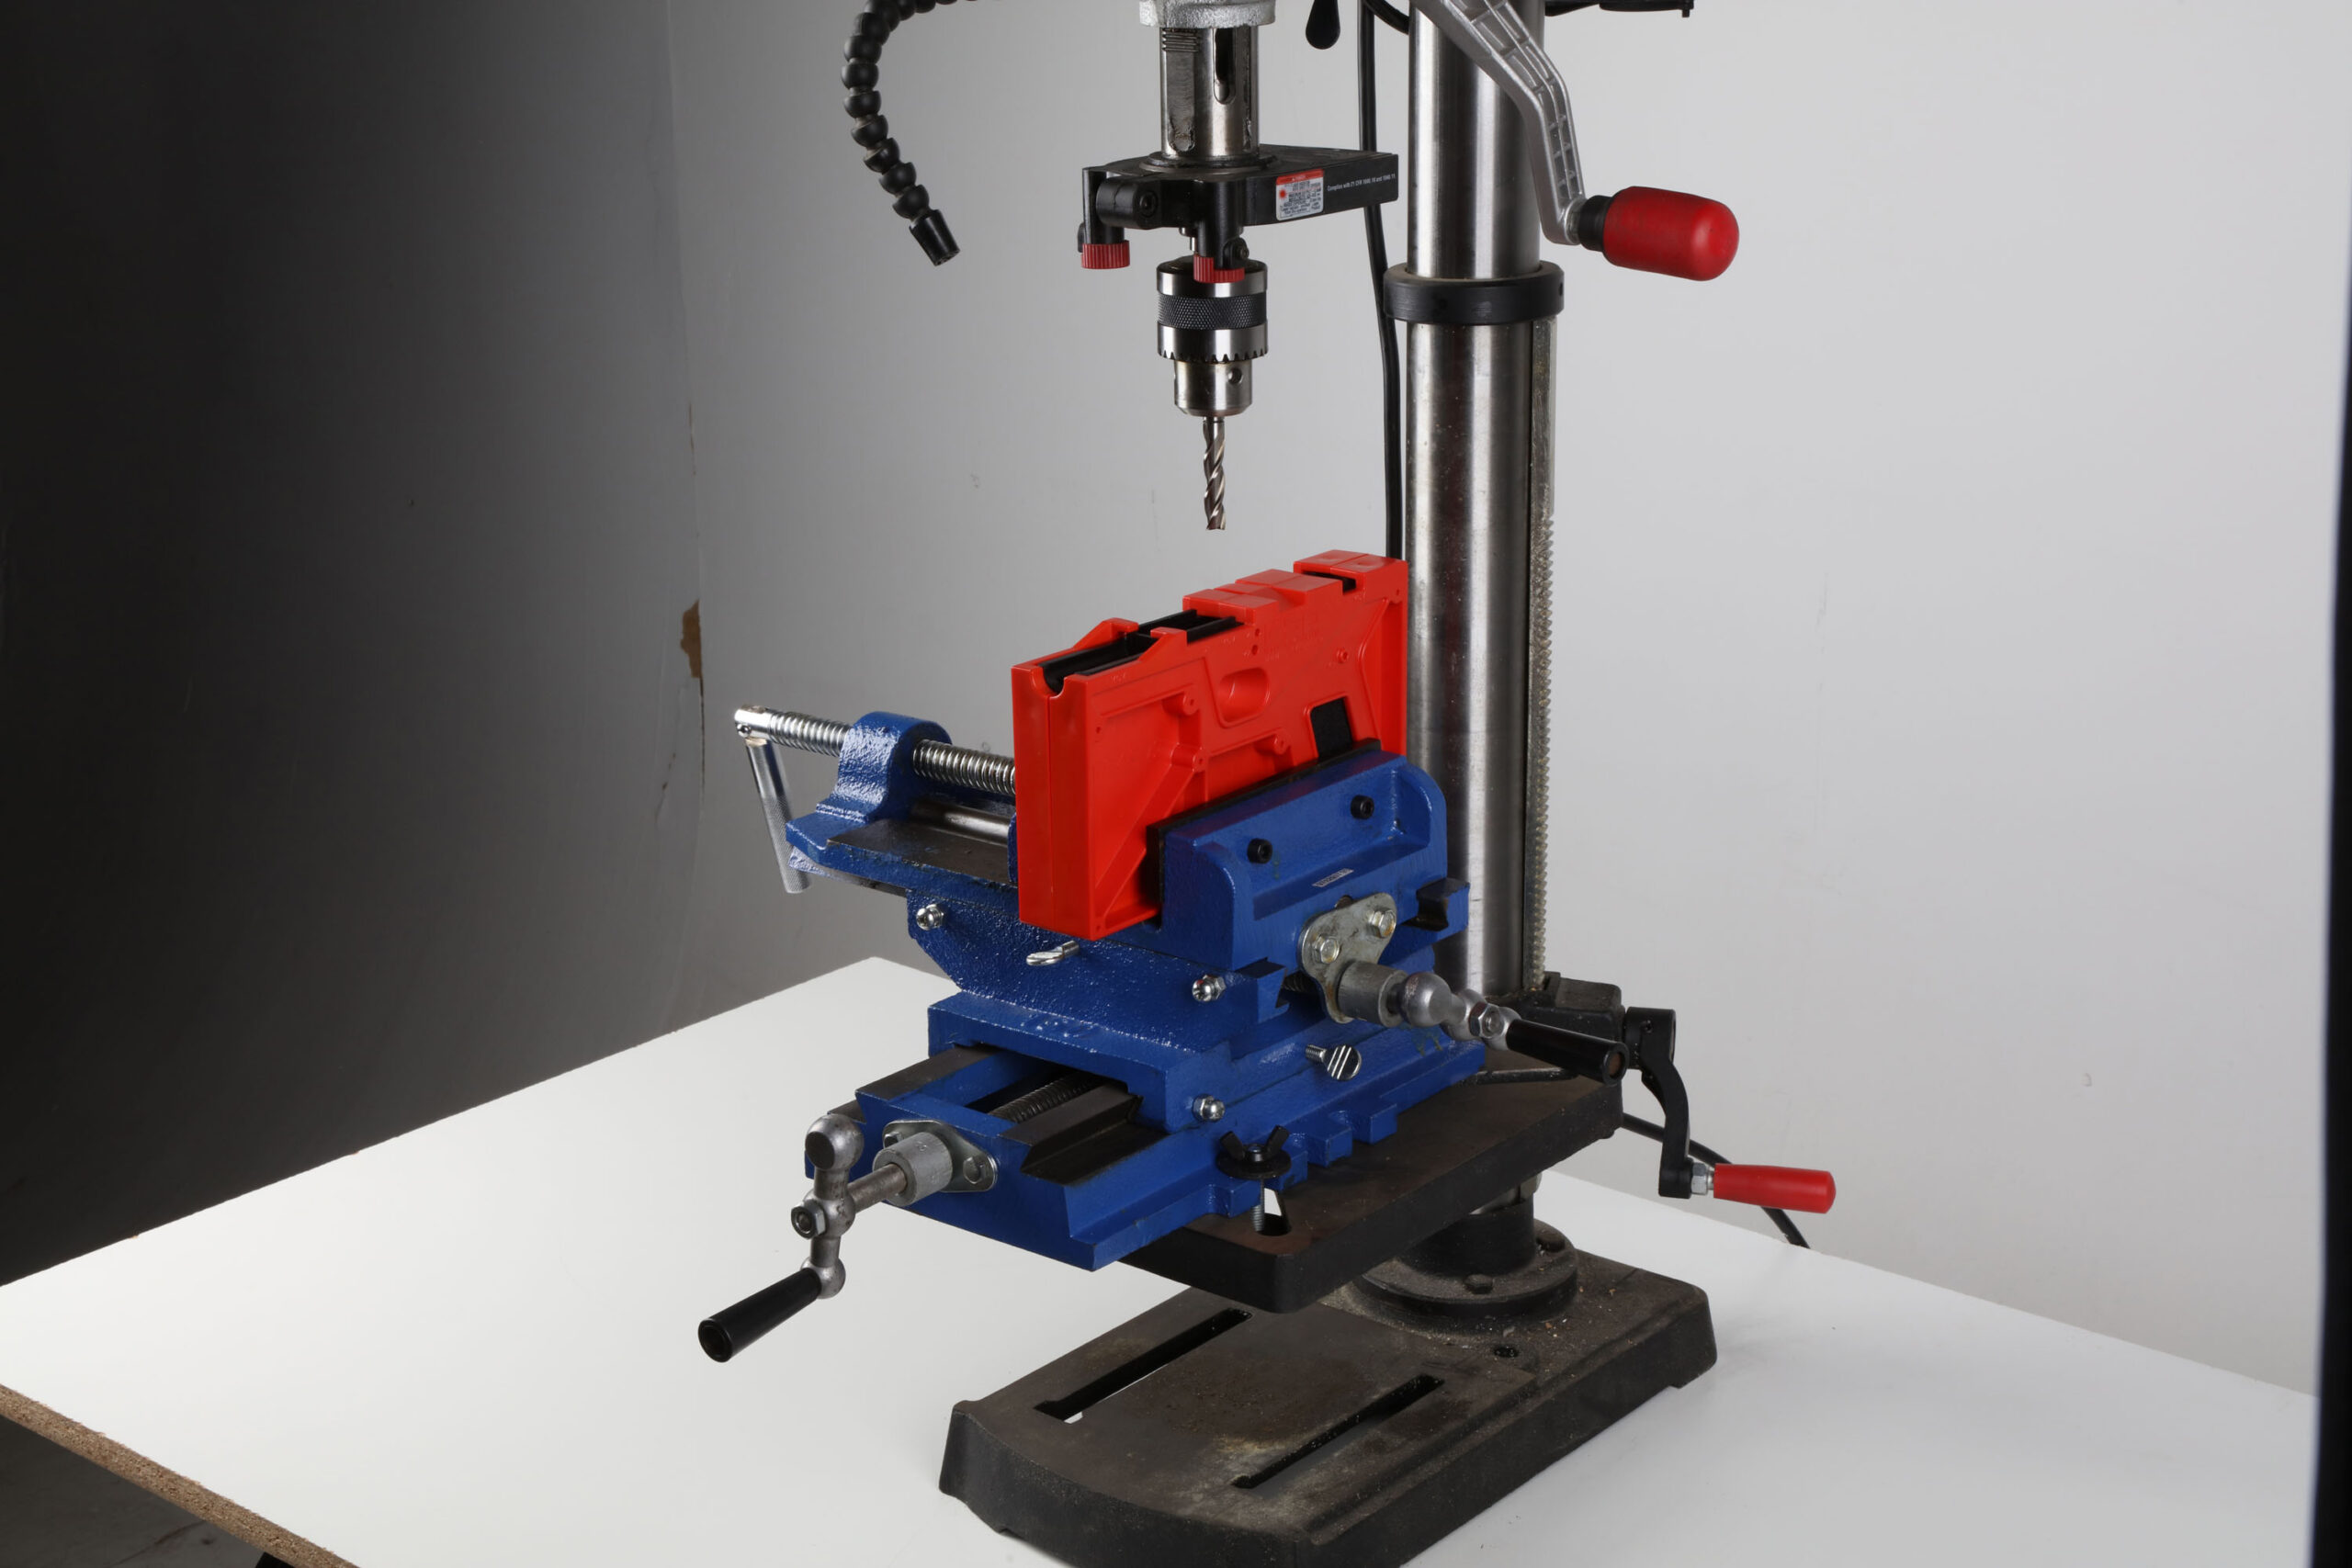
We placed the jig containing the pistol frame in the cross vise, making sure that it sat level and squared up. The jig holds the frame securely and comes with handy guides molded into it. Marked in raised lettering, the jig’s guides give you numbered steps on which areas to mill out and which holes to drill. Of course, these are just guides and reading the instruction manual is still required.
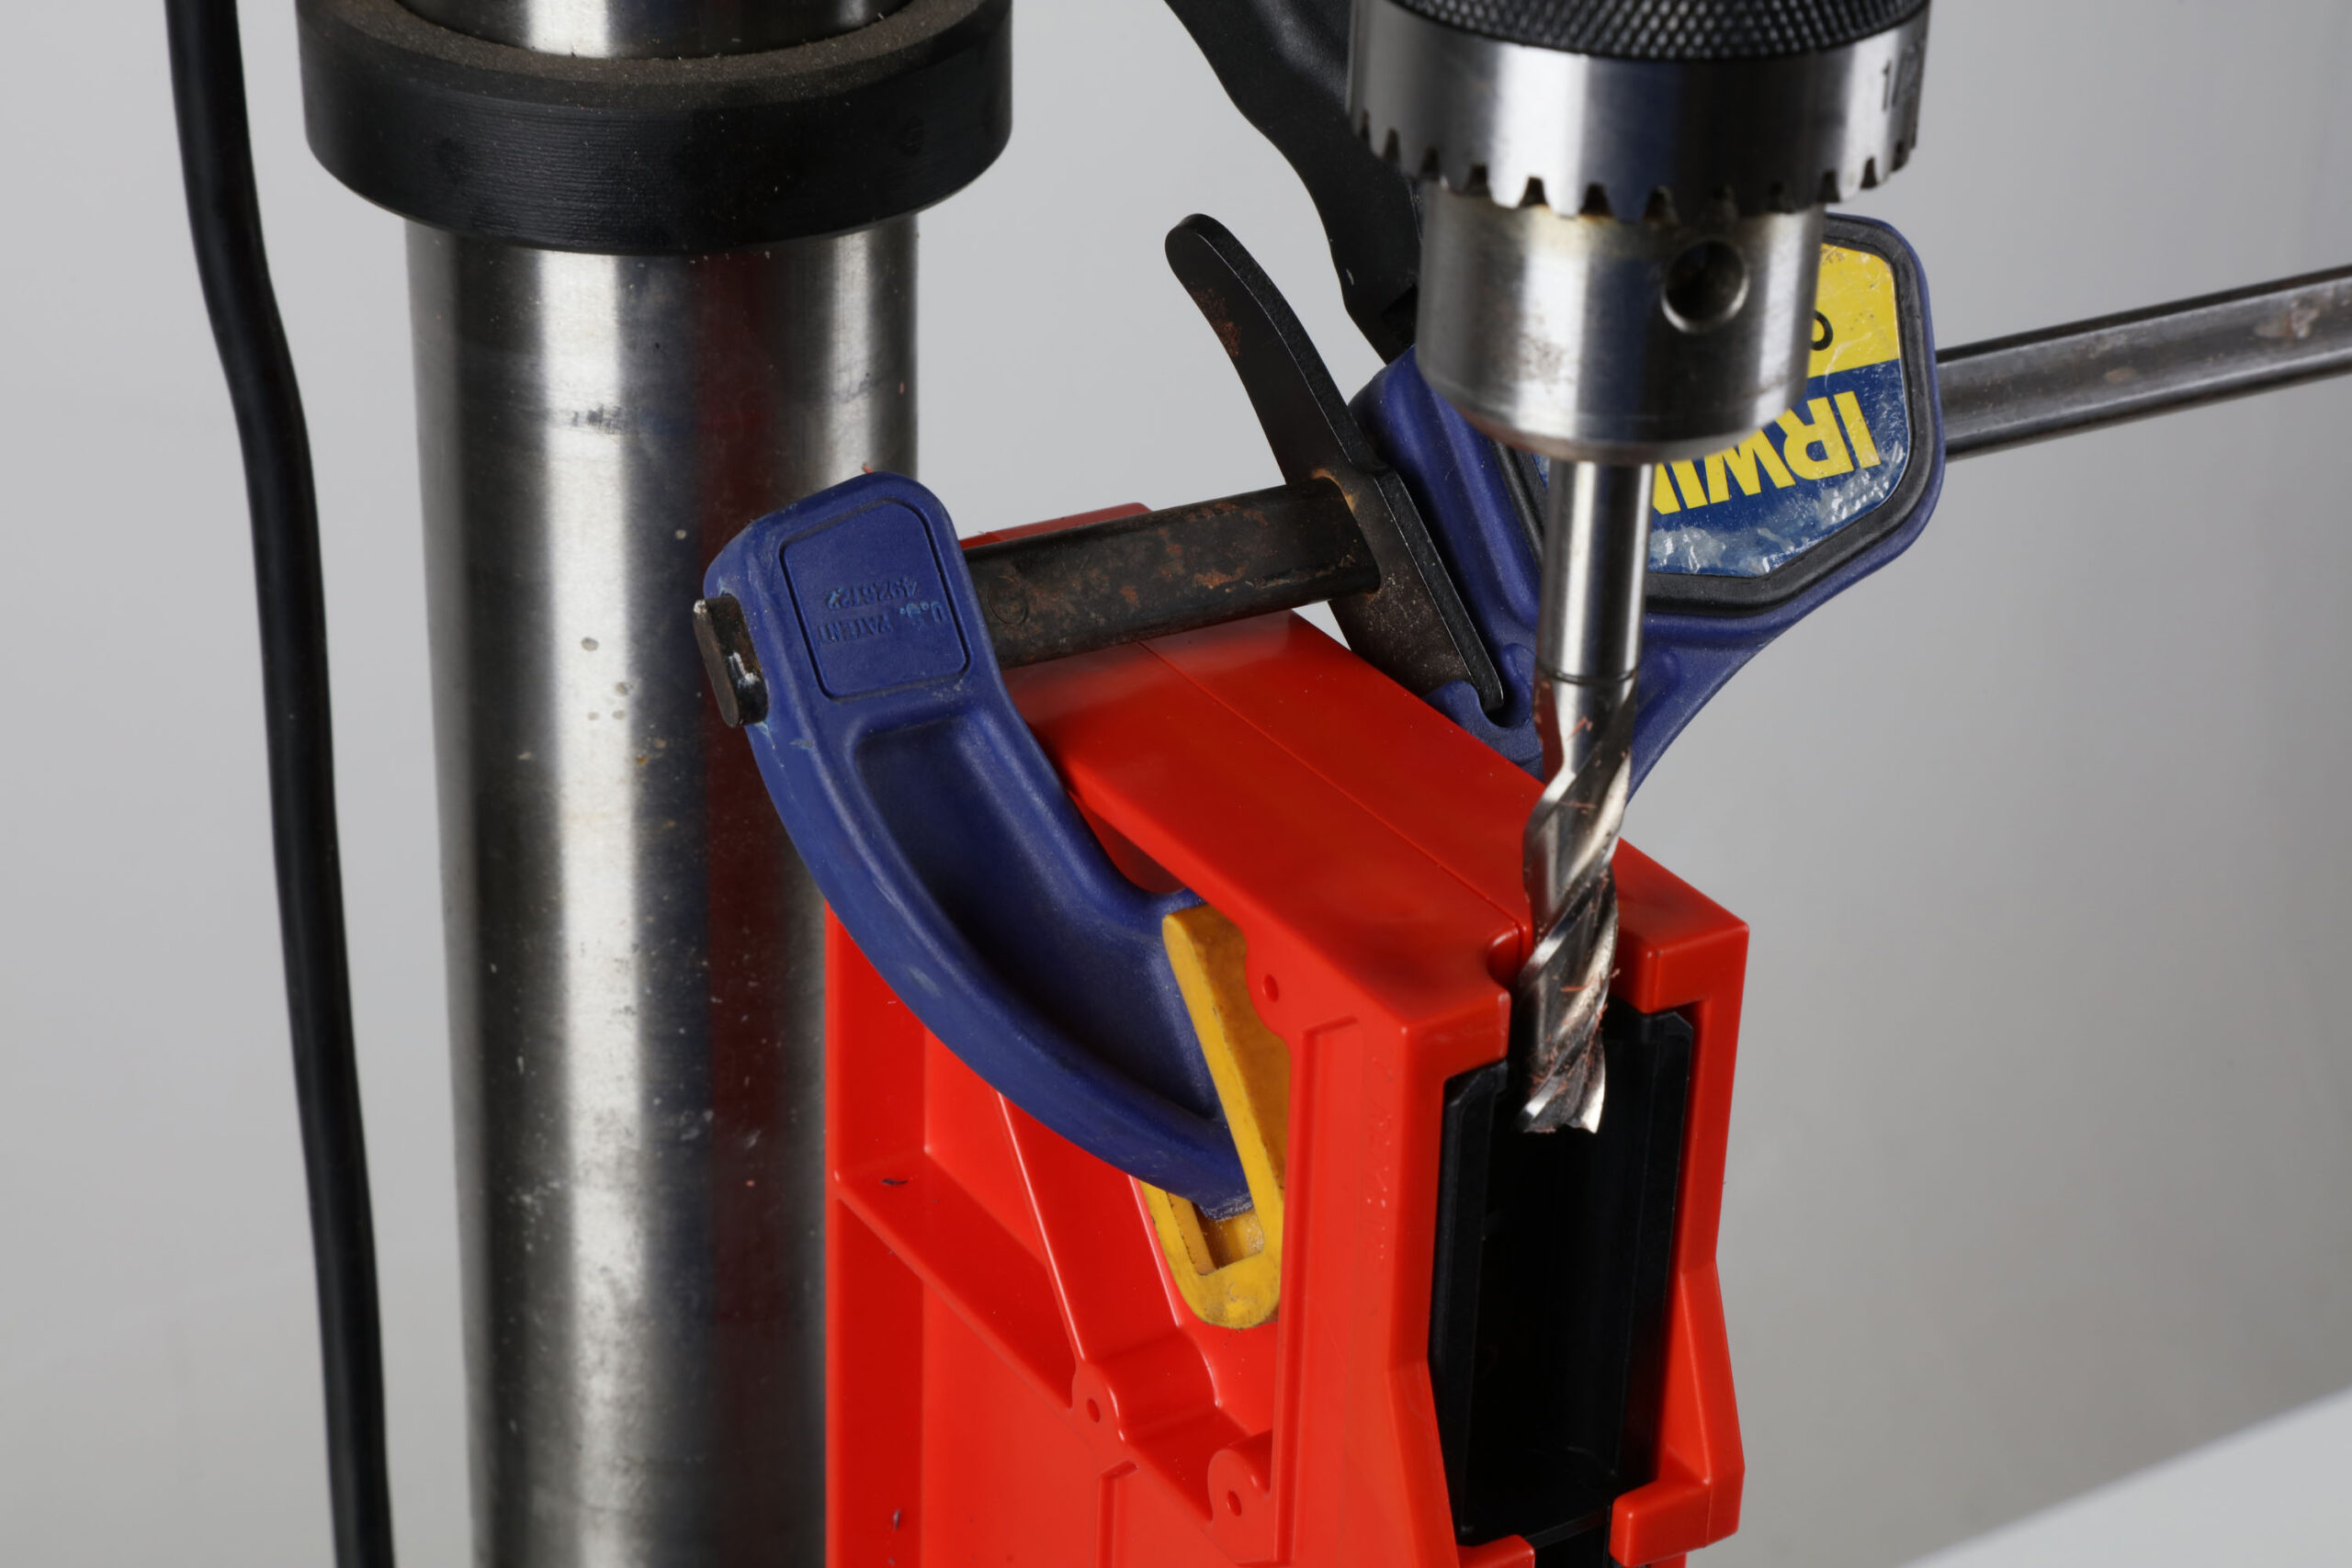
Milling the Rails


The first thing we needed to do was mill out the frame’s top rails. This was a fairly easy task. Polymer 80 points out that if you’ve milled anything red, you’re doing it wrong. To play it safe so that we didn’t take off too much material, we stopped the end mill at about 1/16 of an inch from the surface of the jig. Our intention was to file it down by hand instead of taking the chance of removing too much with the end mill.
Reorient the Jig
Next to mill out of the frame is a chunk of plastic that’s molded where the barrel sits in the frame. Called the barrel block, this obstruction needed to be removed. To do so, the jig needed to be orientated vertically. When we did this, we noticed that a seam in the front of the jig widened. We weren’t sure if it mattered or not, but to play it safe we used a bar clamp to help pinch it closed.
The Barrel Block
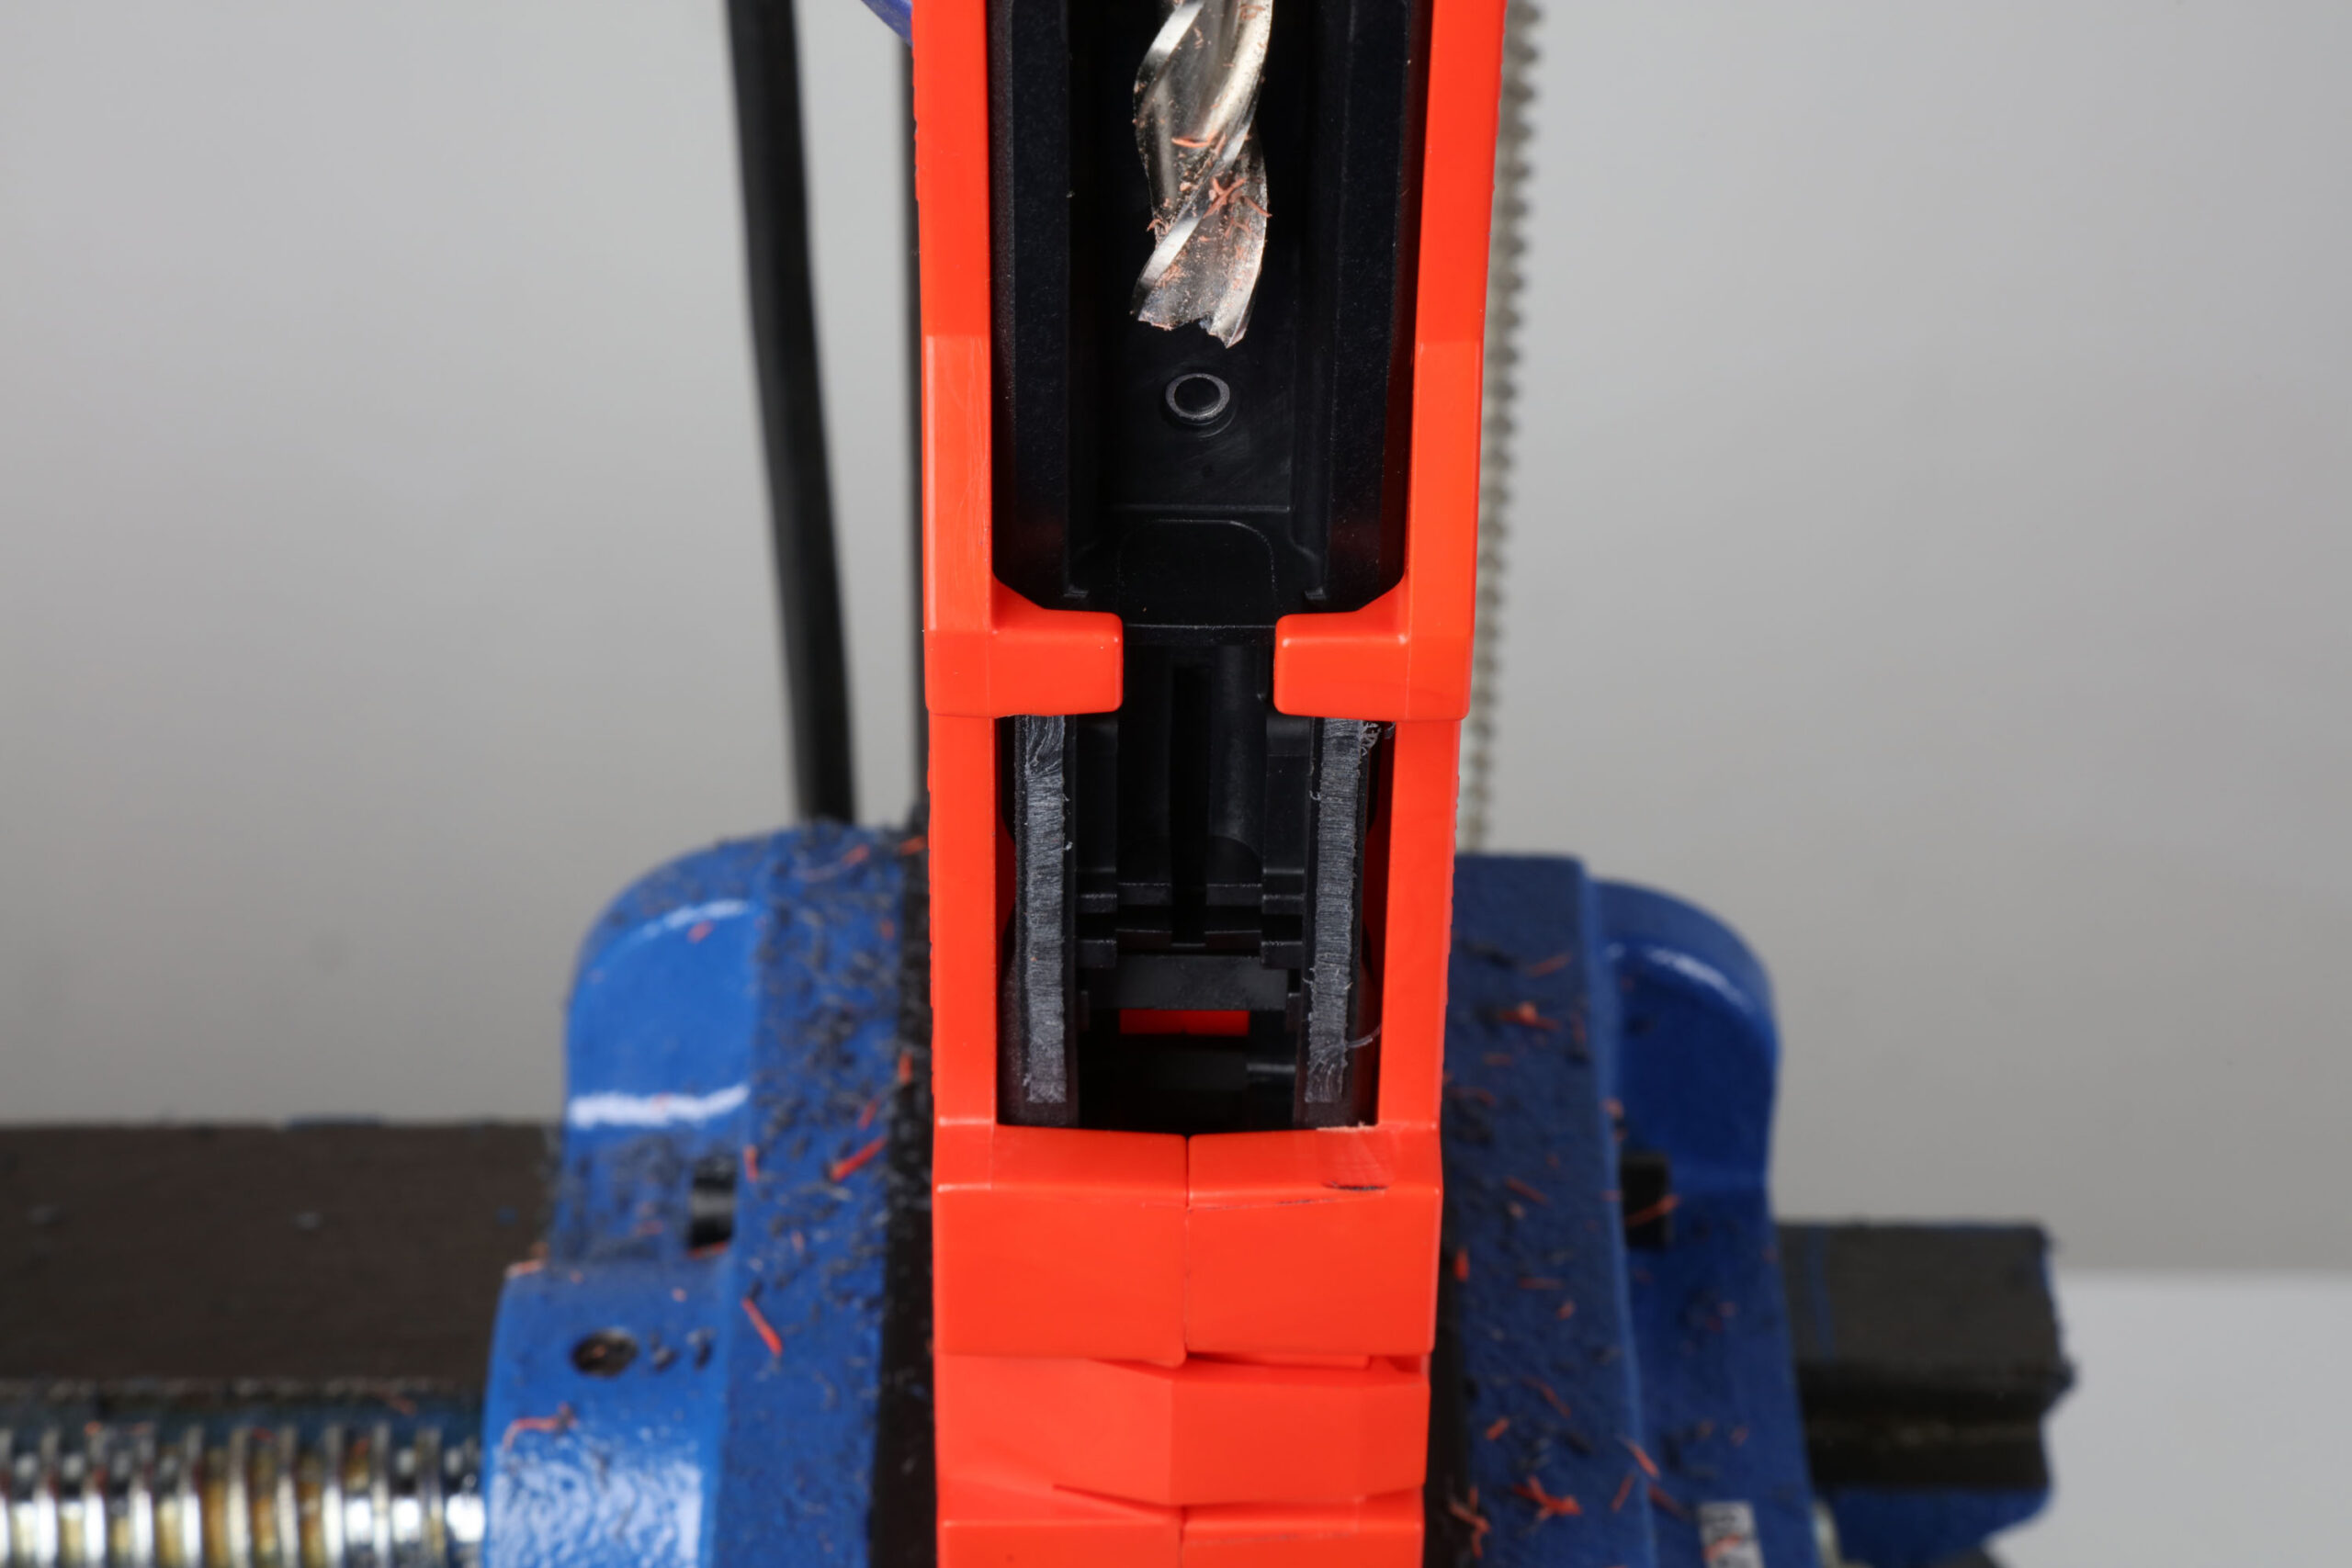
Polymer 80 is good about showing you what and what not to mill. If you look carefully, you’ll see a U-shaped line on the barrel block delineating the area that needs to be milled. The surrounding area is to remain untouched. They also give good advice by telling you to “slow down and work precisely and methodically, measuring twice and cutting once.” You can’t put material back after you’ve taken it out, so we move forward slowly but deliberately.
Milling the Block

After working the cross vise slowly, one-tenth of an inch at a time, we got the barrel block milled out to our satisfaction. If you don’t use a cross mill often, we highly recommend memorizing which direction turning the knobs will make the jig go. The last thing you want in such a precise space is to turn it the wrong way and mill out an area you’re not supposed to.
Filing the Frame
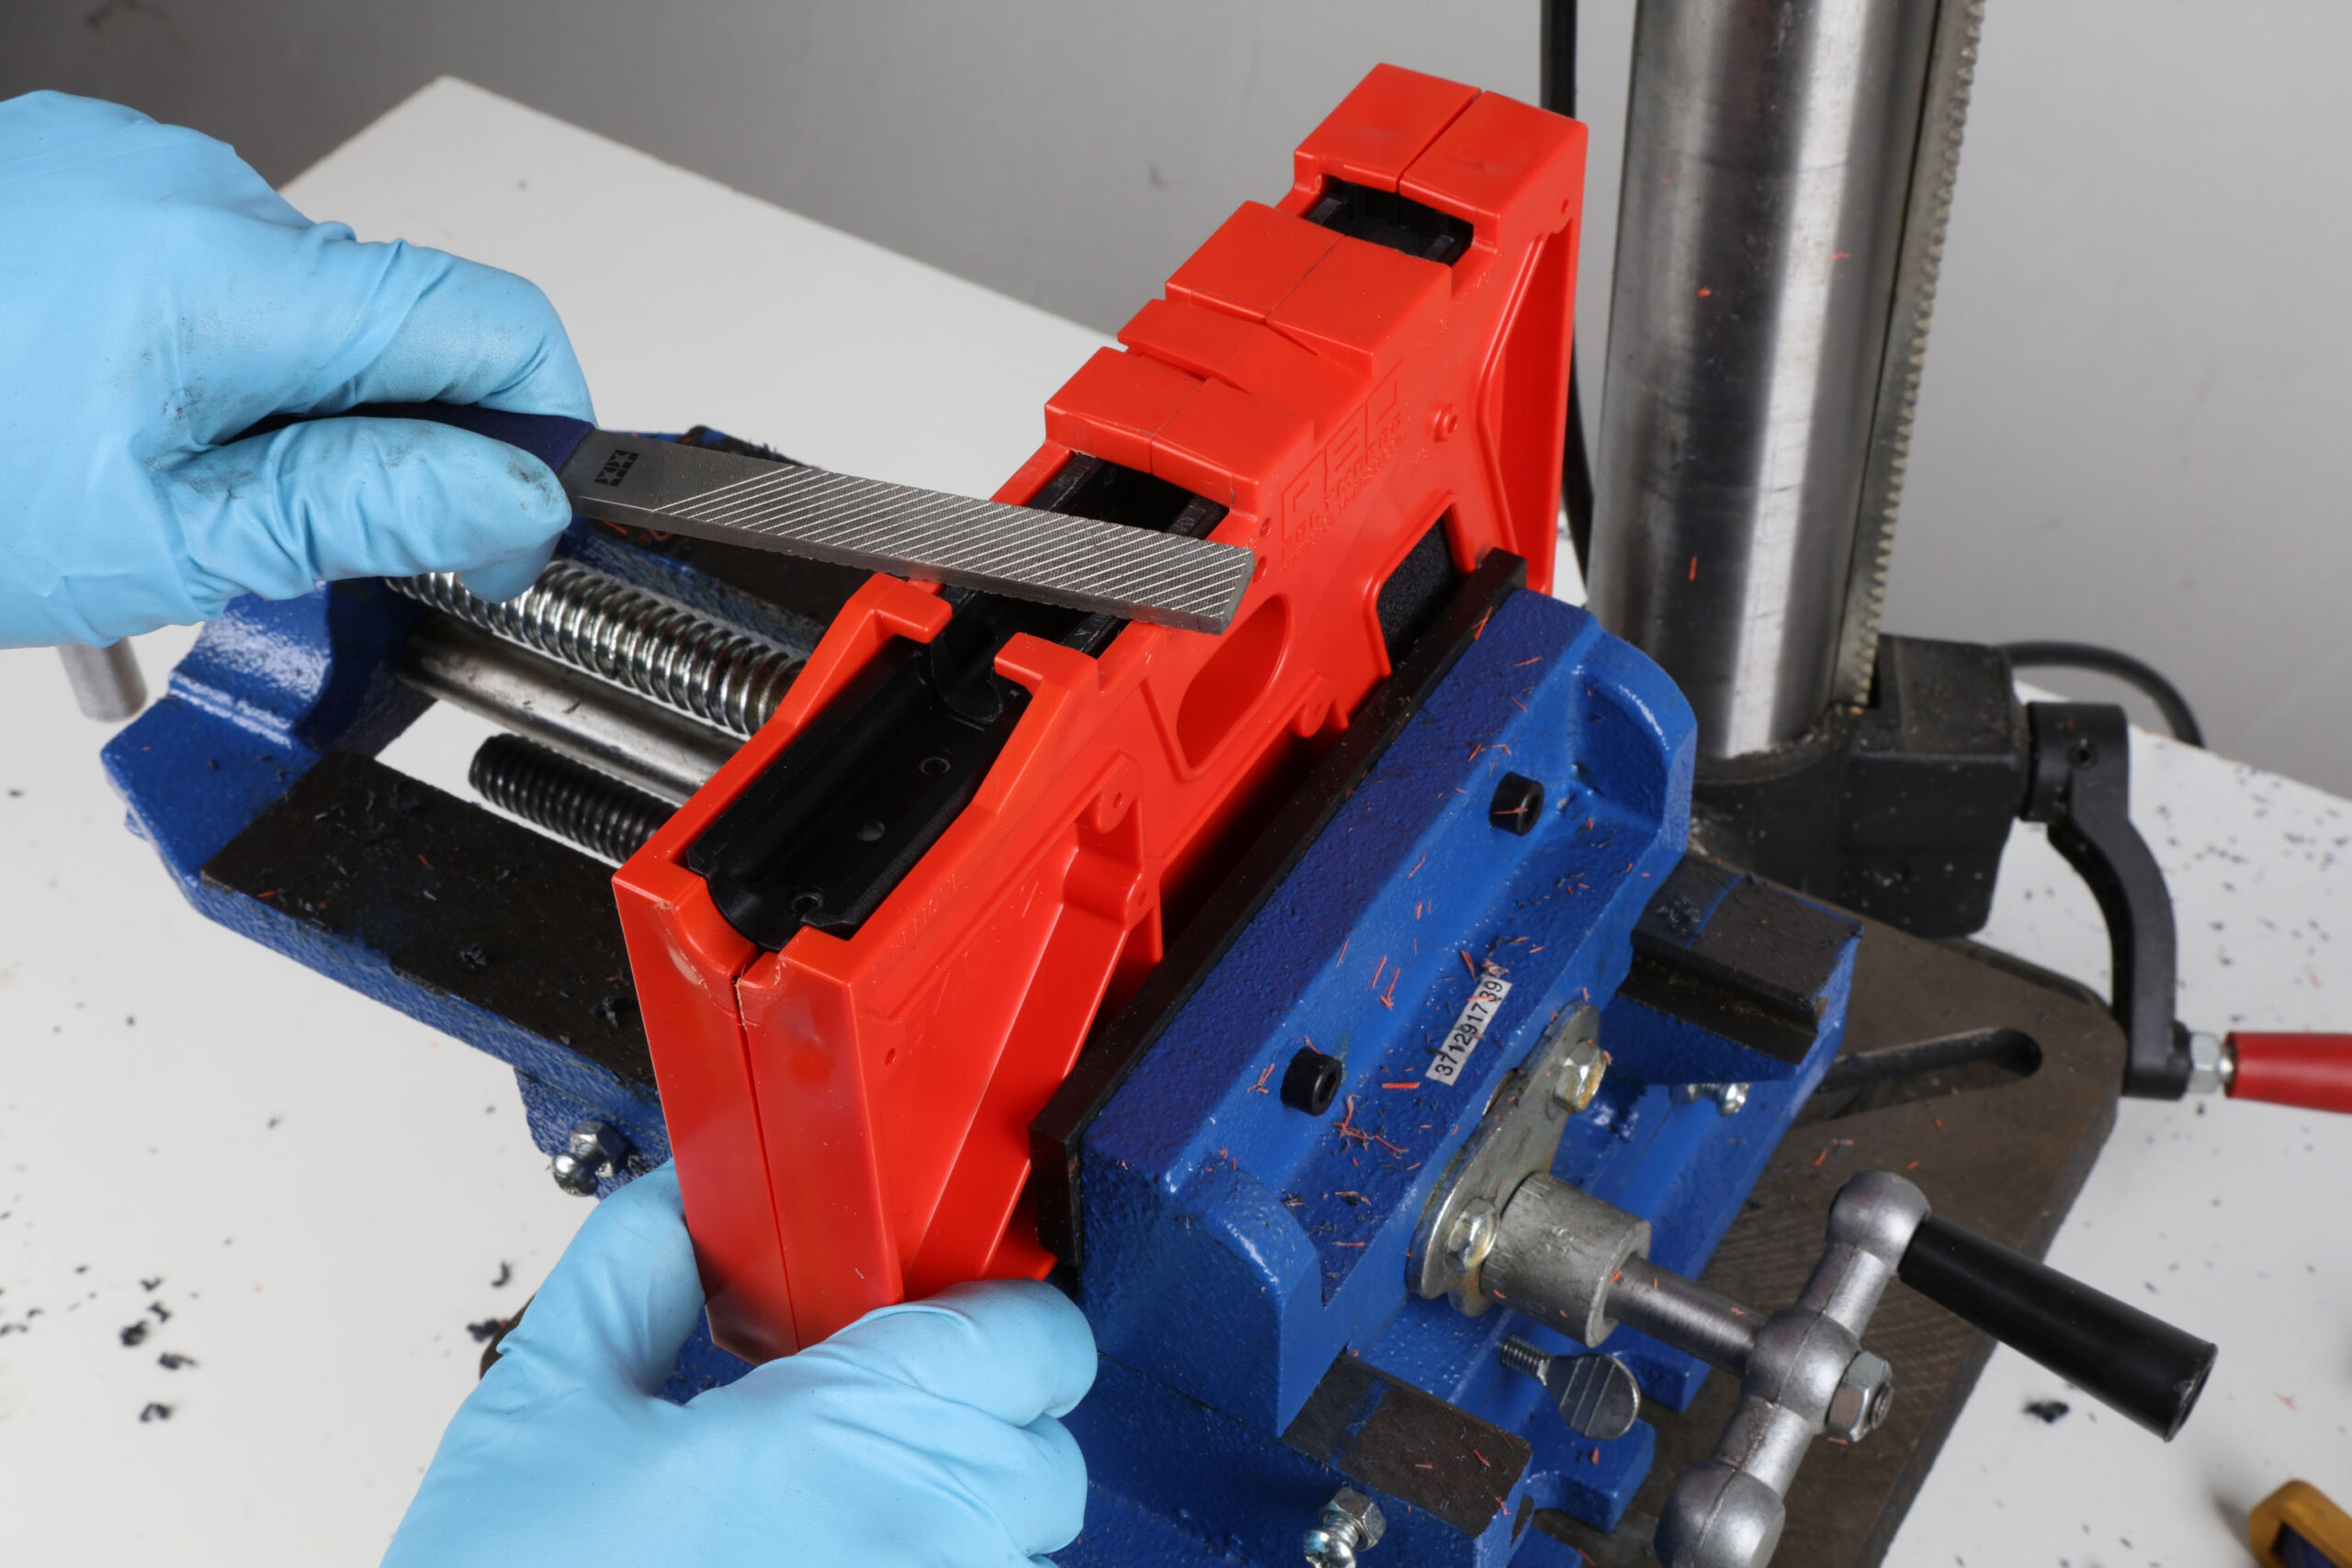

After the front and rear frame rails and barrel block have been milled, we went about filing the remaining frame rail surfaces down by hand. As you’ll recall from Step 3, we left about 1/16-inch worth of material so as to not take out too much at once. A good file or even sandpaper can help take the rail down so that it is perfectly flush with the rest of the frame.
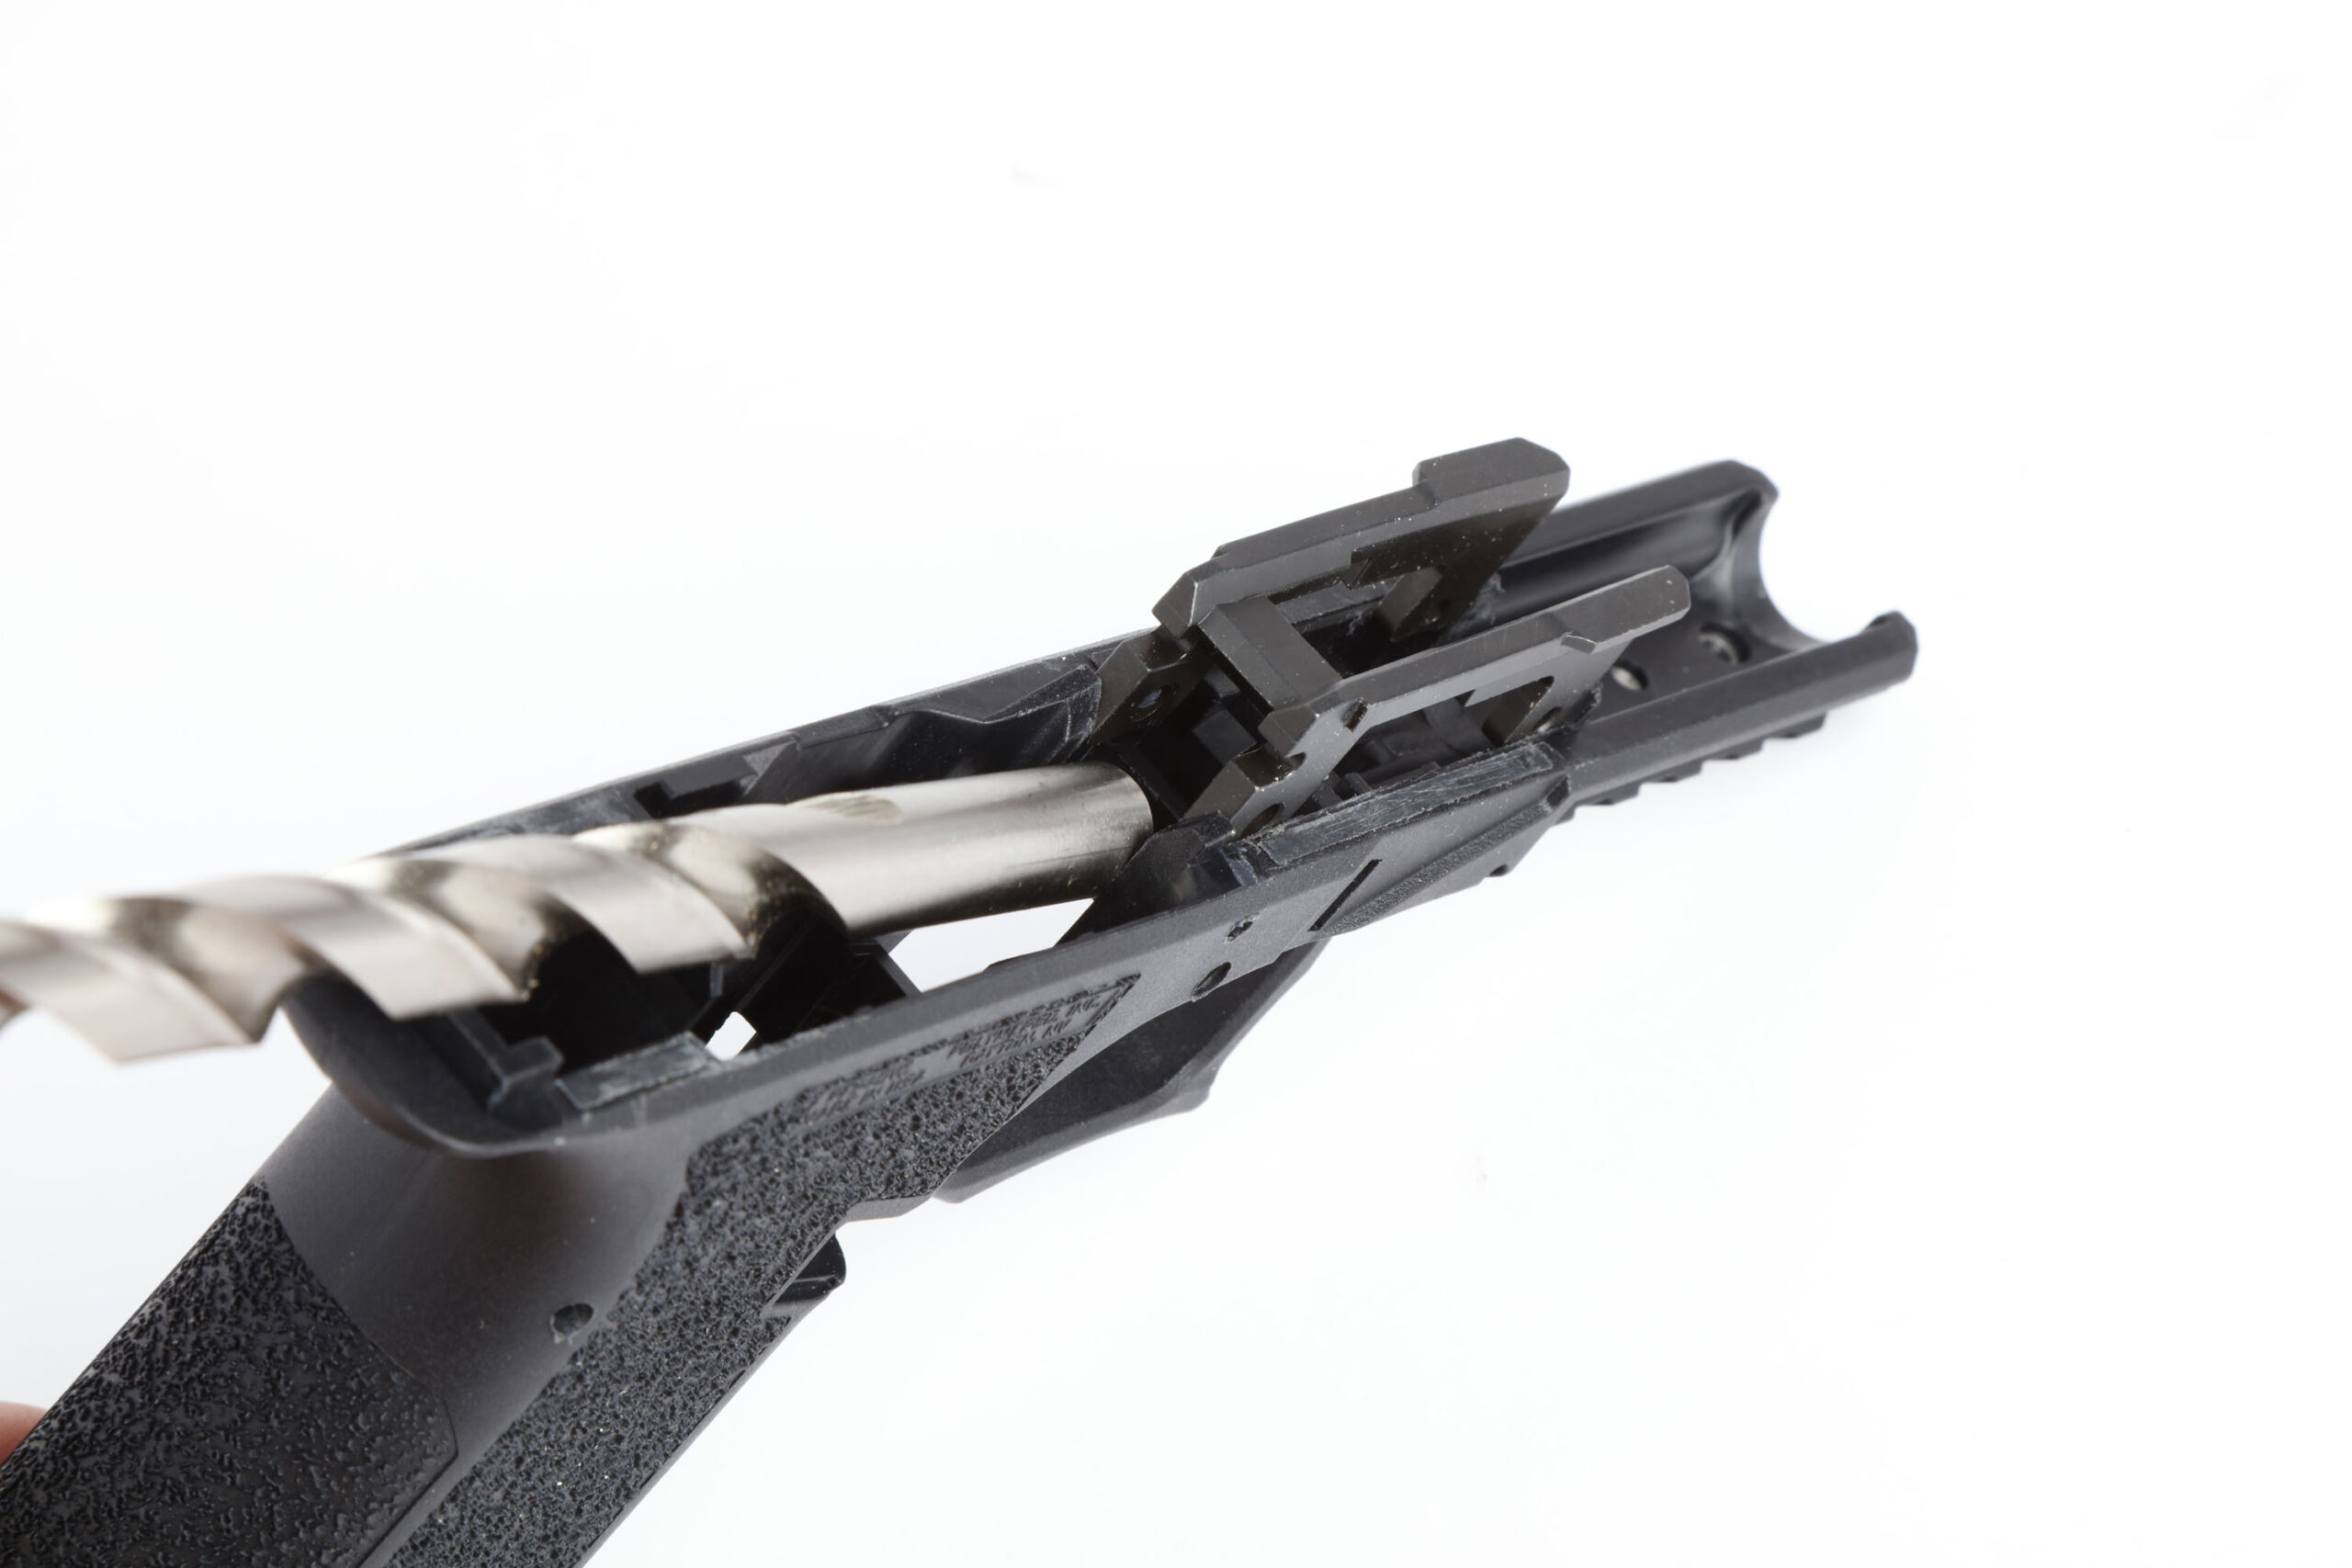
Milling Results
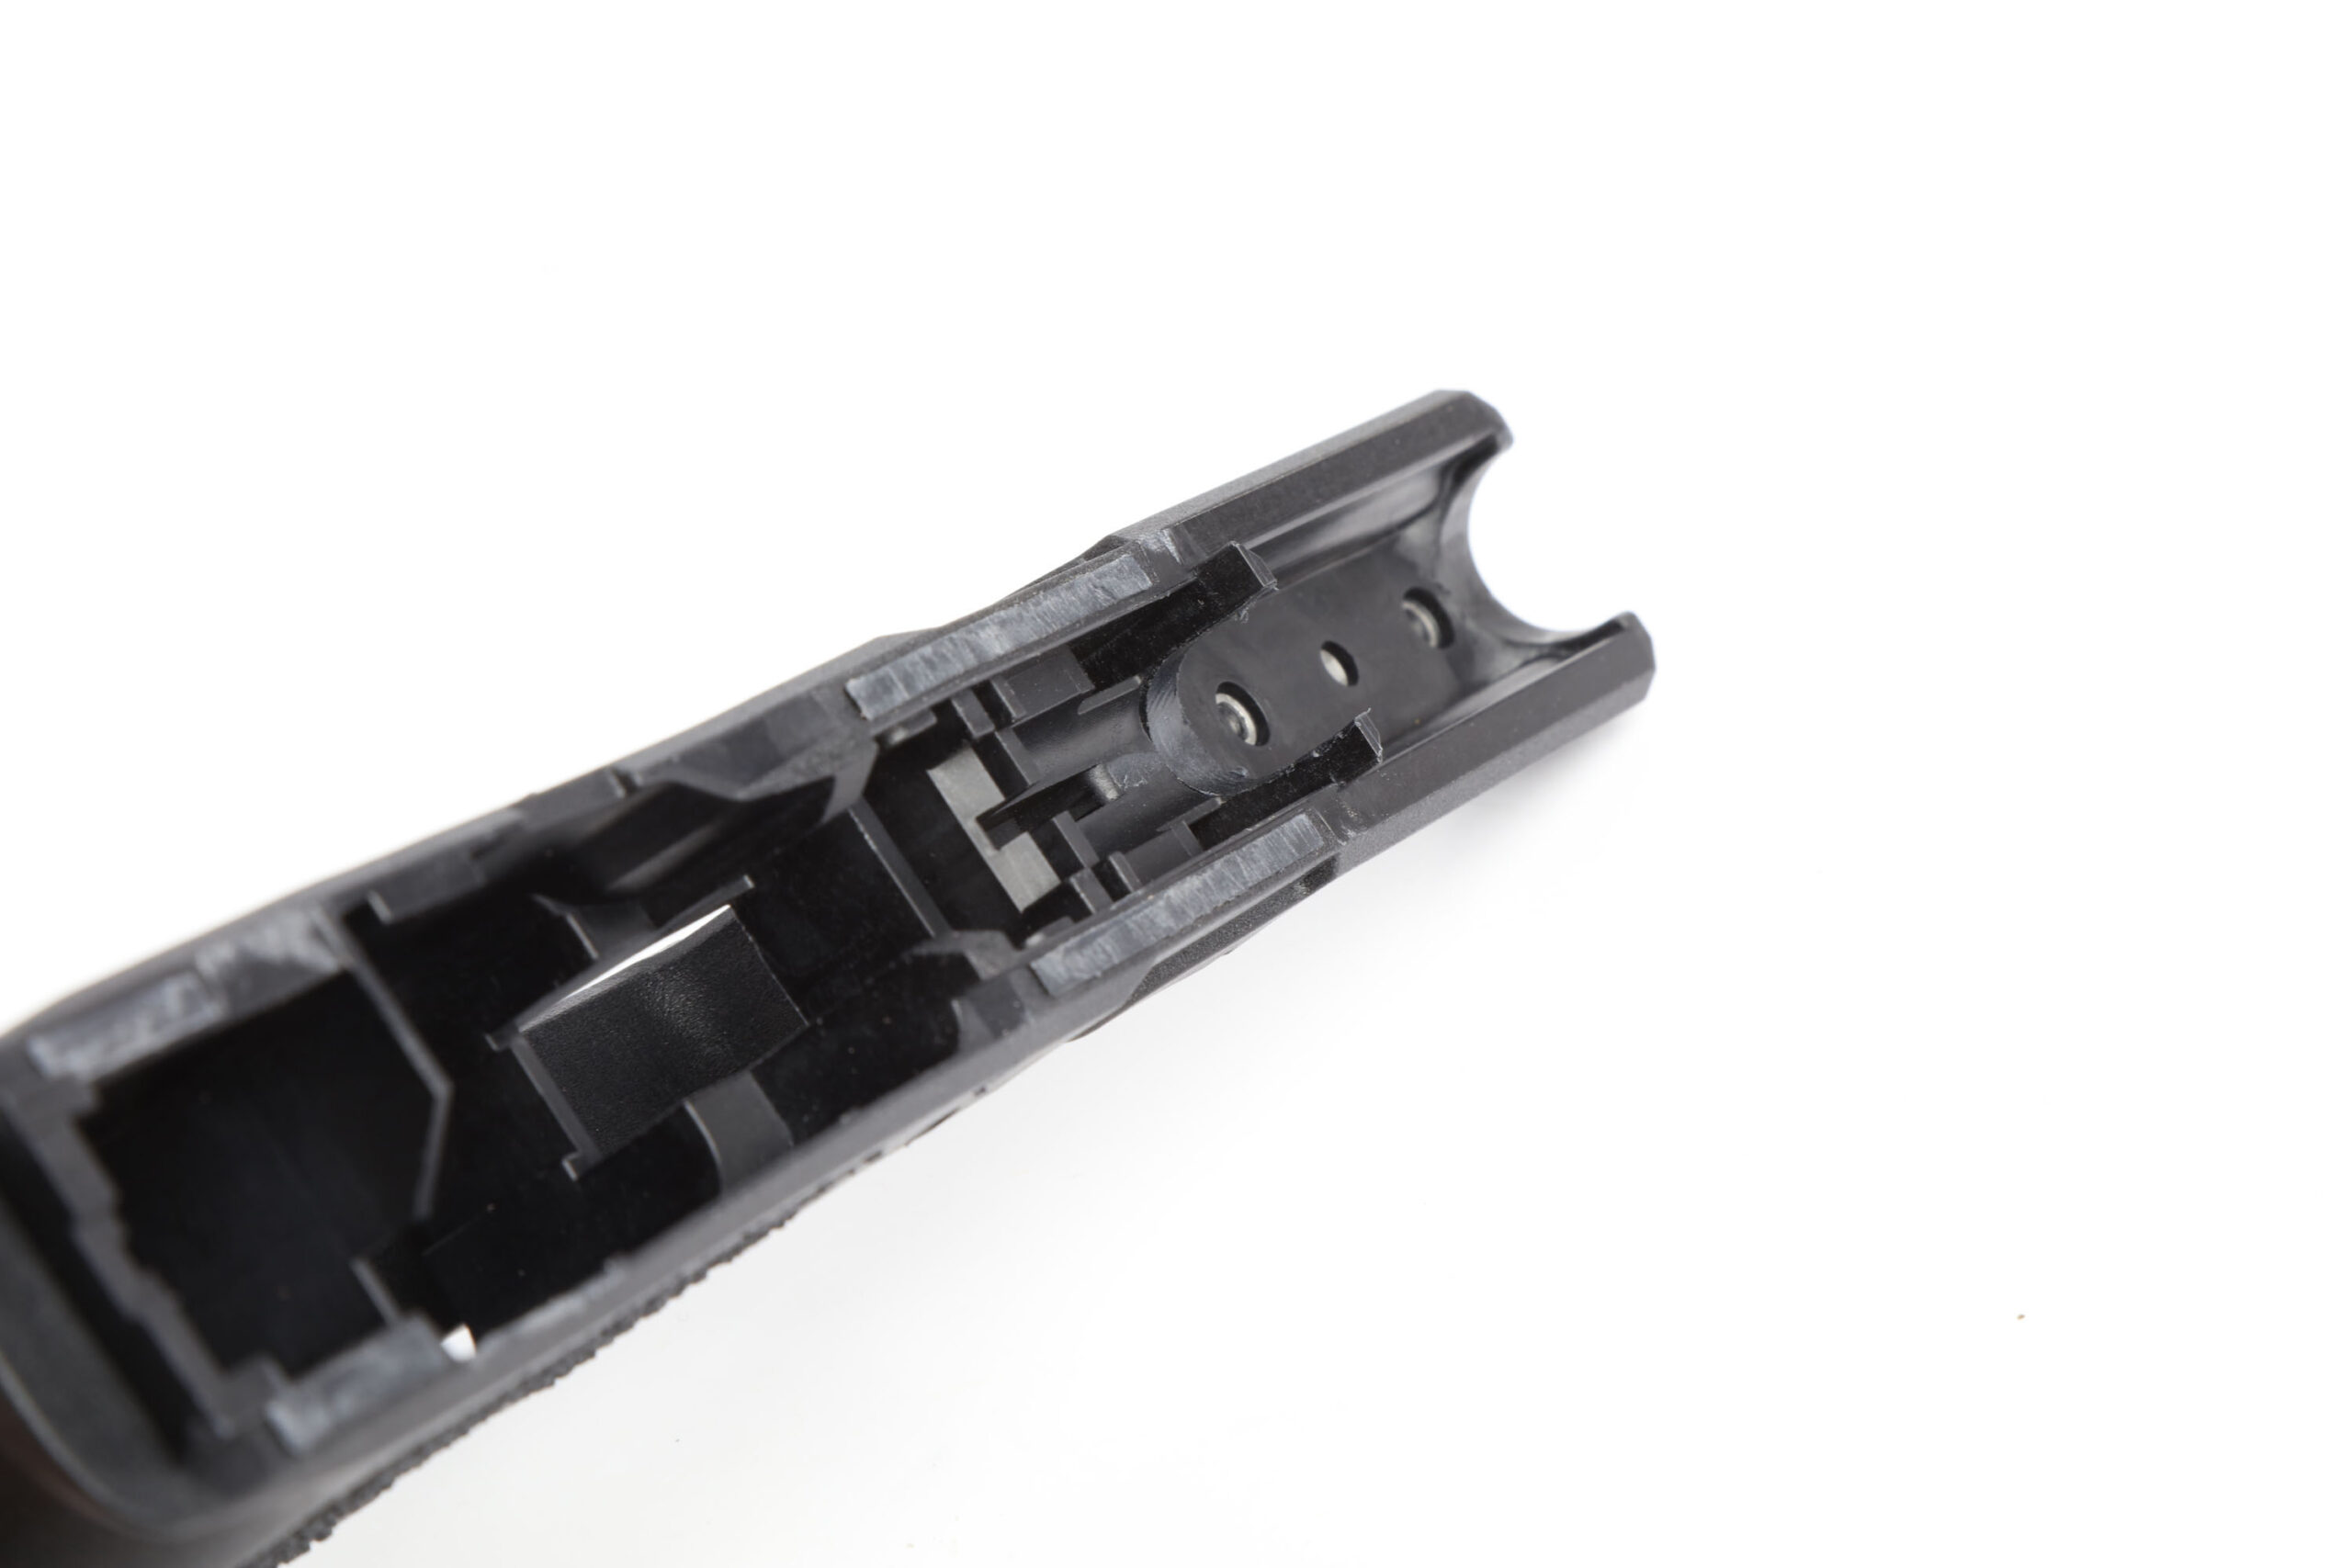
Here’s the frame after it has been milled and filed. You can see the milled rails on both sides of the front and rear of the frame as well as the U-shaped cut in the barrel block in the middle part of the frame’s front end. Everything looks clean and relatively smooth, so we’ll move on to drilling.
Drilling
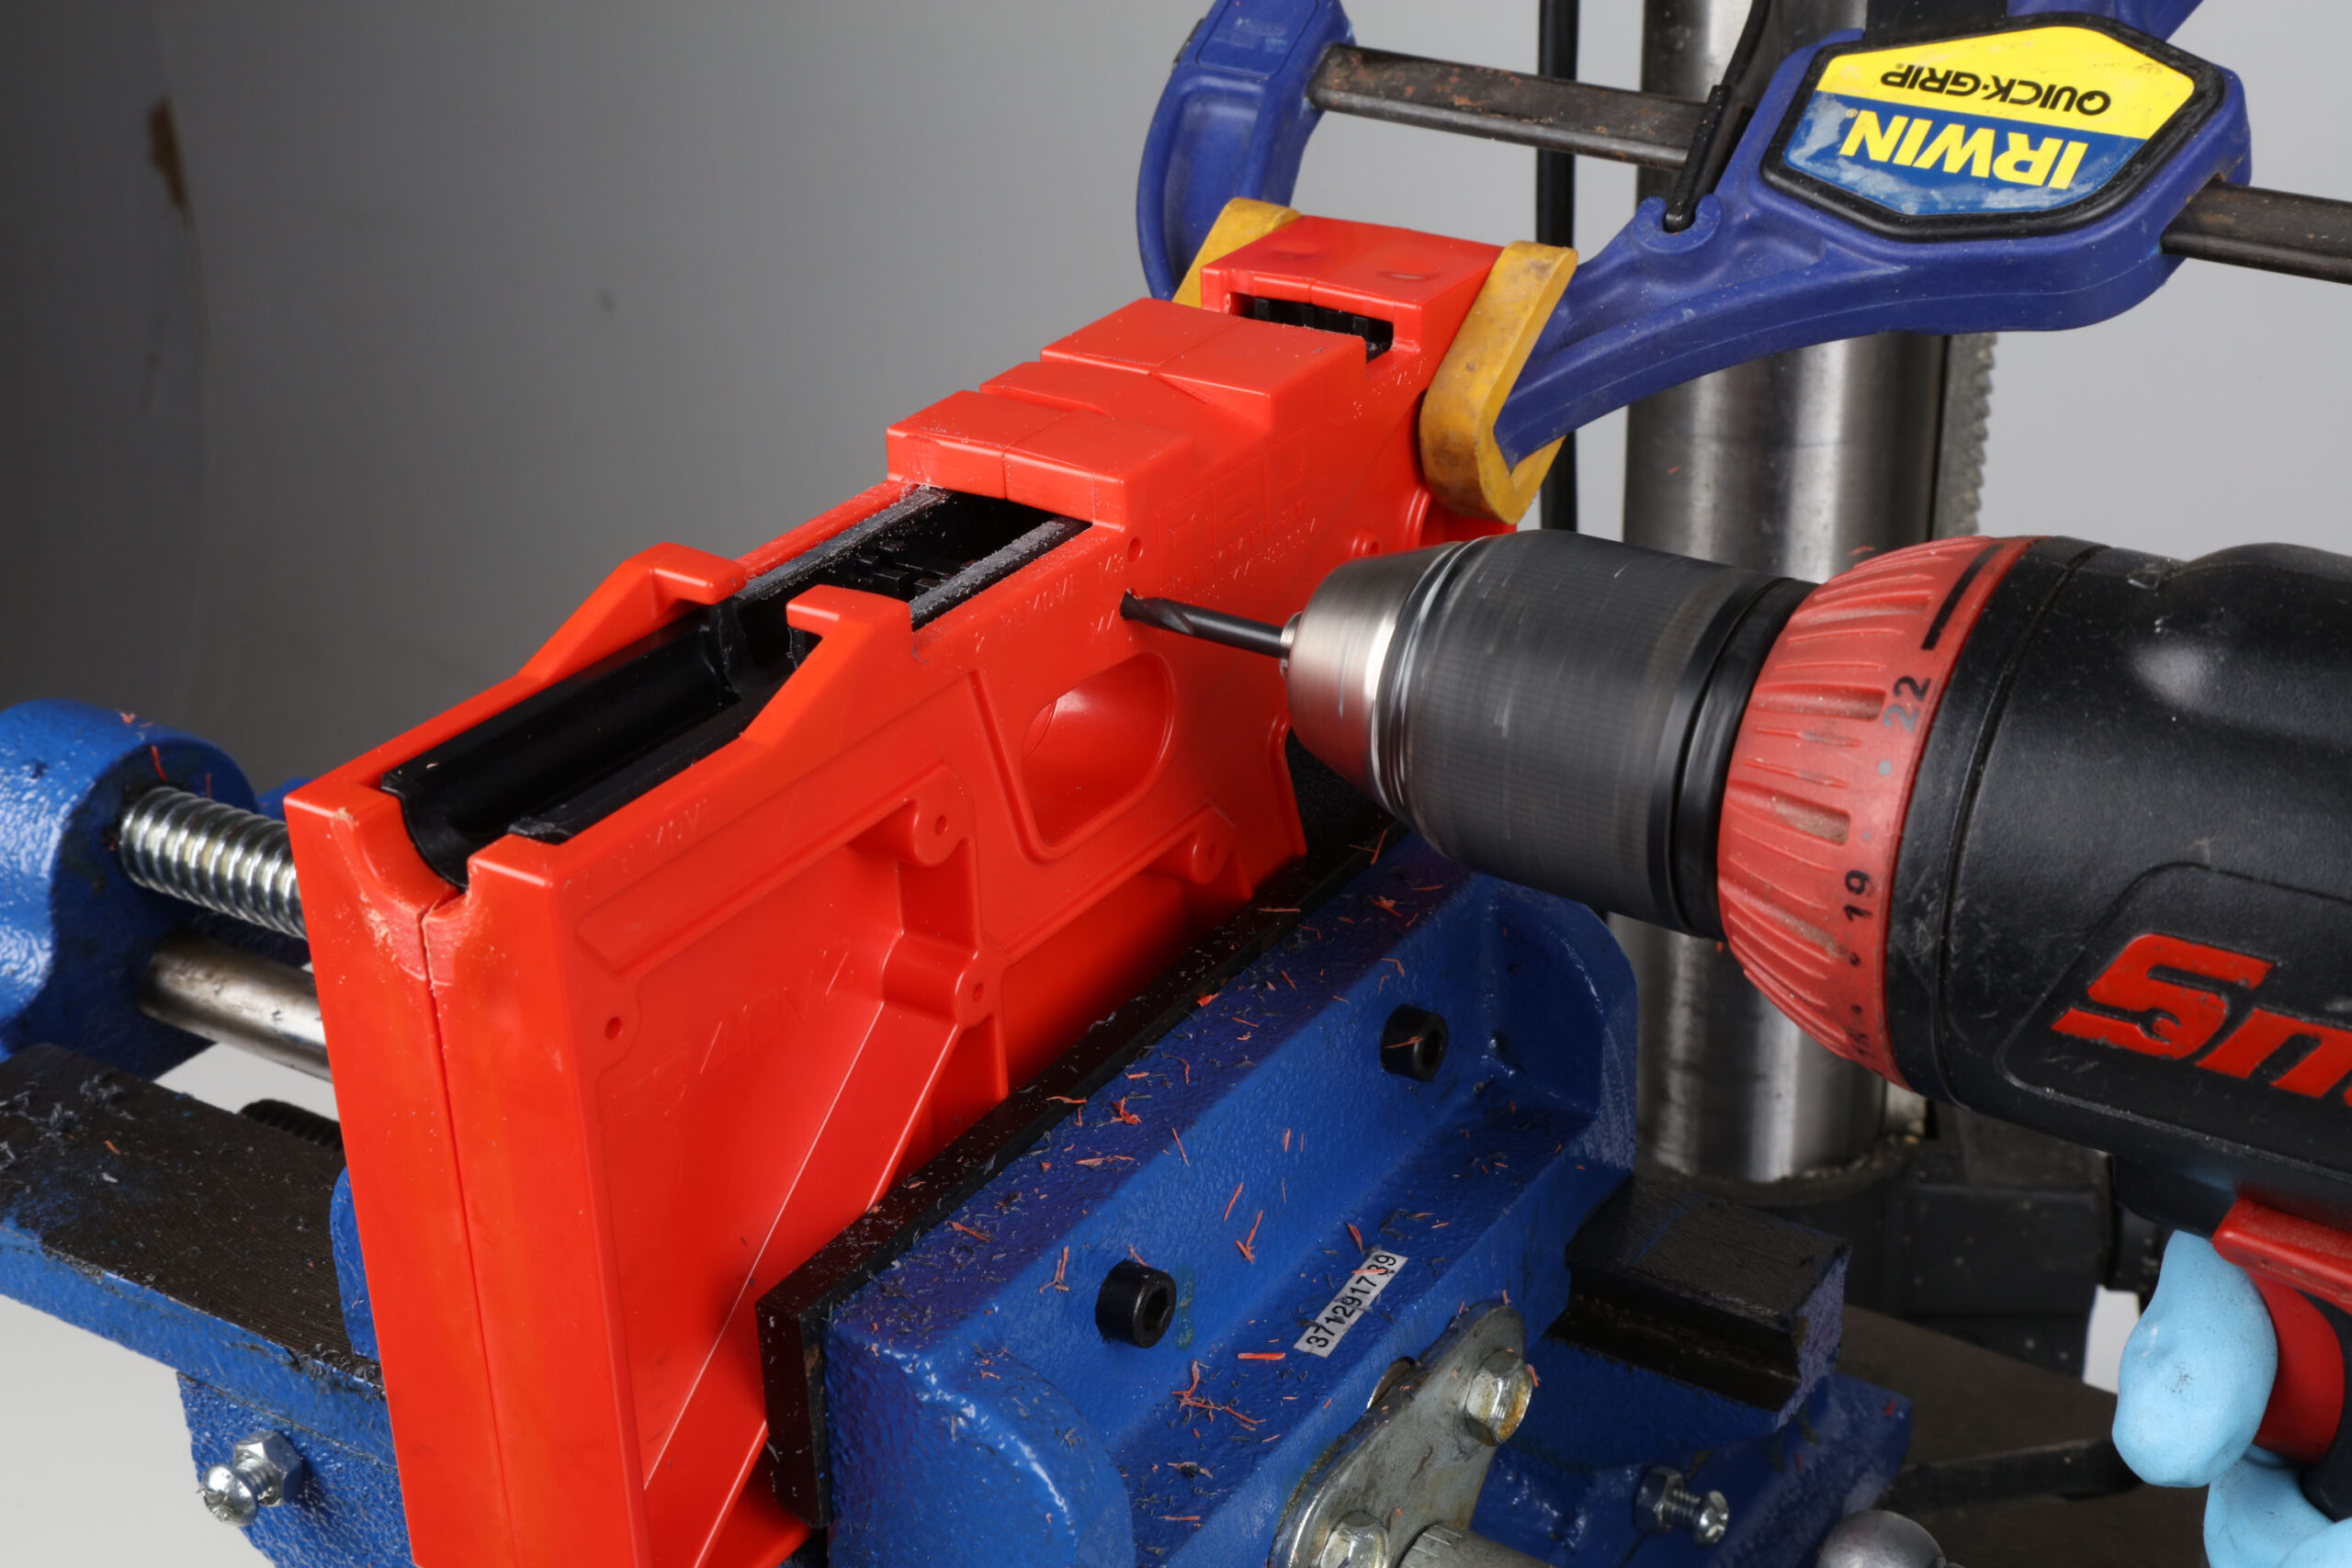
Using two different-sized drill bits that came with the kit, we preceded to drill pin holes as indicated on the jig. Polymer 80 points out not to drill the holes in one vertical action using the drill press. The holes are to be drilled horizontally using a handheld power drill, from each side. In other words, don’t just power through from one side to the other. Take your time and drill one hole on one side, then move on to drill the other hole on the other side.
A Hiccup
If you read the instructions and watch Polymer 80’s installation YouTube video, you’ll notice that they each tell you to install the included Rear Rail Module (RRM) and Locking Block Rail System (LBRS) parts in different orders. We followed the video version and installed the RRM first along with our trigger assembly only to find that the LBRS was too wide to fit in the frame. Lucky for us, Polymer 80 anticipated this and included a tip in the written instructions on how to fix this issue.
Fitting the LBRS

According to the instructions, a tight-fitting LBRS can be remedied by spreading the frame with a tool such as a screwdriver shaft or dowel so the LBRS can slide in. They call for a 7/16-inch tool, which of course we didn’t have. We did however have a 11mm drill bit (random, we know) that worked for us. It was wide enough to spread the frame so that the LBRS fit.
Internals Installation
Polymer 80 recommends only getting the LBRS in partially, which allows room for easy trigger assembly and RRM installation. We did just that and everything fit perfectly. The trigger assembly and RRM slid in with just a gentle push. After those parts were situated, we carefully used a nylon mallet to hammer the LBRS into place.
Pins and Frame Parts Kit Install
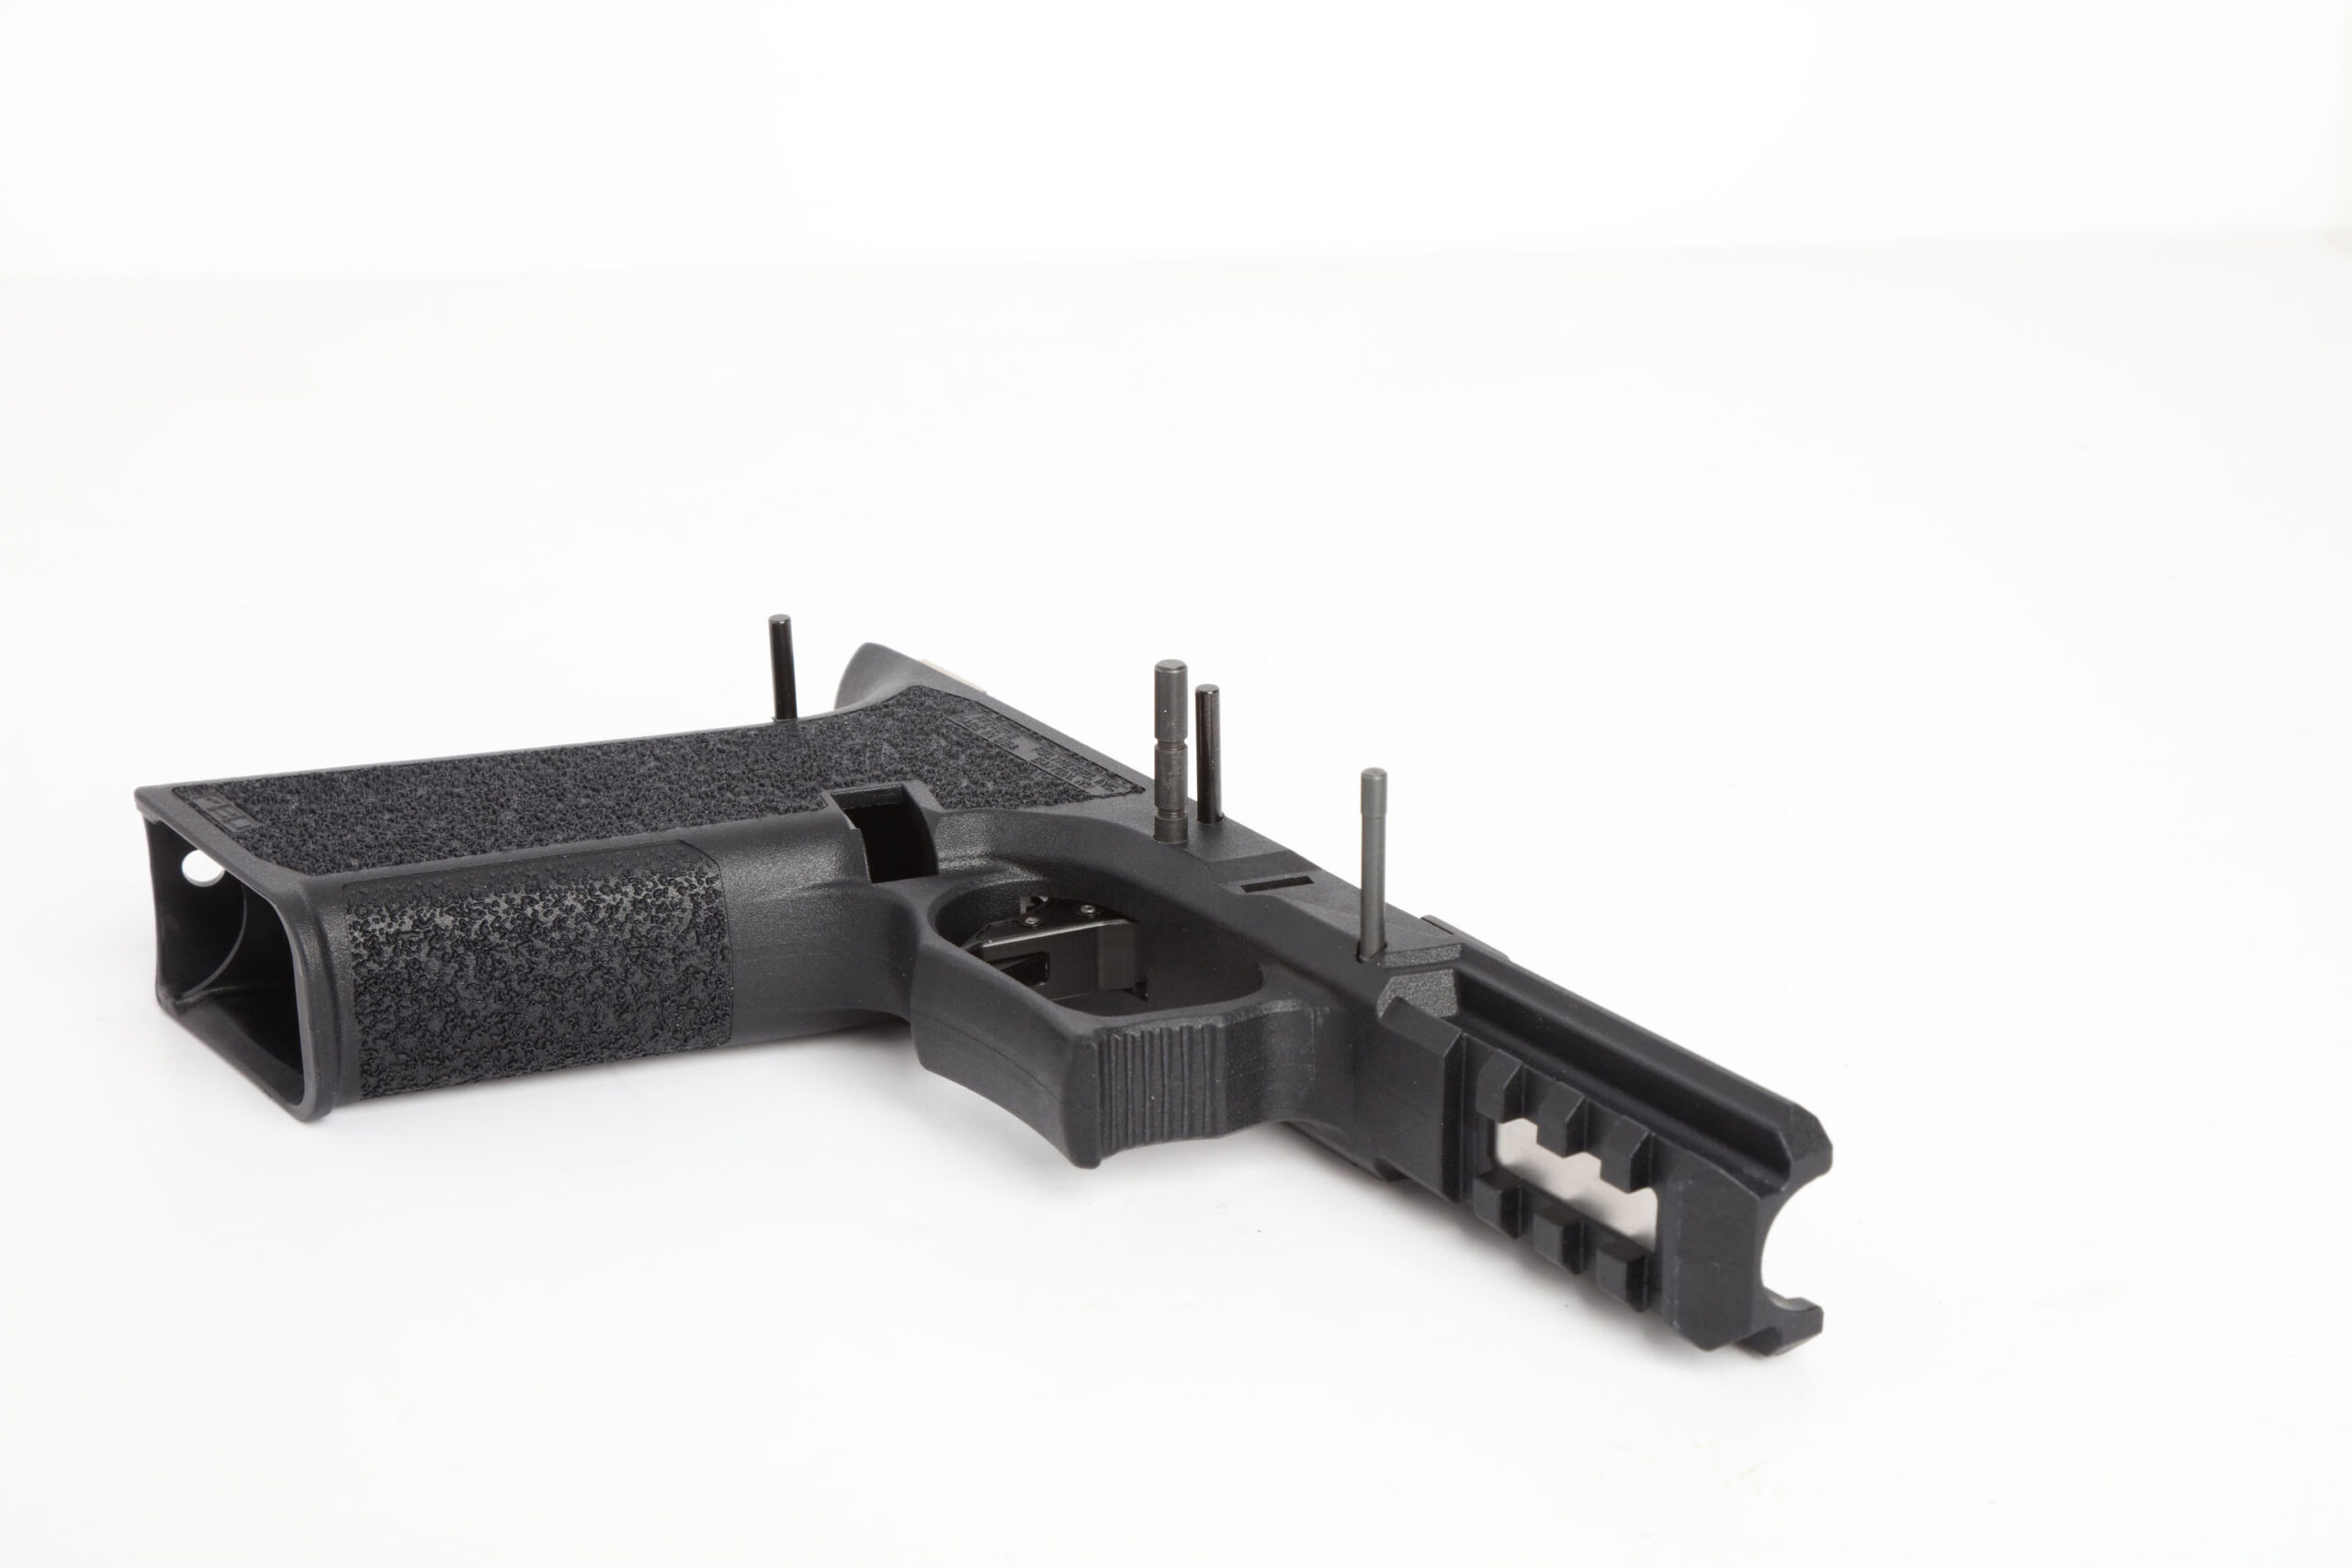
The final step was to hammer in the frame’s pins. The frame comes with two 3x25mm pins; the others came with a separate frame parts kit and trigger kit that we used for this build.
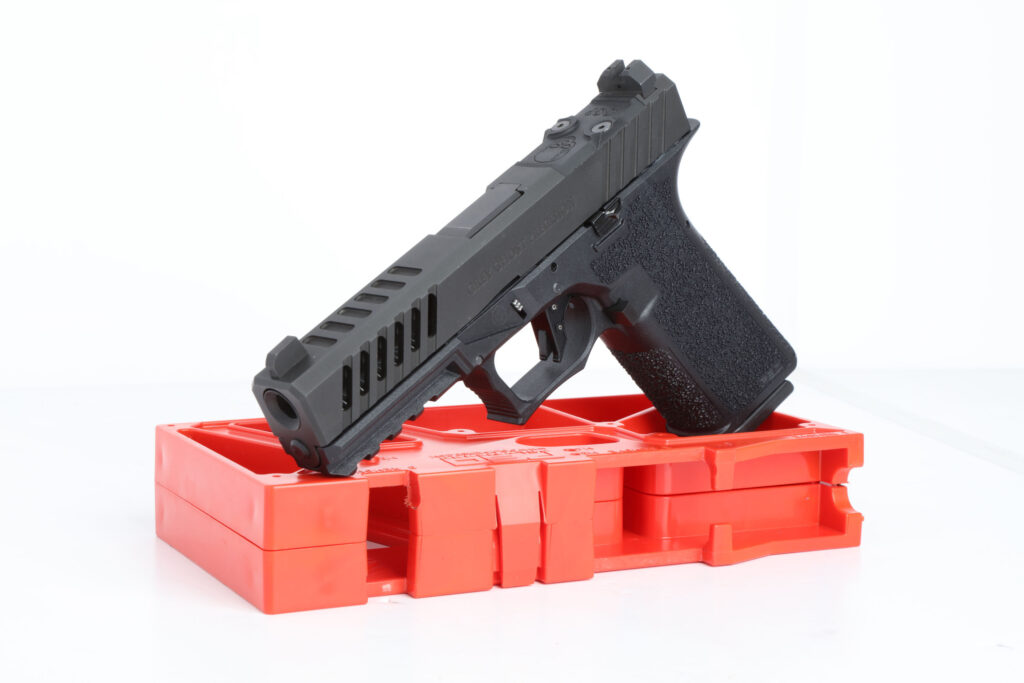
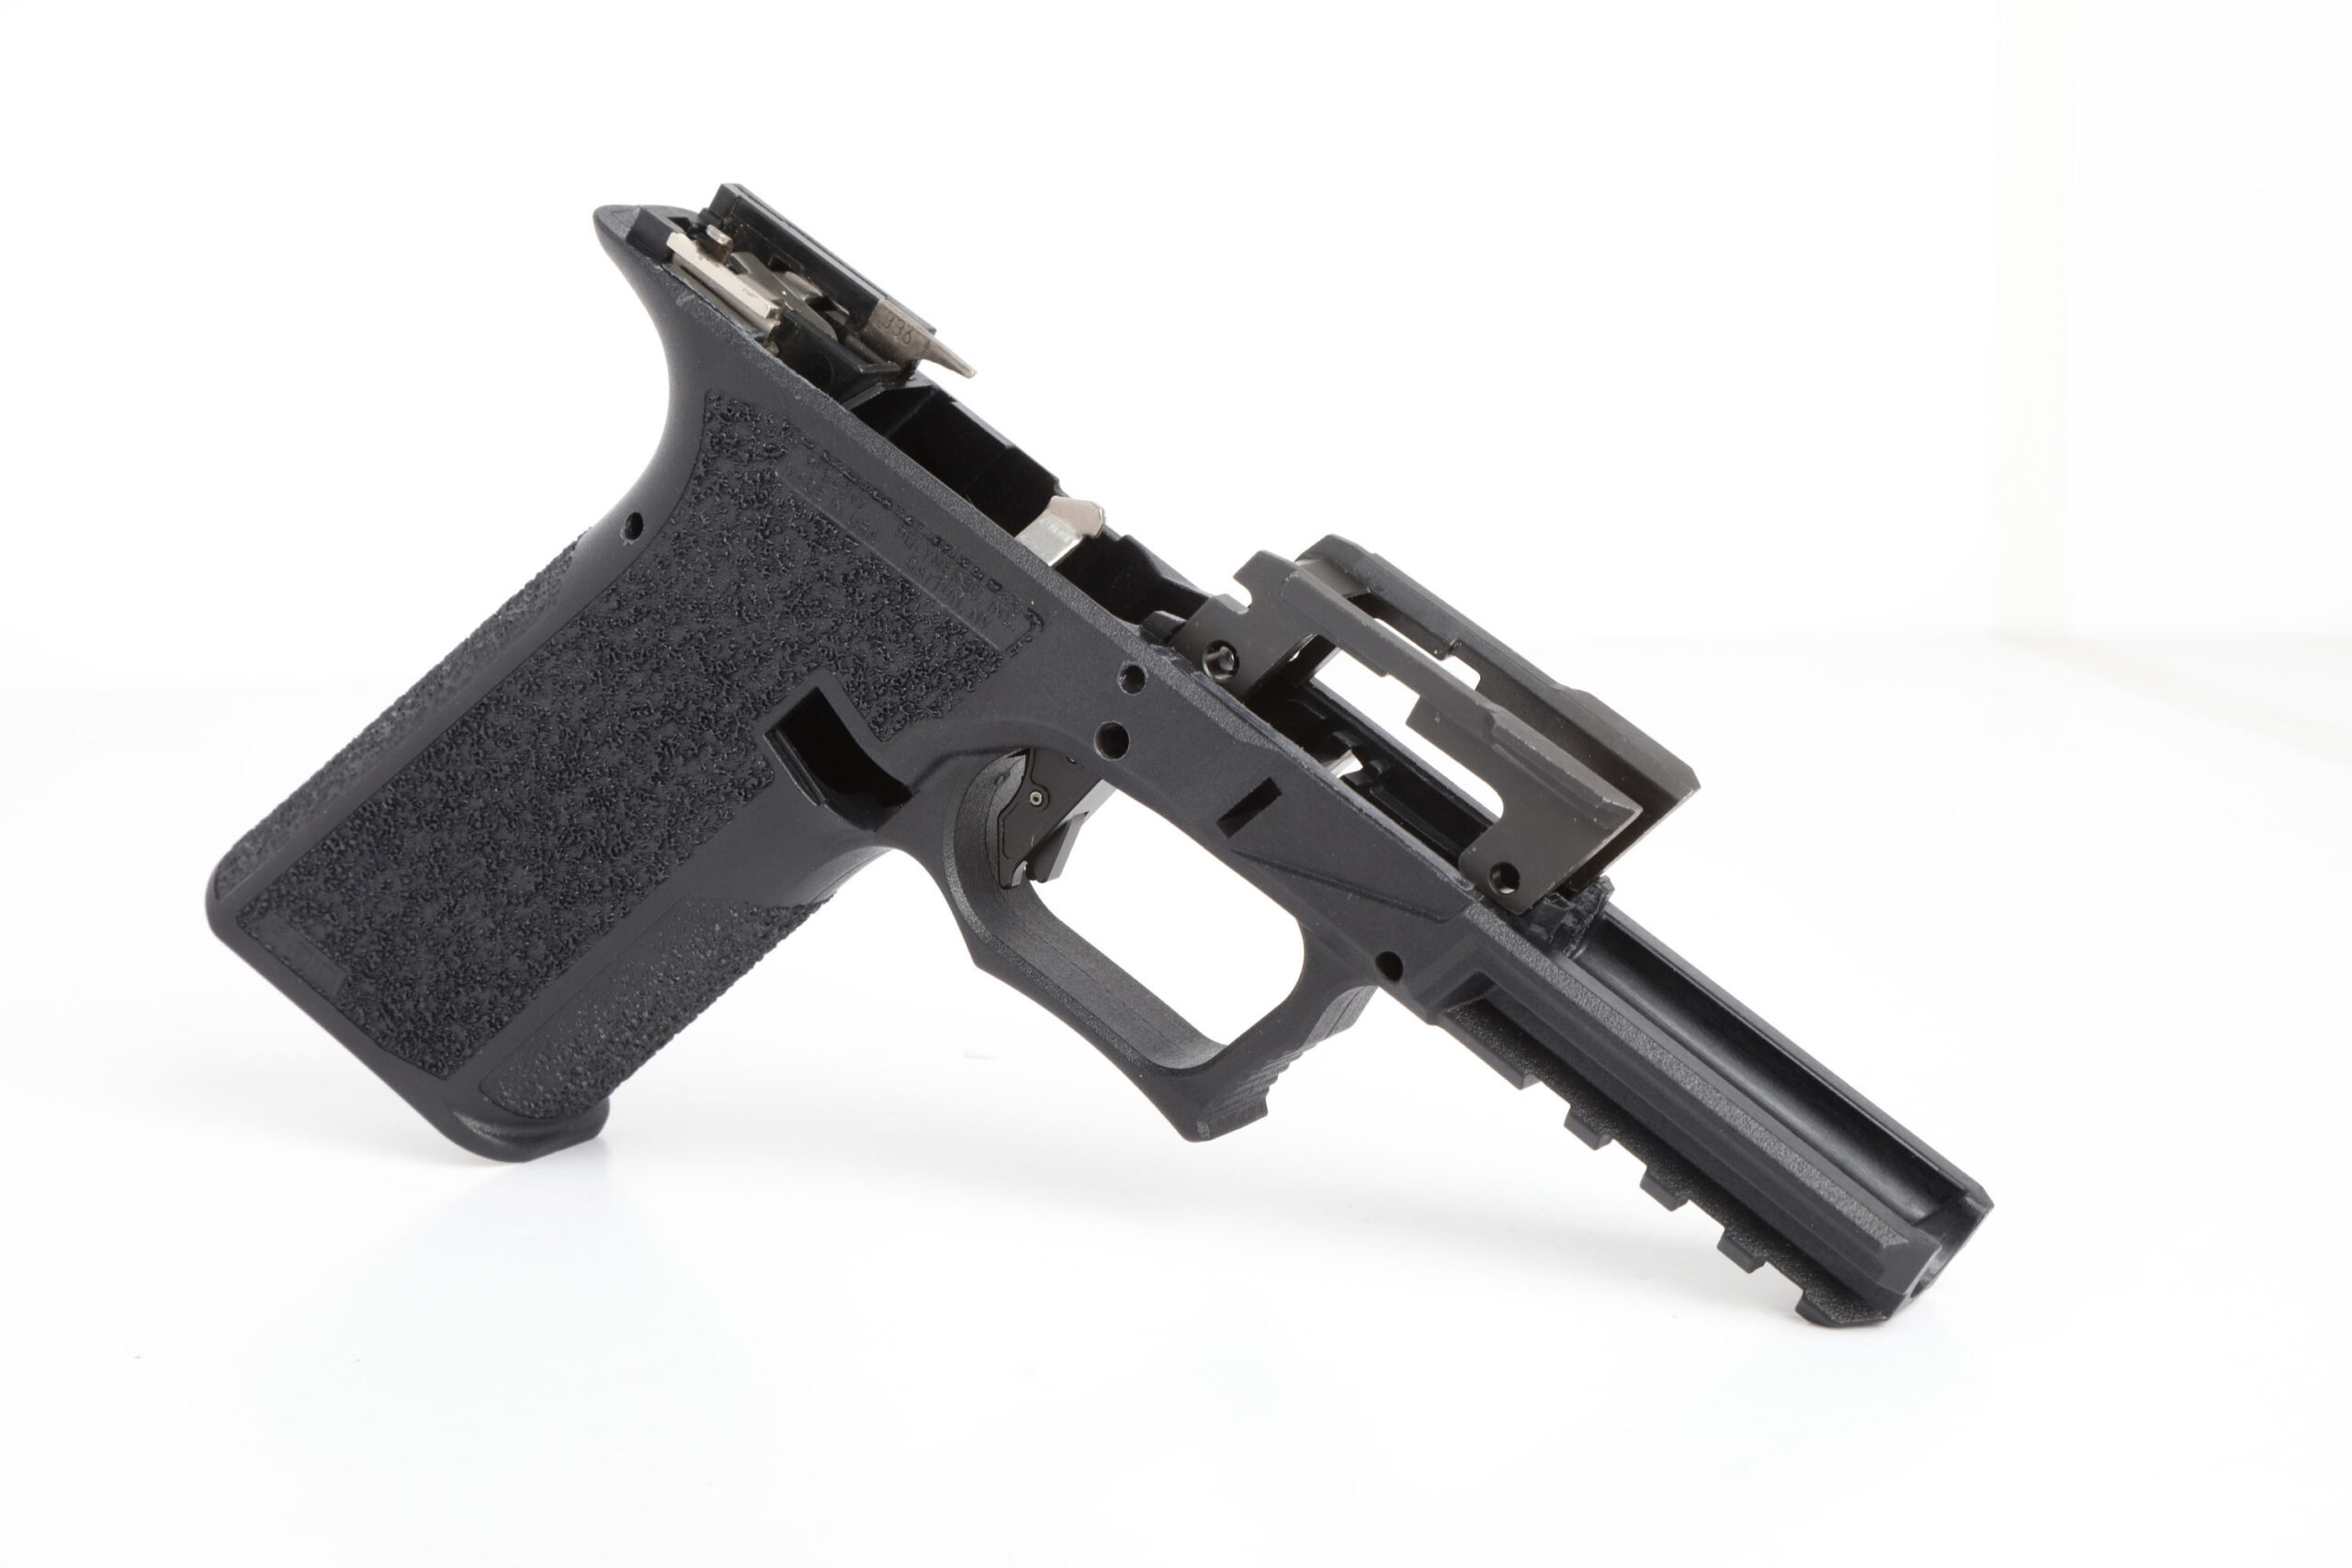
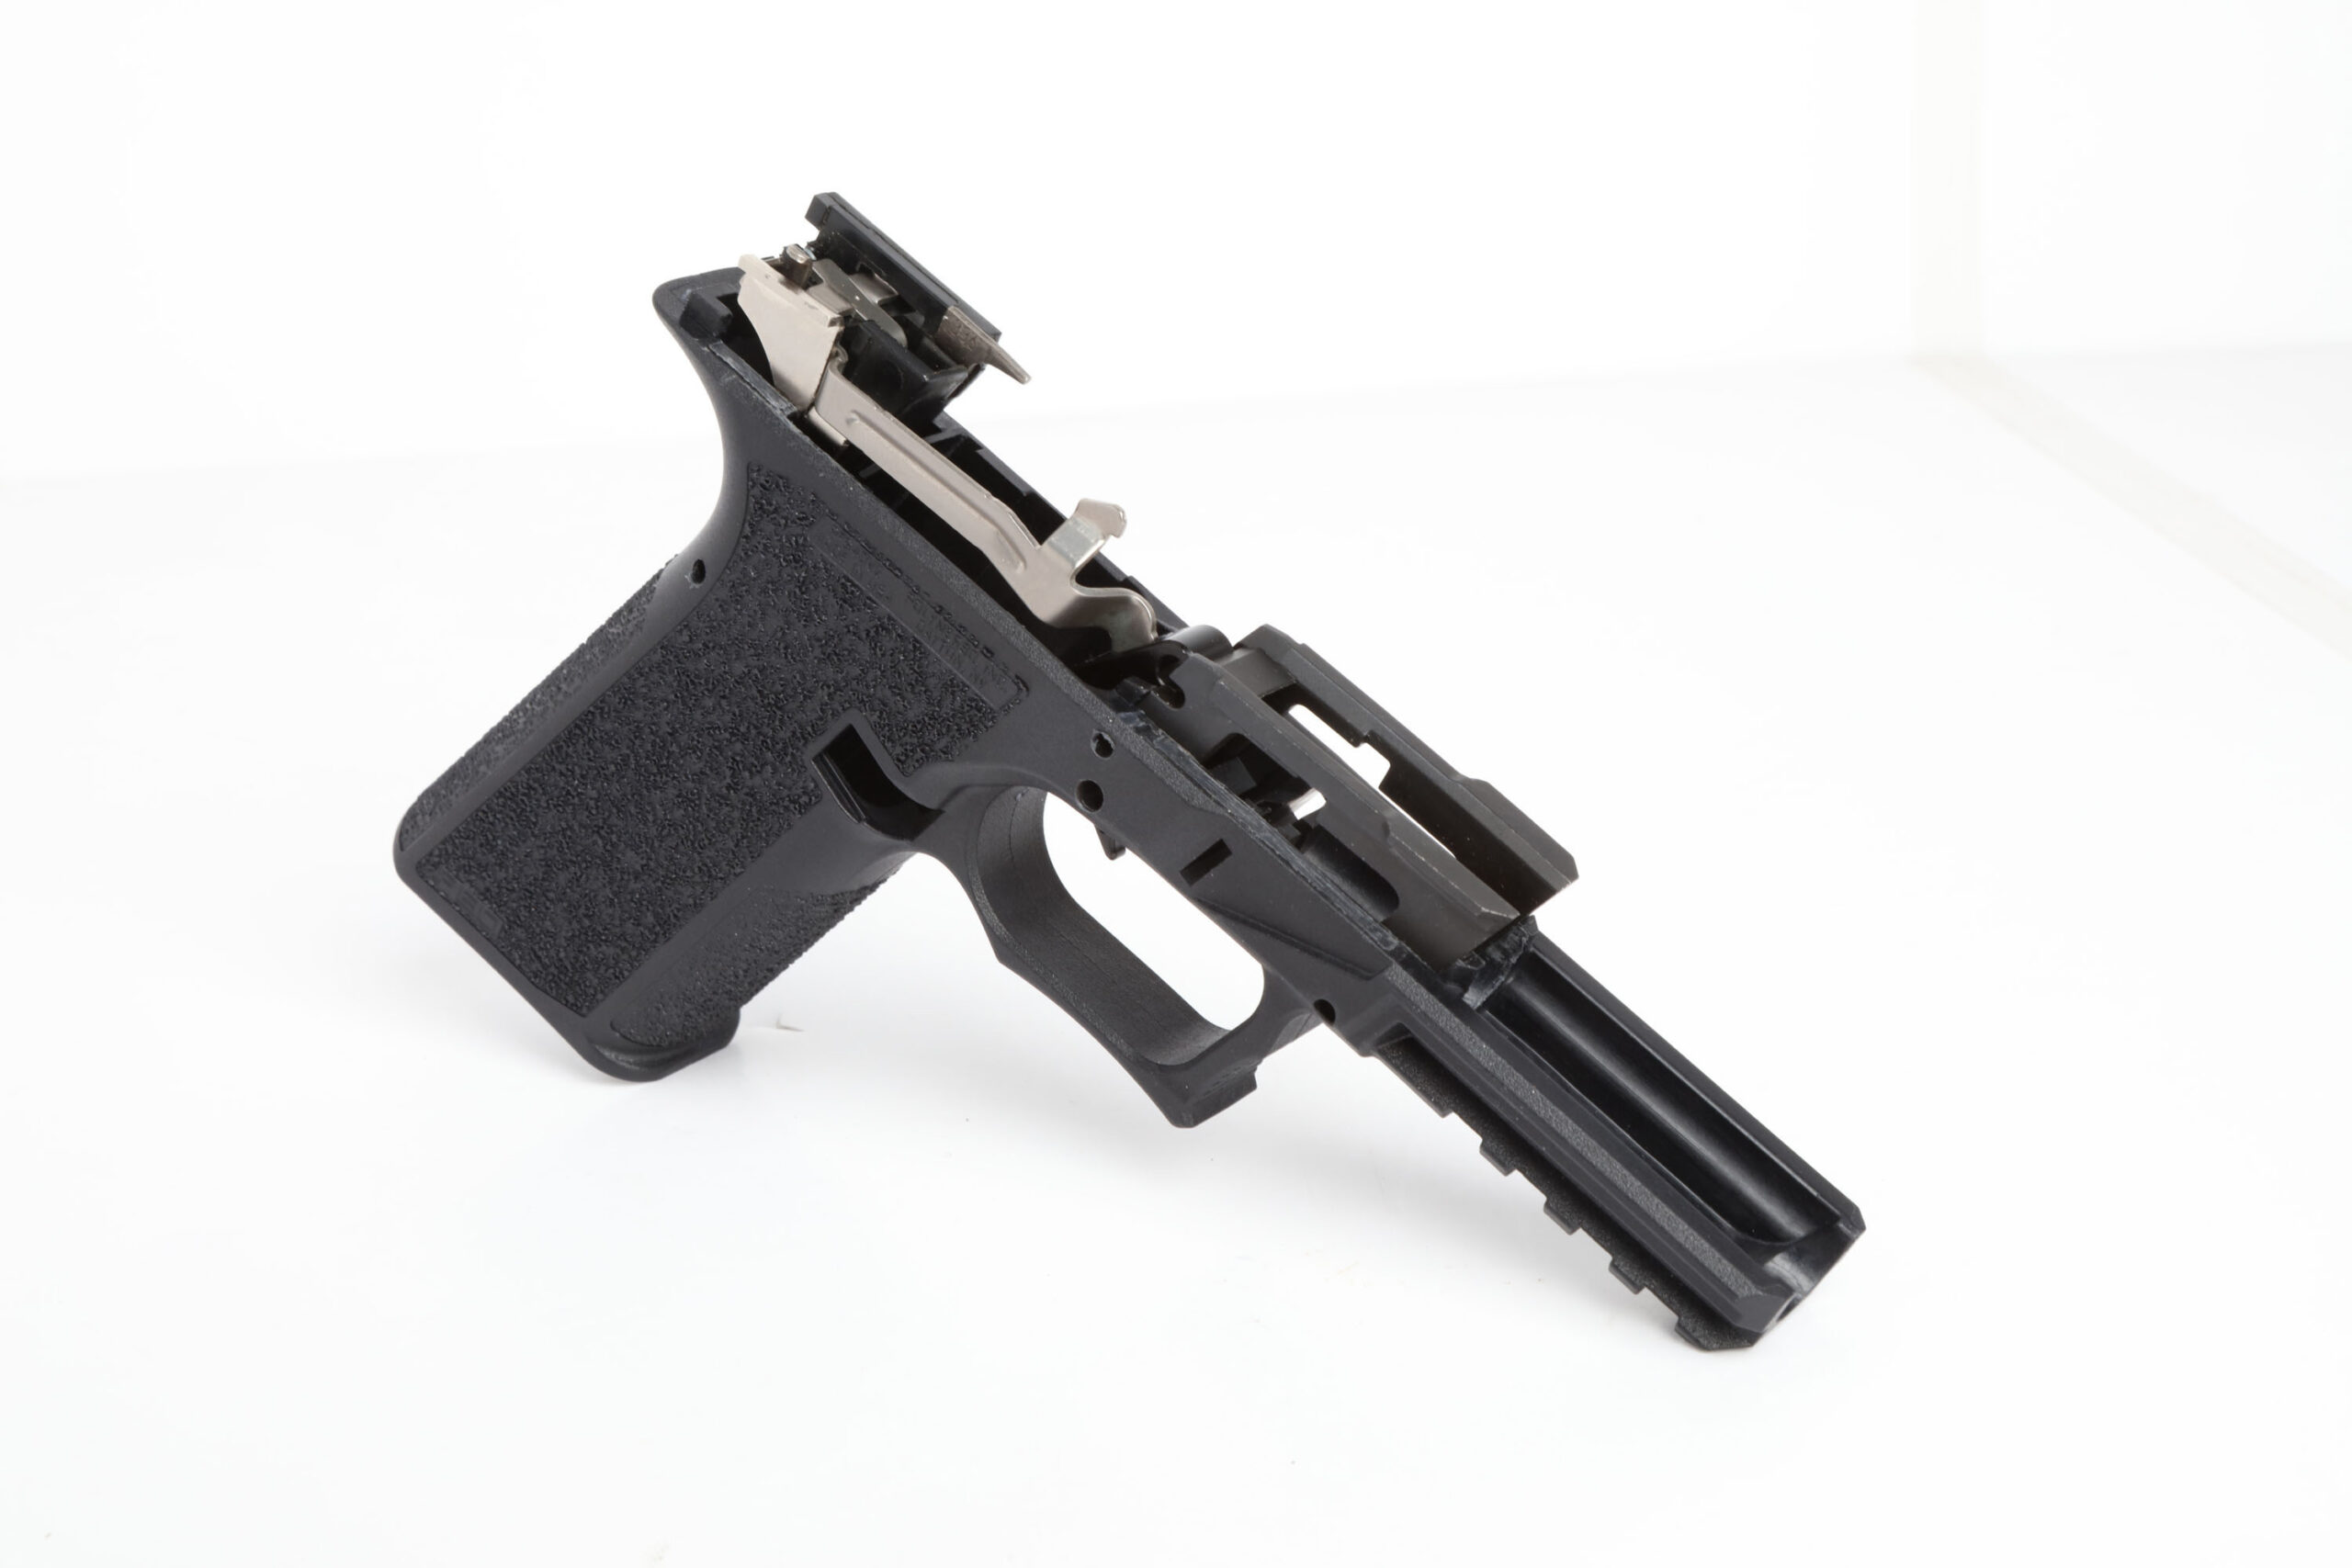
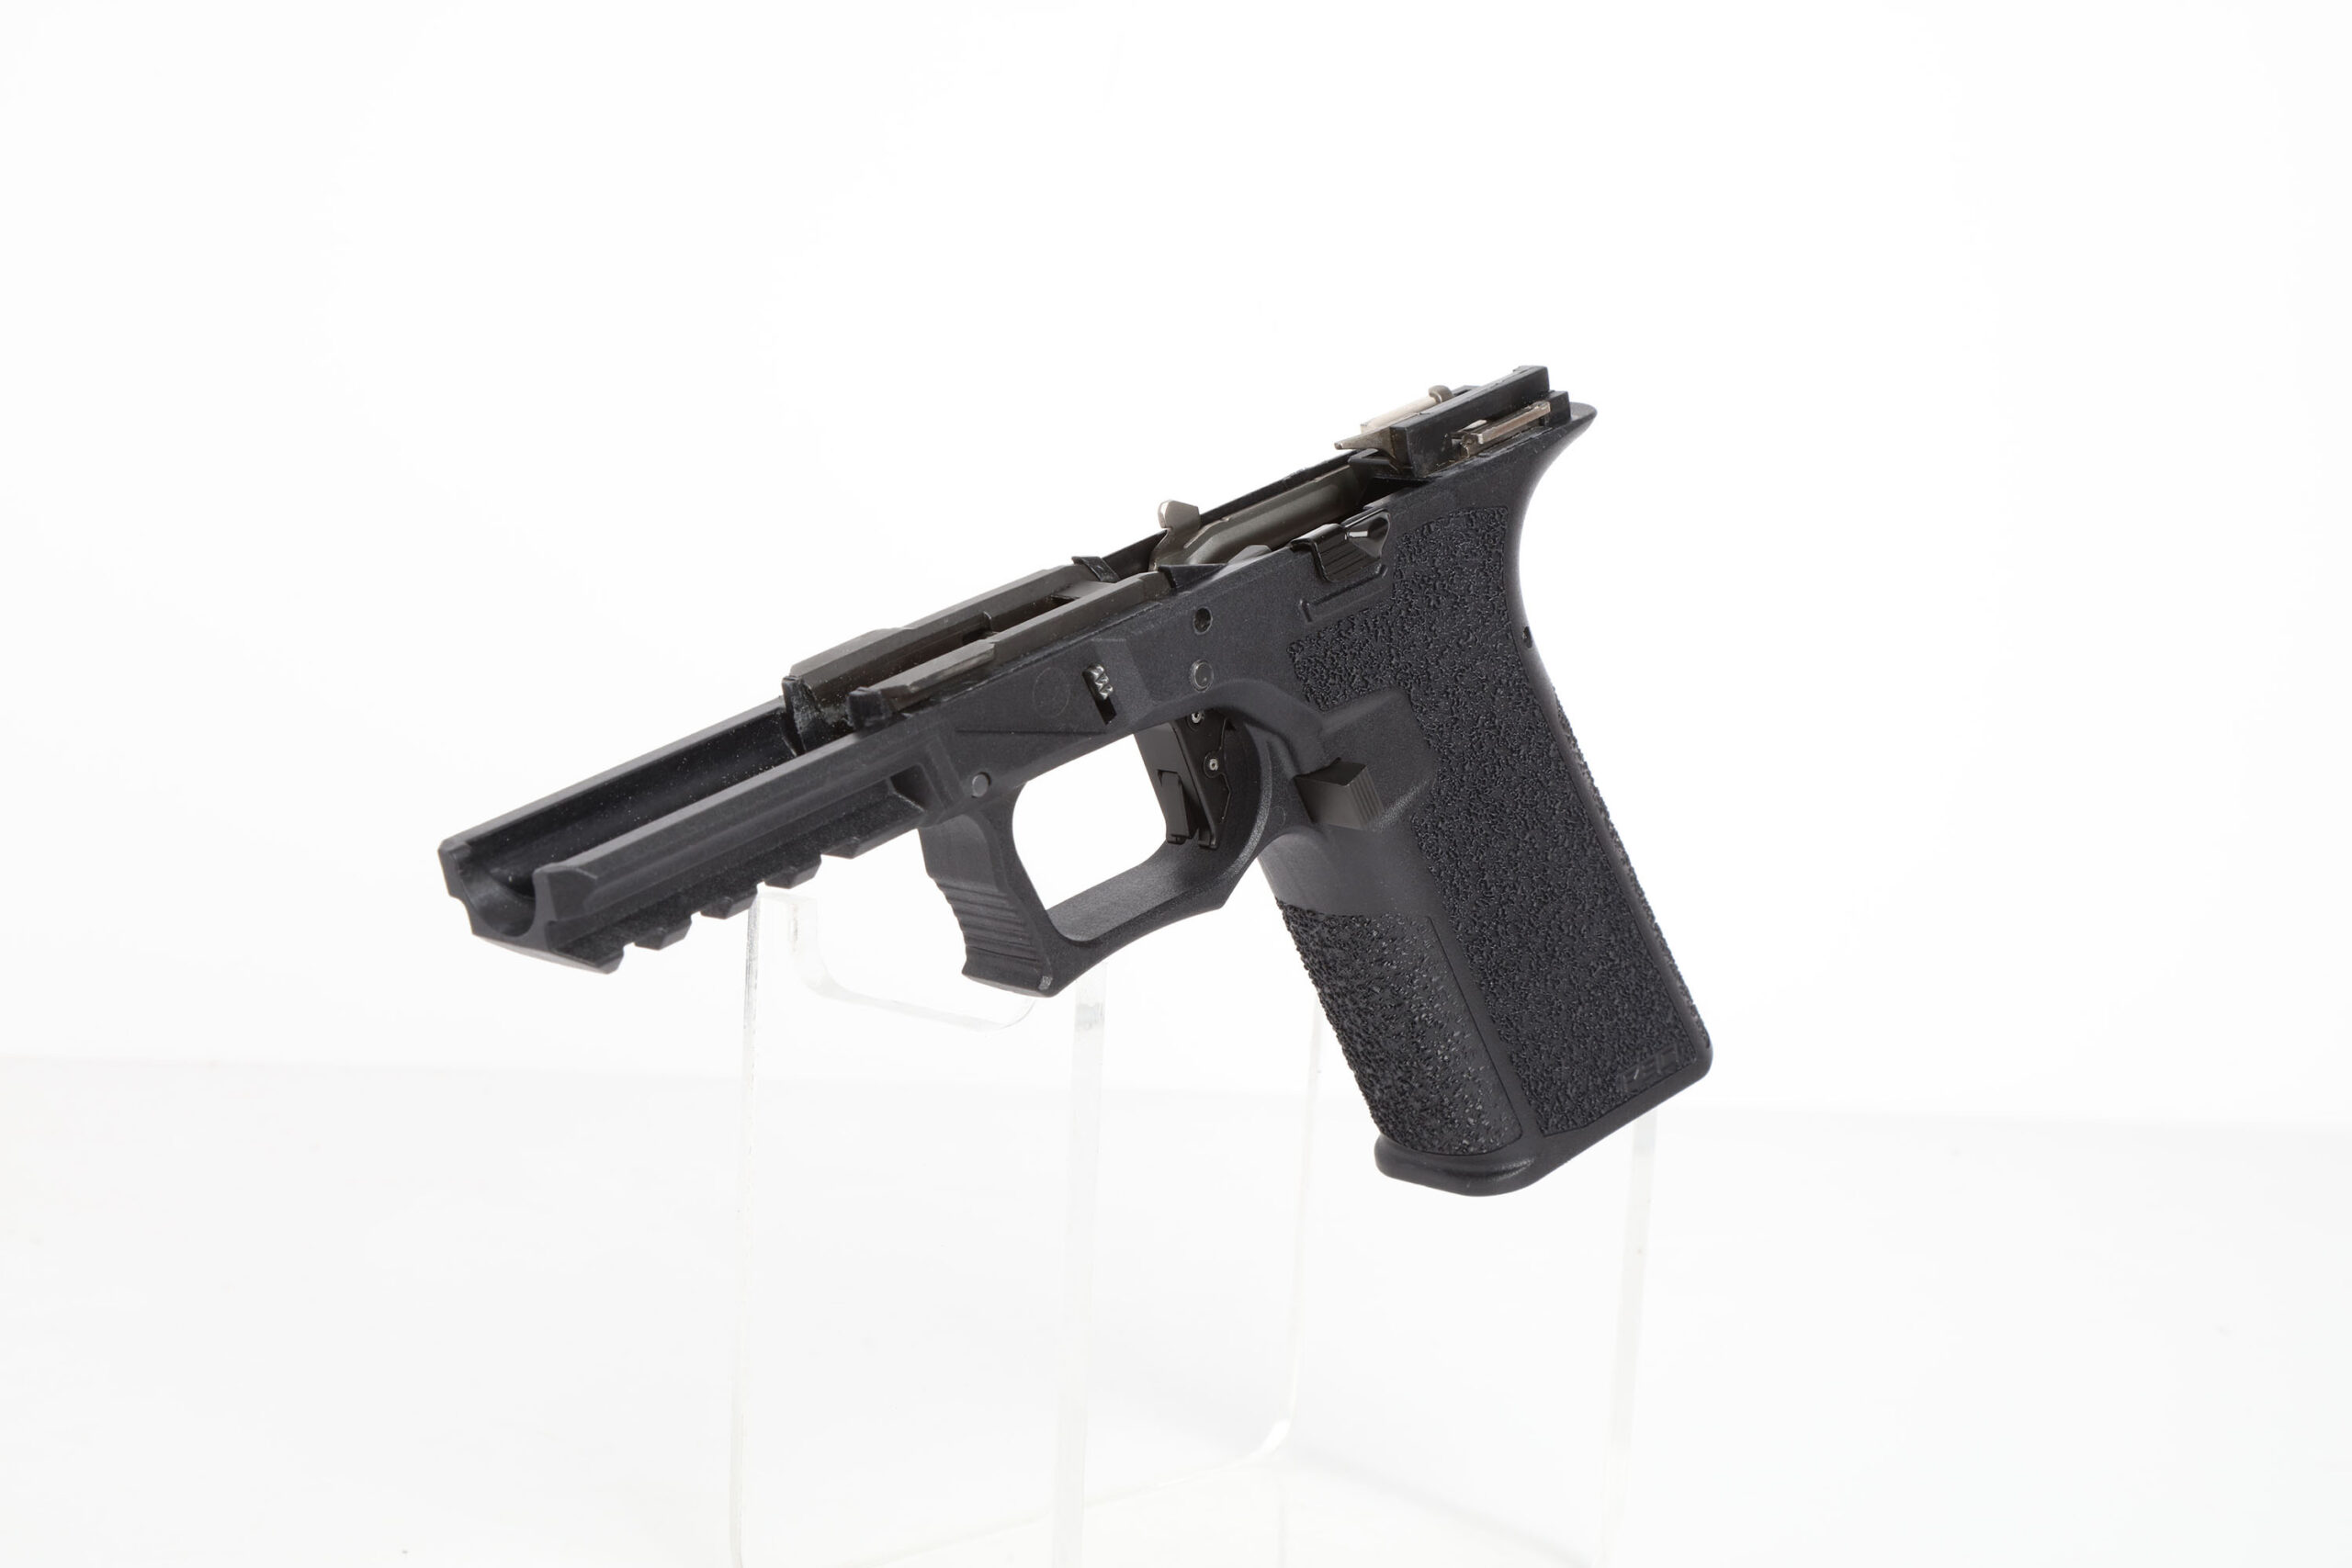
Complete
The finished frame feels and looks great. It comes with many of the custom features that Glock customizers apply to their stock factory frames. It has a high beavertail and deeply contoured trigger guard undercut that allows the pistol to sit low in your hand. There’s no hump in the grip and it has a scalloped magazine release as well as forward thumb placement shelves. It even has a slightly flared magwell.
Bottom Line
All in all, we’d say that the frame didn’t present much difficulty to mill and assemble. We were able to complete the milling and build in about an hour and a half, including triple checking our work as we went along. If we didn’t already have a drill press and cross vise, we might even say that you can do this project with a Dremel. Polymer 80 probably doesn’t recommend going that route, but we think it is possible if you’re skilled with the rotary tool.
The frame is far nicer than we expected and its polymer feels great in the hand. We feel that they knocked it out for the park in terms of the frame’s contours and features. For those who wish to take their custom build up another notch, Polymer 80 offers another model of the frame kit called the ReadyMod that is completely un-textured, allowing you a completely blank canvas for you to go gonzo with your stippling and grip customization.
Polymer 80
PF940v2 80% Standard Pistol Frame Kit
MSRP: $160
url: polymer80.com
Text by Michael Grey / Images by Jeff Chen